If you would like to add/embed subtitles into a video permanently, here is a simple guide for you.
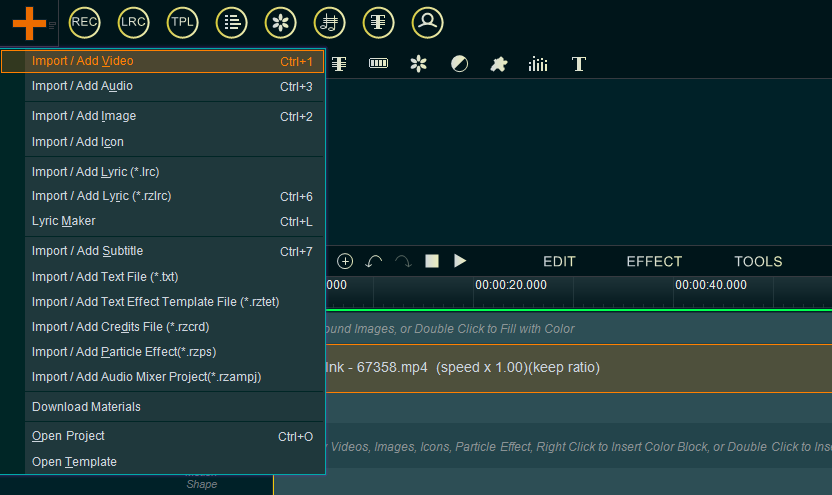
Step 1, Import video you want to add/embed subtitles.
You can click the upper left Plus button then select “Import/Add video“, or use the shortcut key “Ctrl+1” to import source video file. Or directly drag and drop the video file into YouTube Movie Maker.
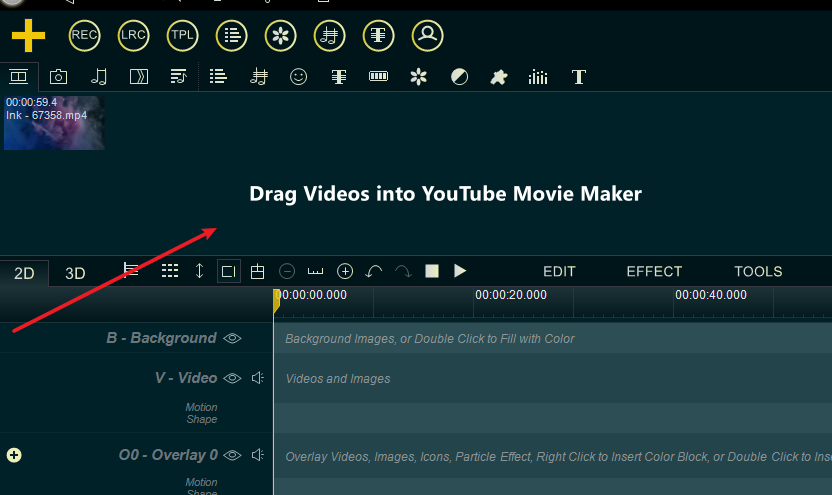
Step 2, drag the video down to the Video line.

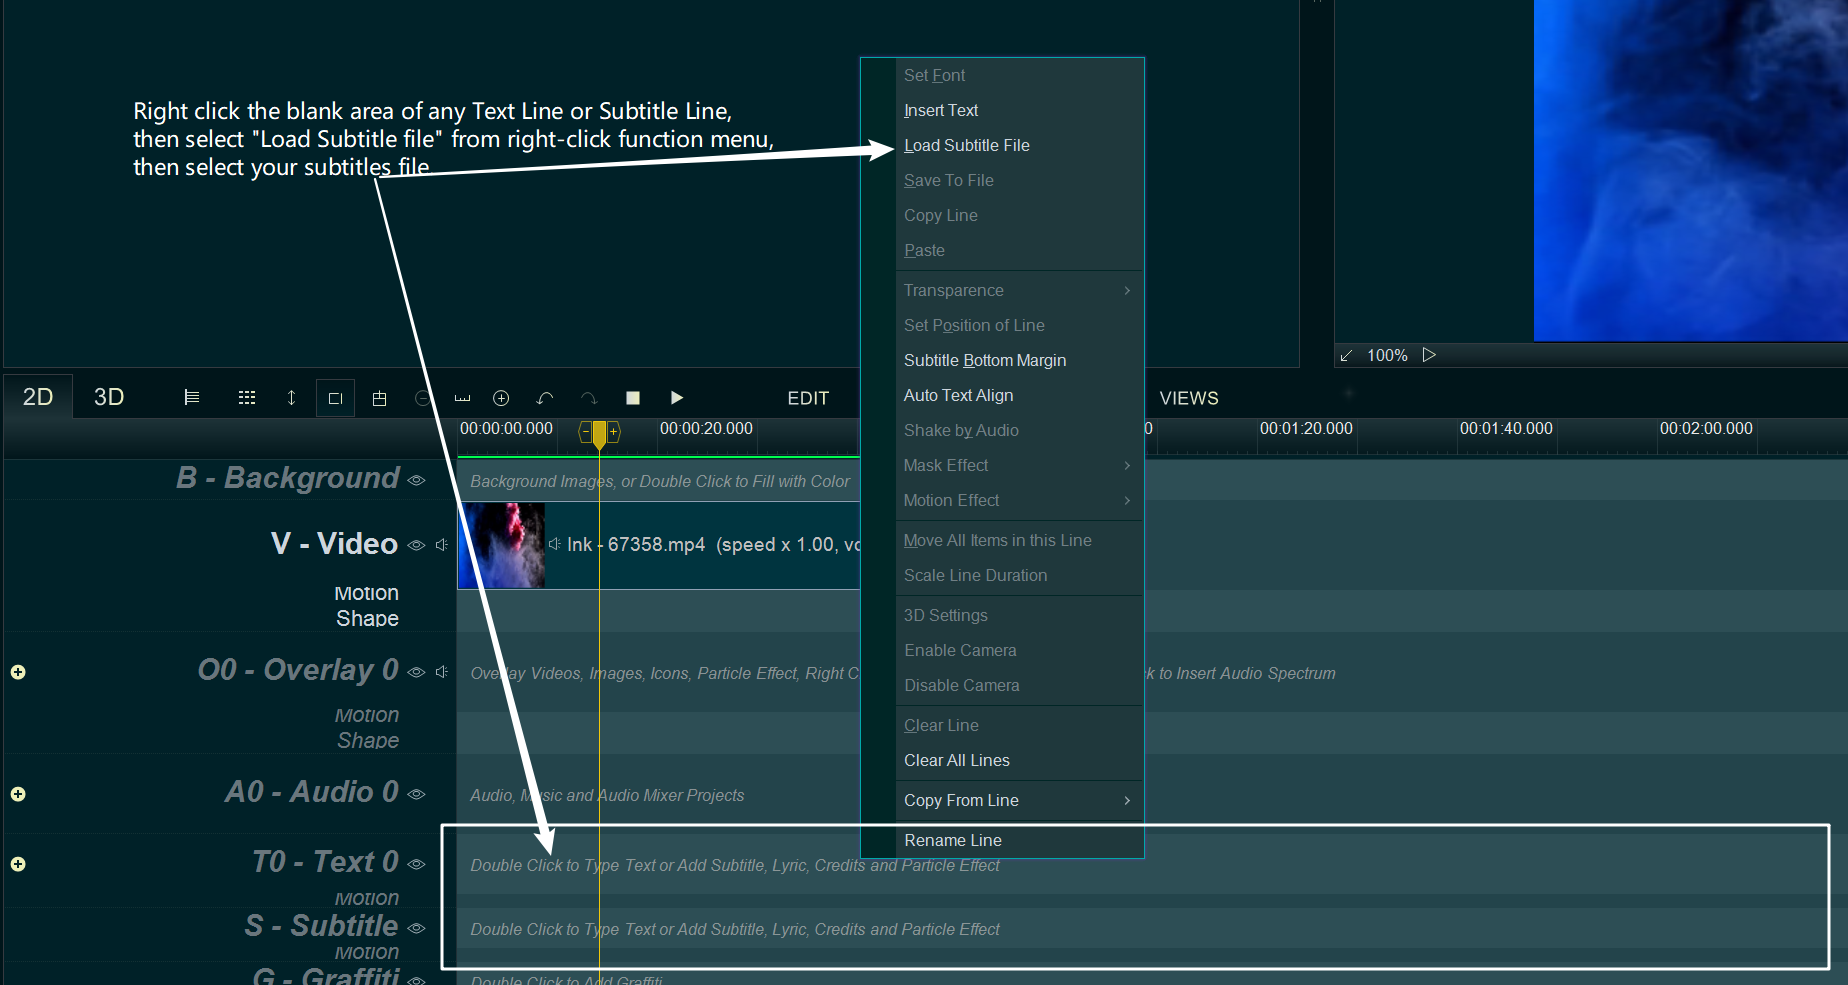
Step 3, Right-click on the blank area of any Text Line or Subtitle Line, then select “Load Subtitle File” from right-click function menu, then select your subtitles file.
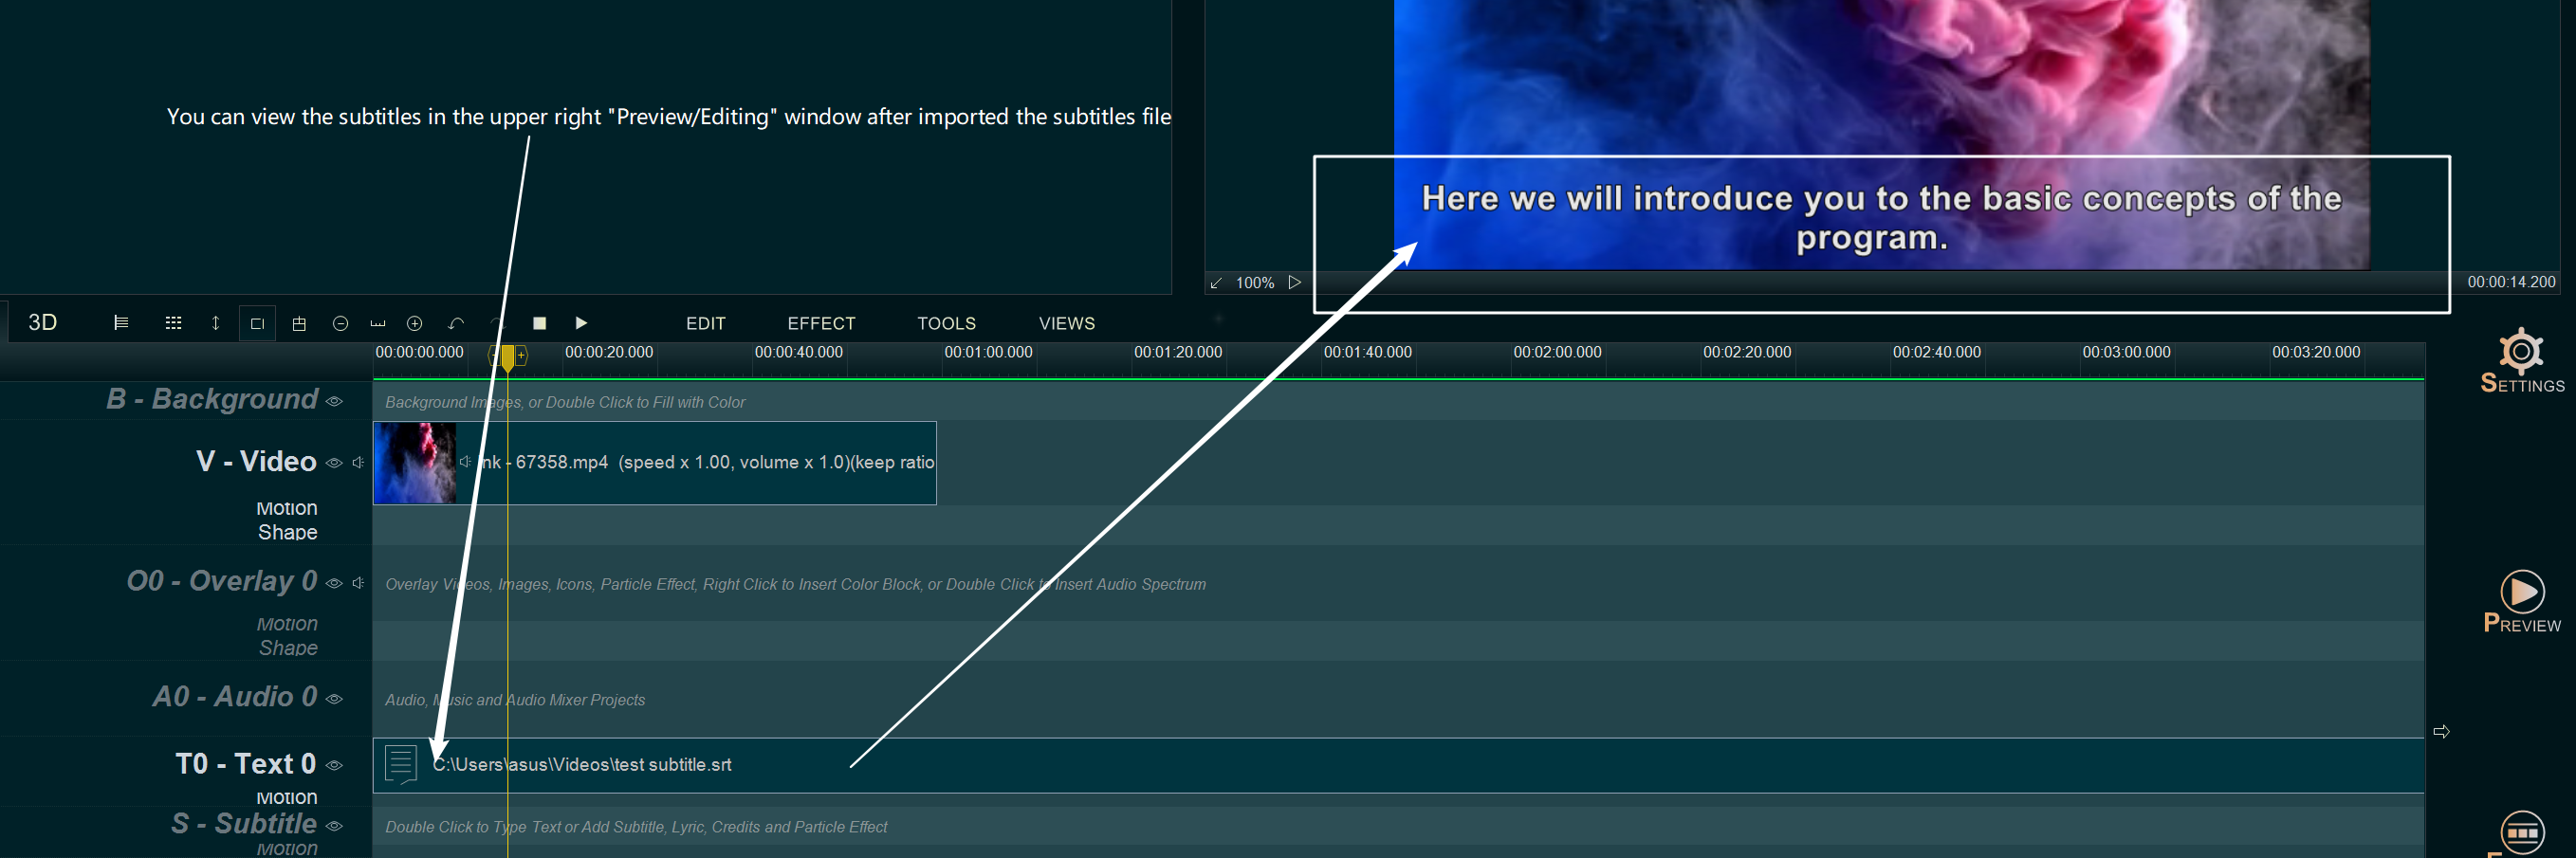
Step 4, the imported subtitles file will be added to the Text Line/Subtitle Line, you can view the subtitles in upper right “Preview/Editing” window, and adjust the font size, subtitles bottom height, and how to wrap, etc.
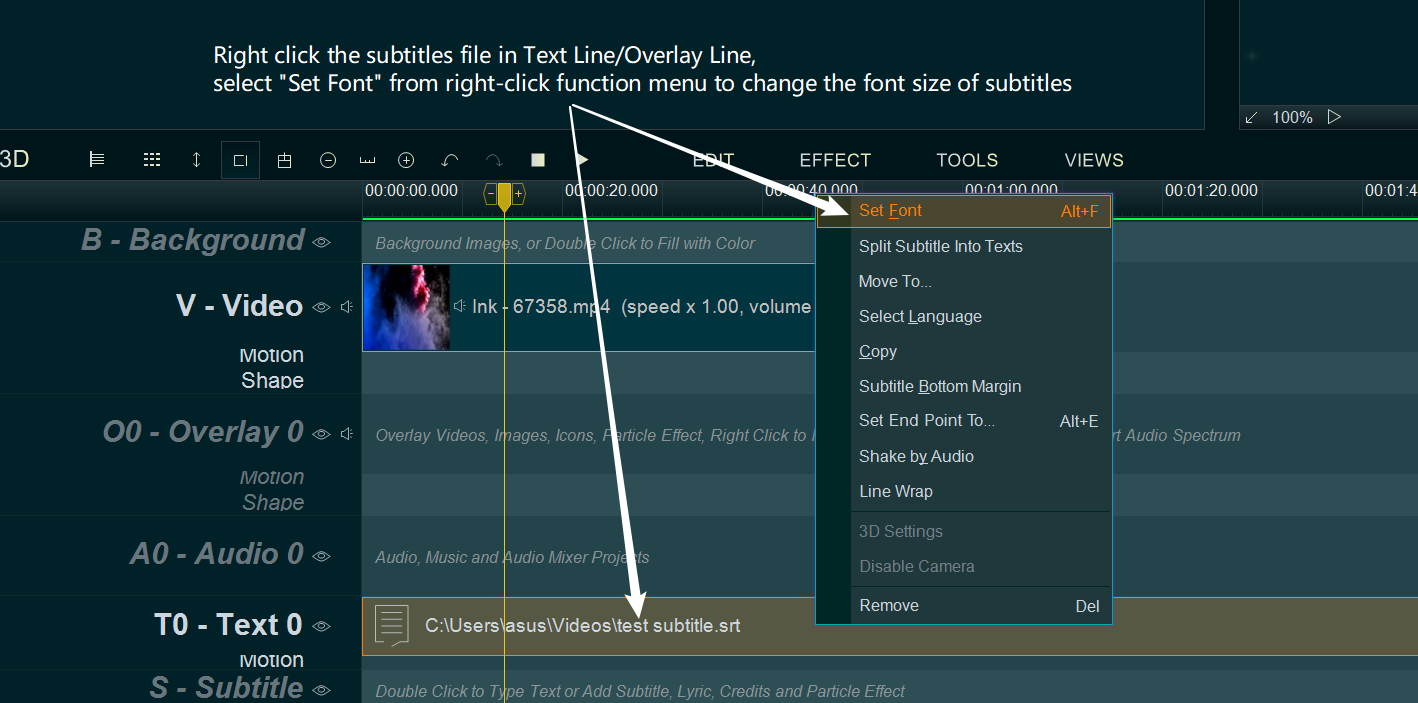
- Subtitles type: right click the subtitles file in Text Line/Subtitle Line, then select “Set Font” from right-click function menu to change font size, color and type for subtitles.
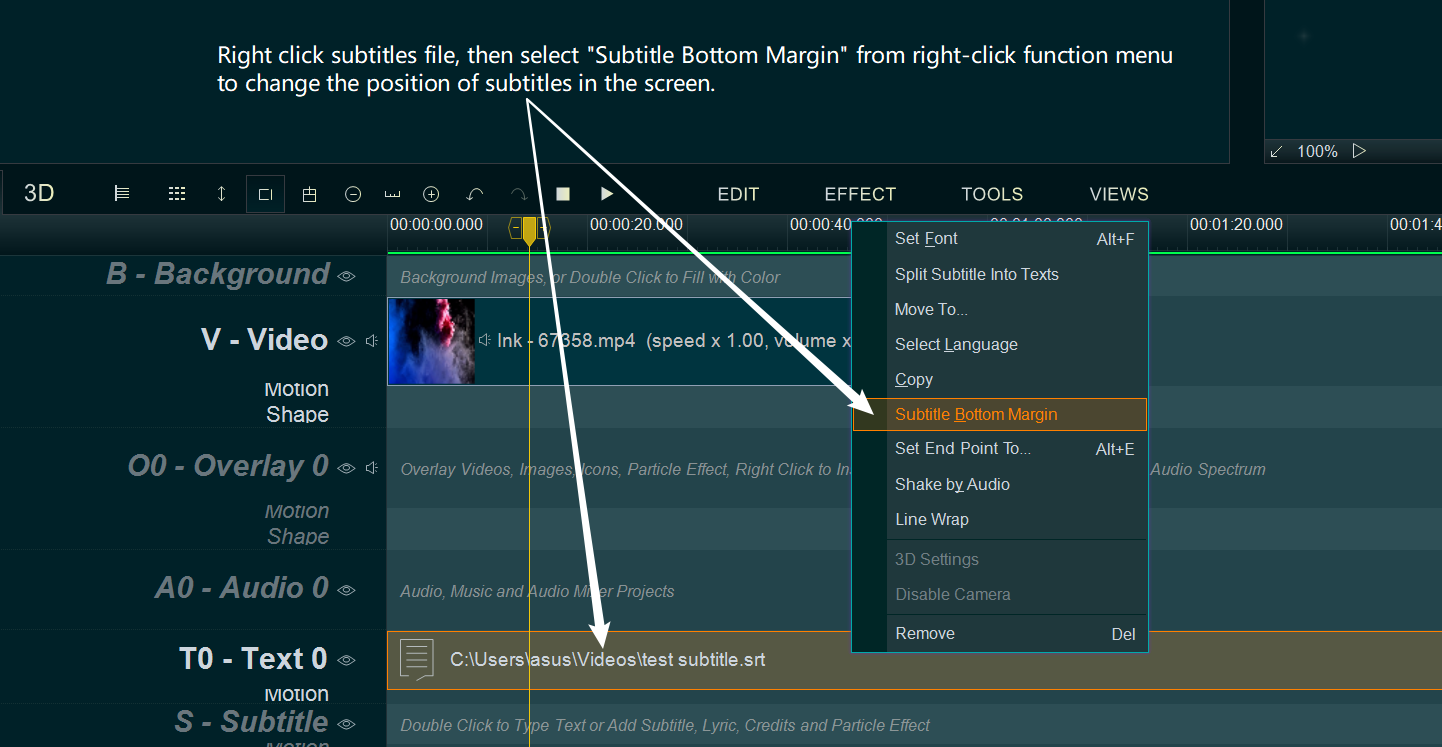
- Subtitles position: right click the subtitles file in Text Line/Subtitle Line, then select “Subtitle Bottom Margin” from right-click function menu to change the font size, color and type for subtitles.
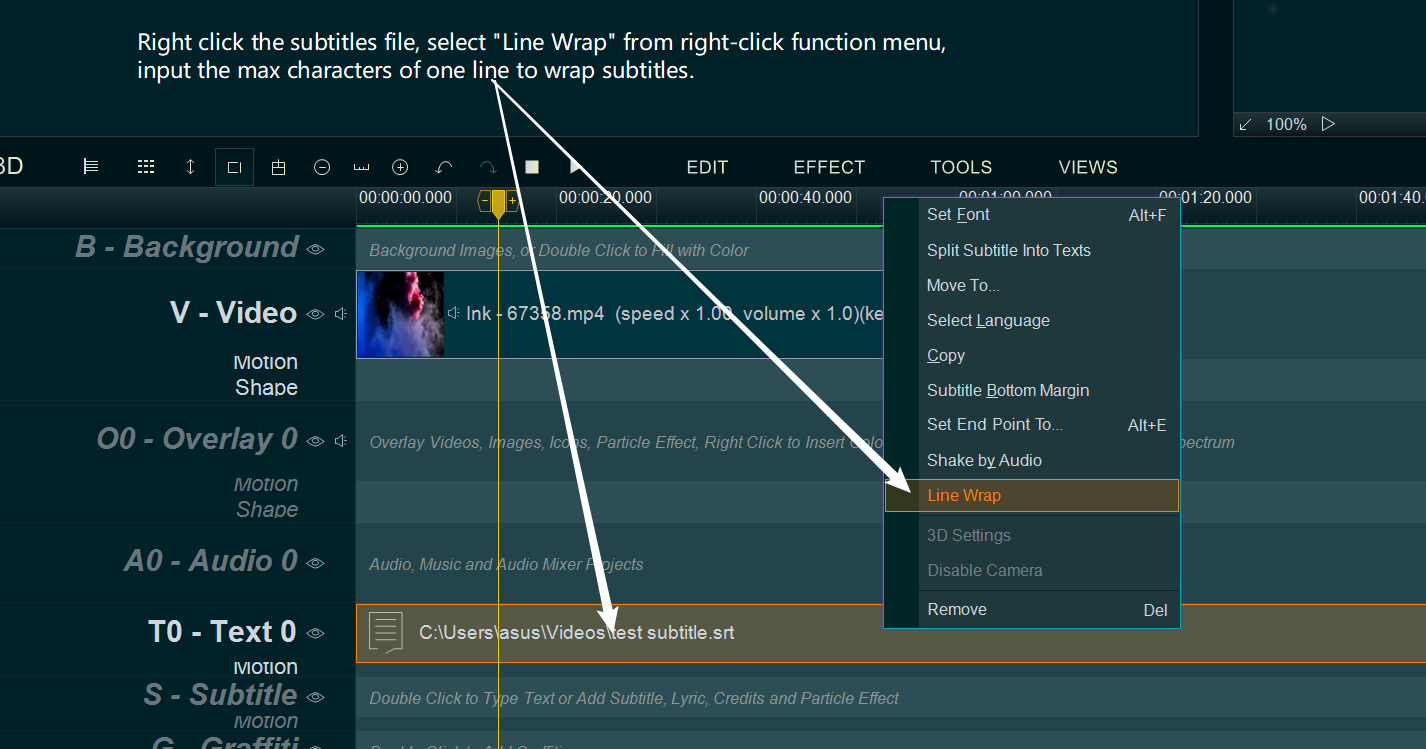
- Wrap Subtitles: right click the subtitles file in Text Line/Subtitle Line, then select “Line Wrap” from right-click function menu, input the max characters of one line to wrap subtitles.
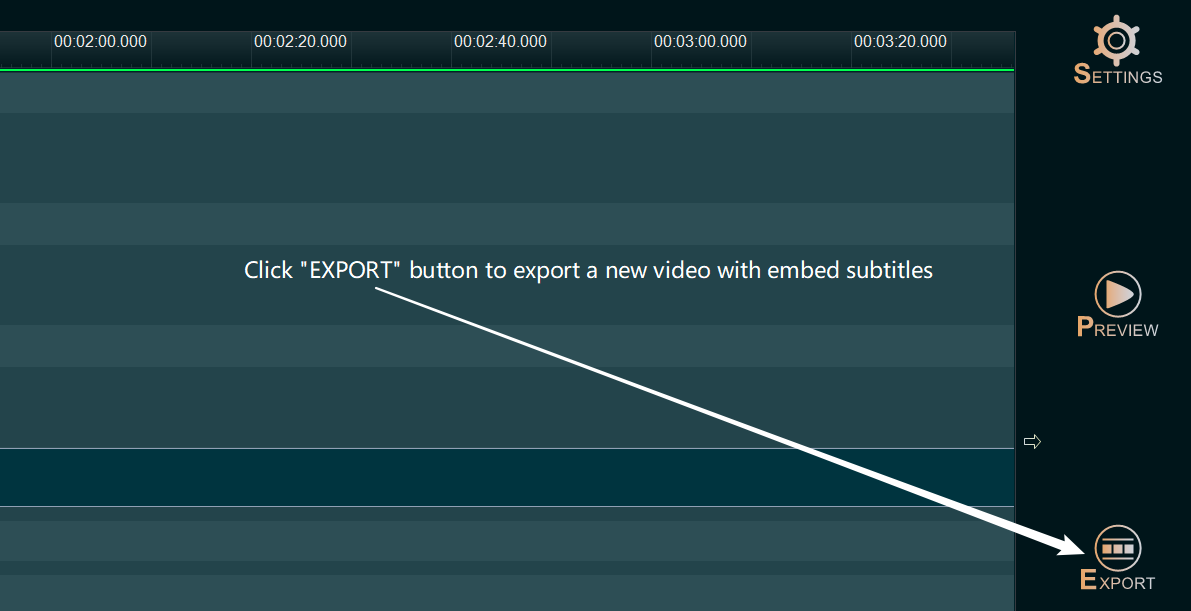
Step 5, at last, click “EXPORT” button to export a new video with subtitles.