Many users think it’s difficult to make a particle effect when they first see the UI screen of Particle Effect Maker.
Don’t worry. We’ll get you close to it with a simple and easy-understanding explanation. Of course, we have a lot real examples to help you learn it better.
Let’s start with the basic functional buttons.
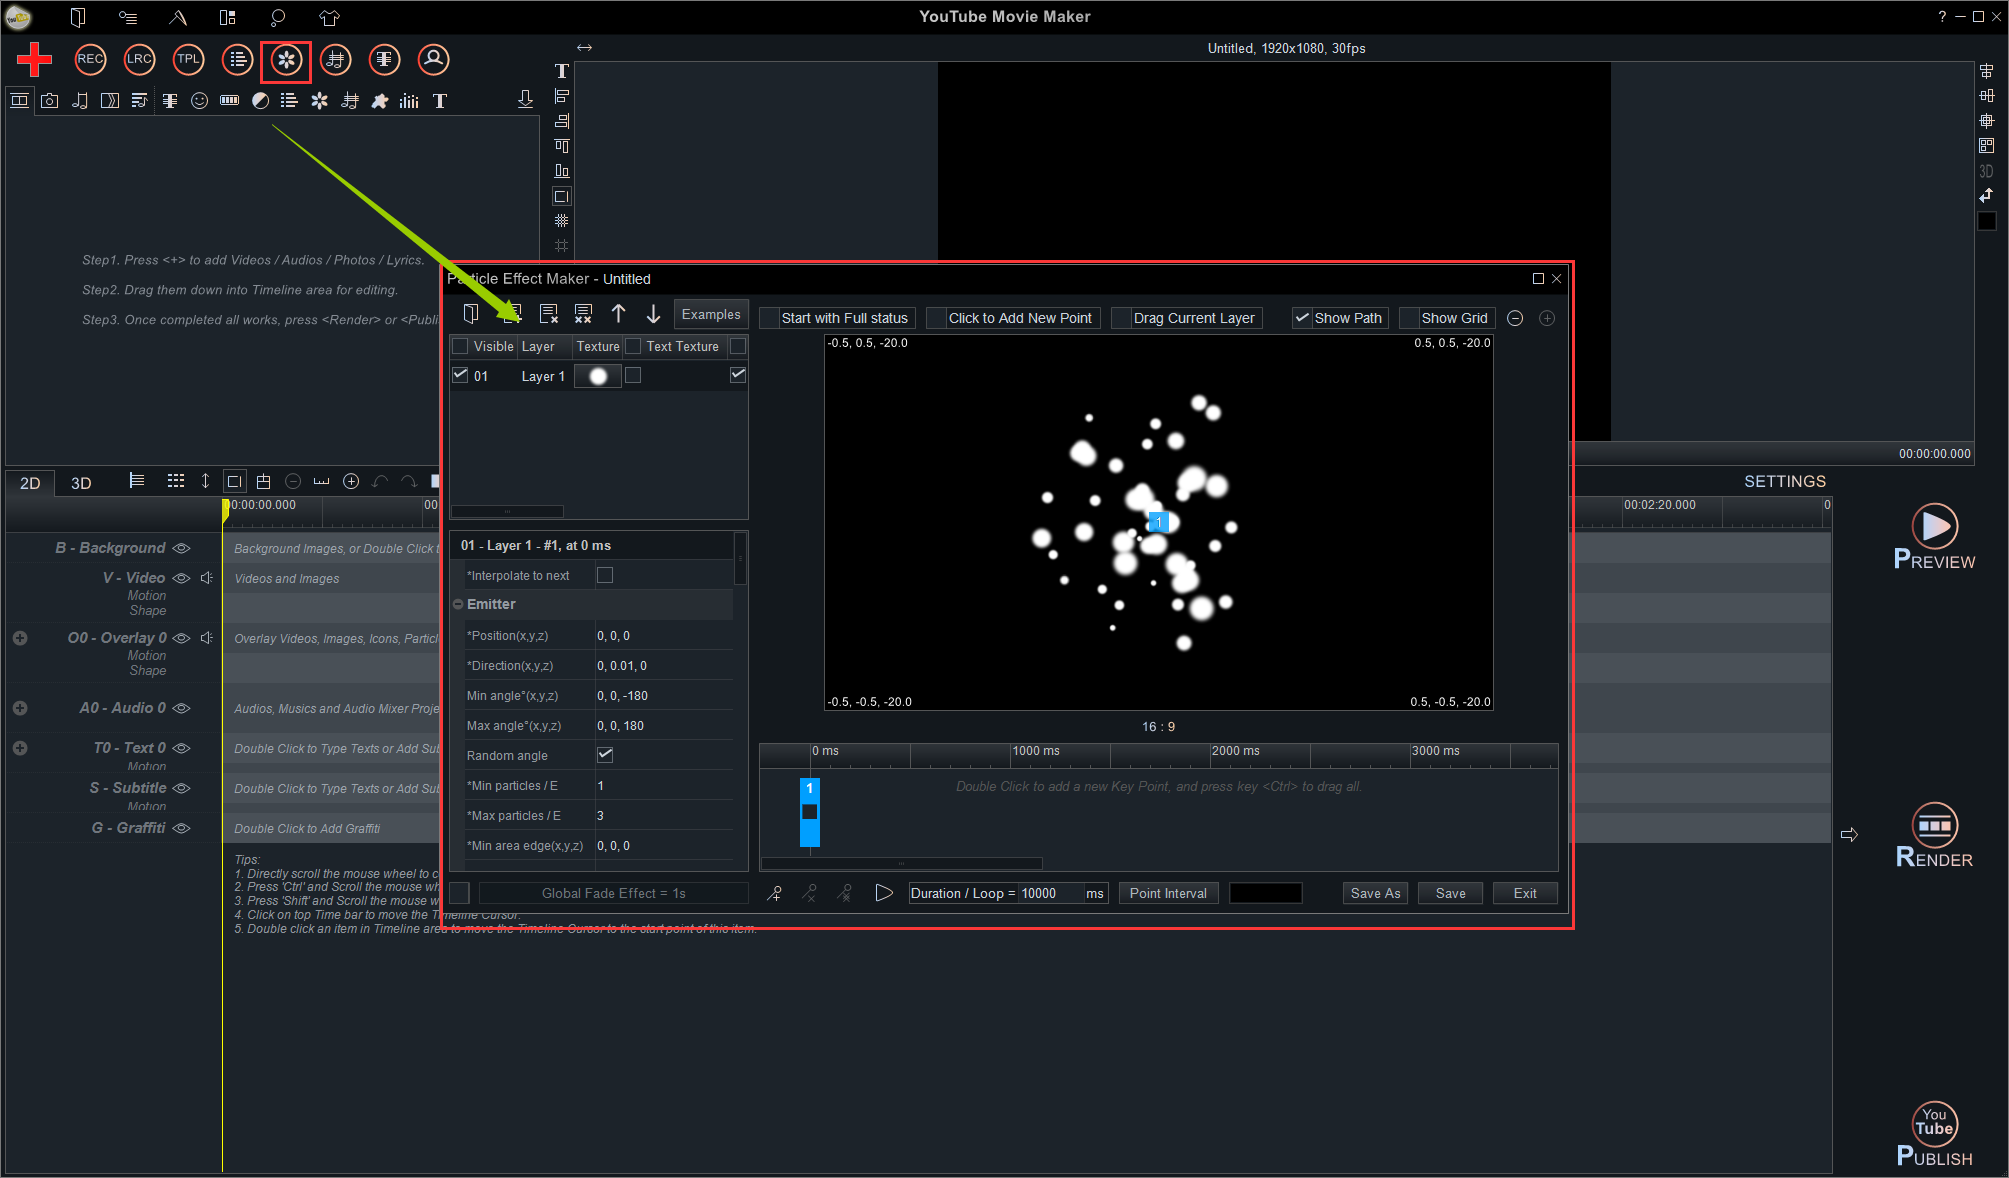
Run your “YouTube Movie Maker” and click the upper left circle “Create a Particle effect “ button to open Particle Effect Maker UI.
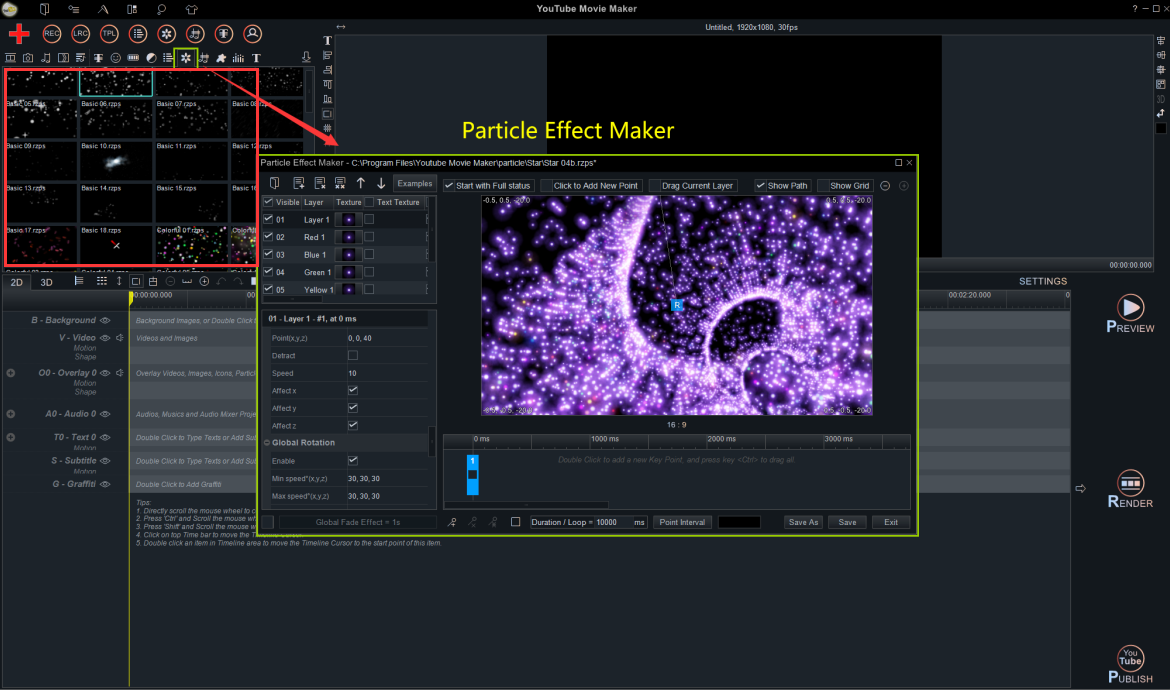
There are many examples of built-in effects. You can select PARTICLE EFFECT TAB to view all the built-in effects
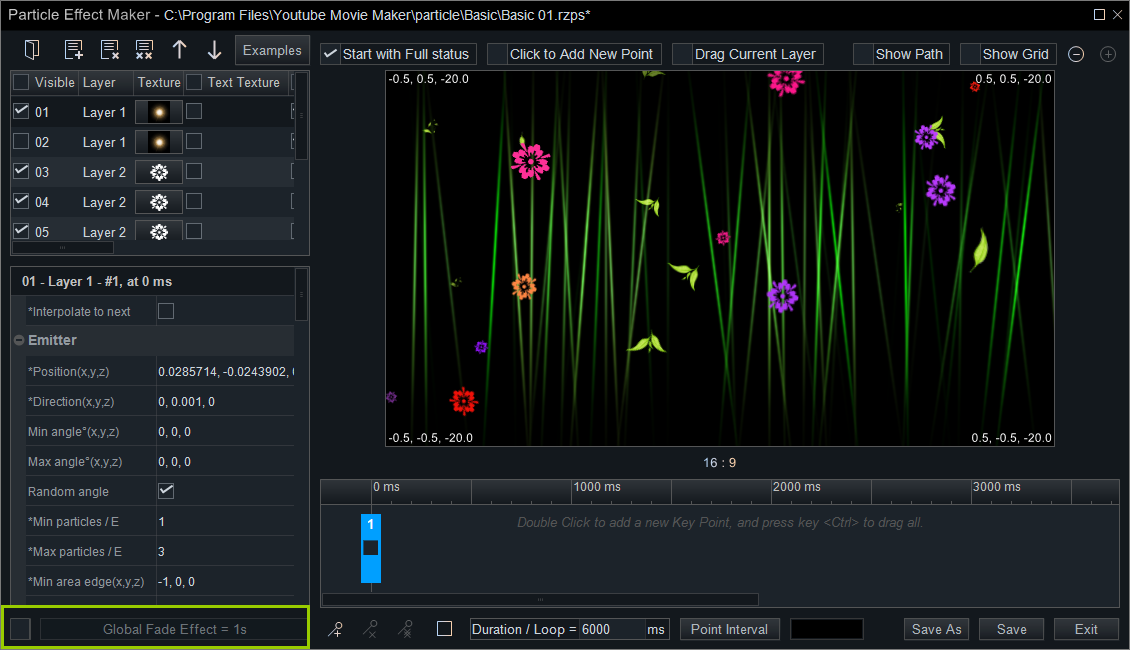
Let’s take a clear look at the UI screen of Particle Effect Maker.
Click this button to open “File” menu, create a new particle file, open the previous particle file, save or save as particle file, etc.
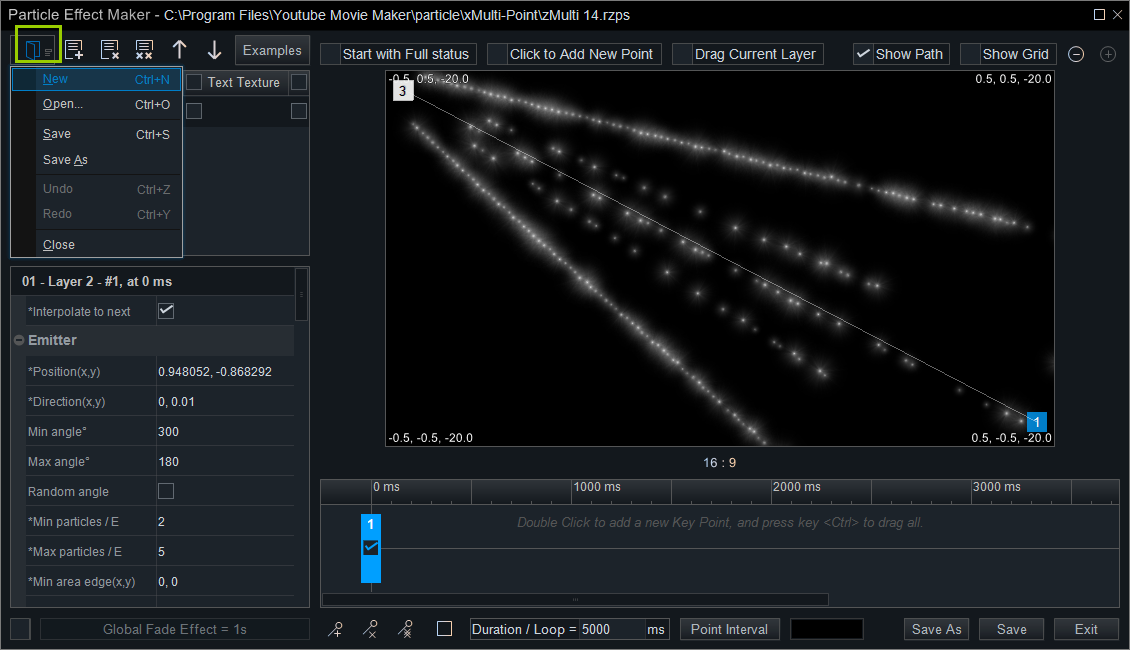
This button is used to delete the selected layer.

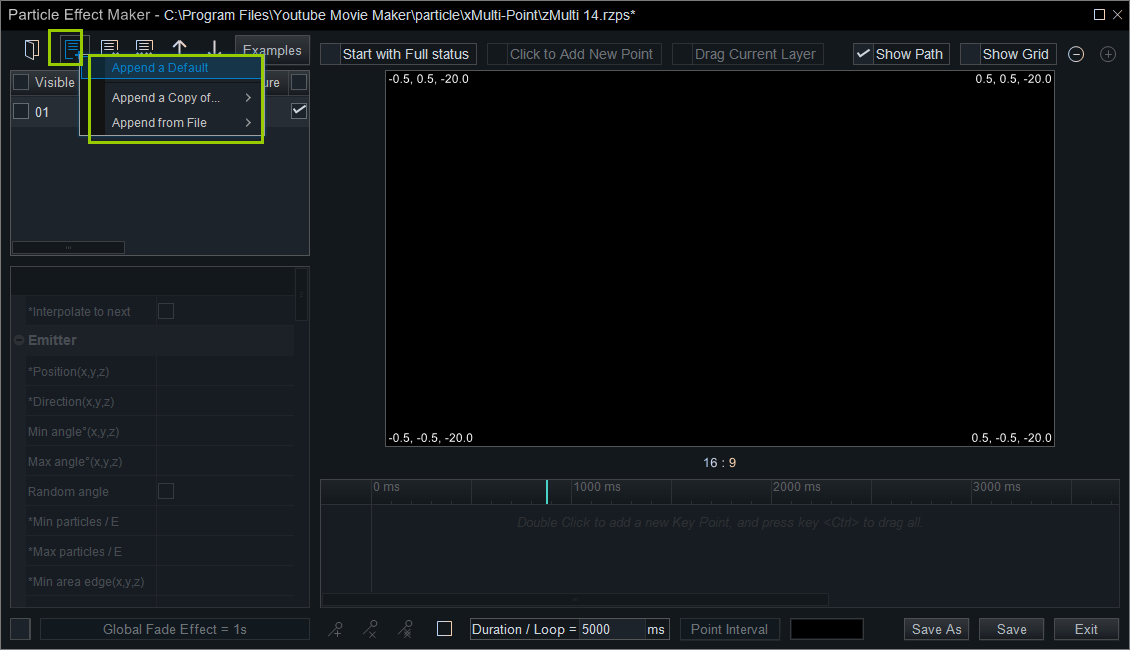
This button is used to append a new layer, you can append a default layer, or append a copy of the current layer, or append from a particle effect file.
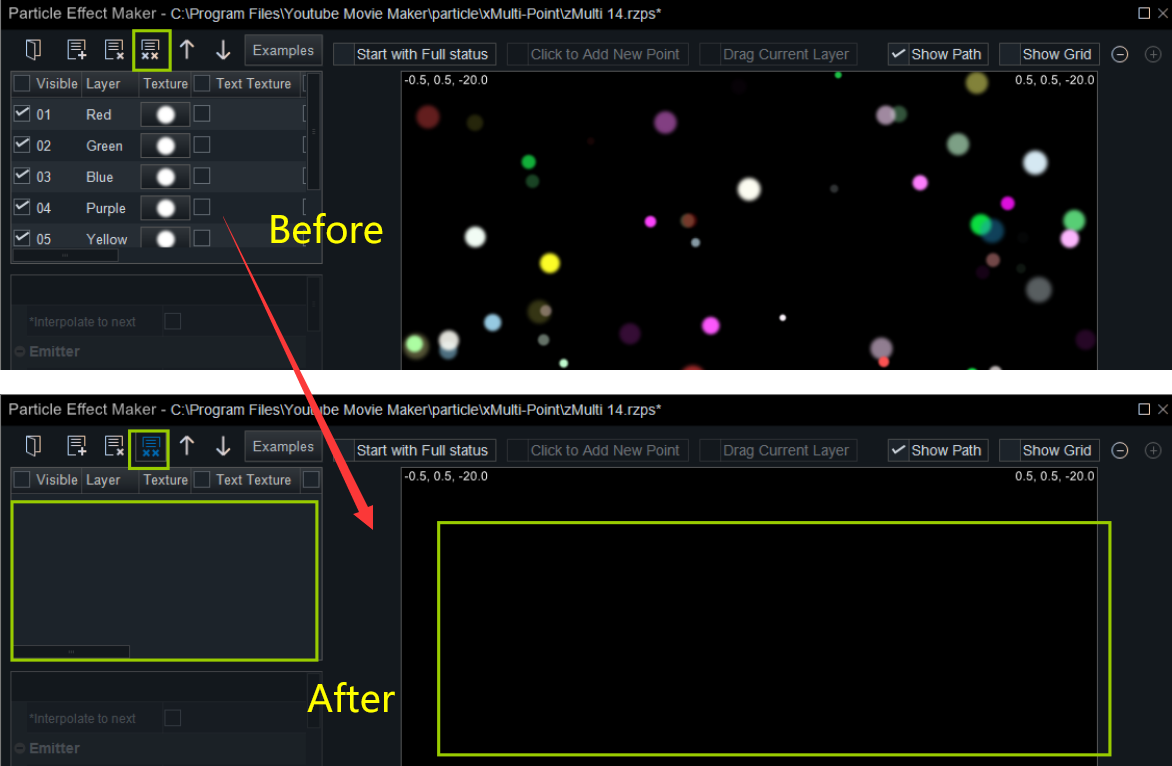
This button is used to delete all layers whether they are selected or not.
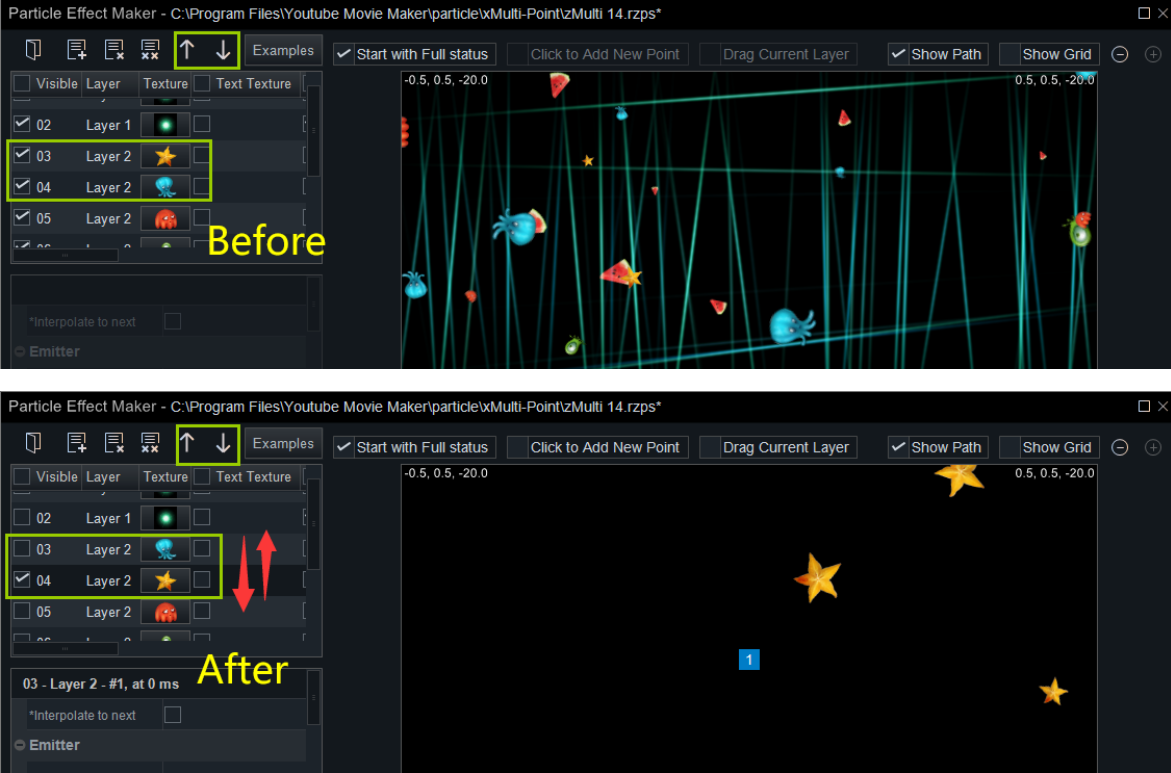
These two buttons are used to adjust the order of the layers in the source bin.
Click this button to get various particle effect examples and you can use them directly or fine adjust them.

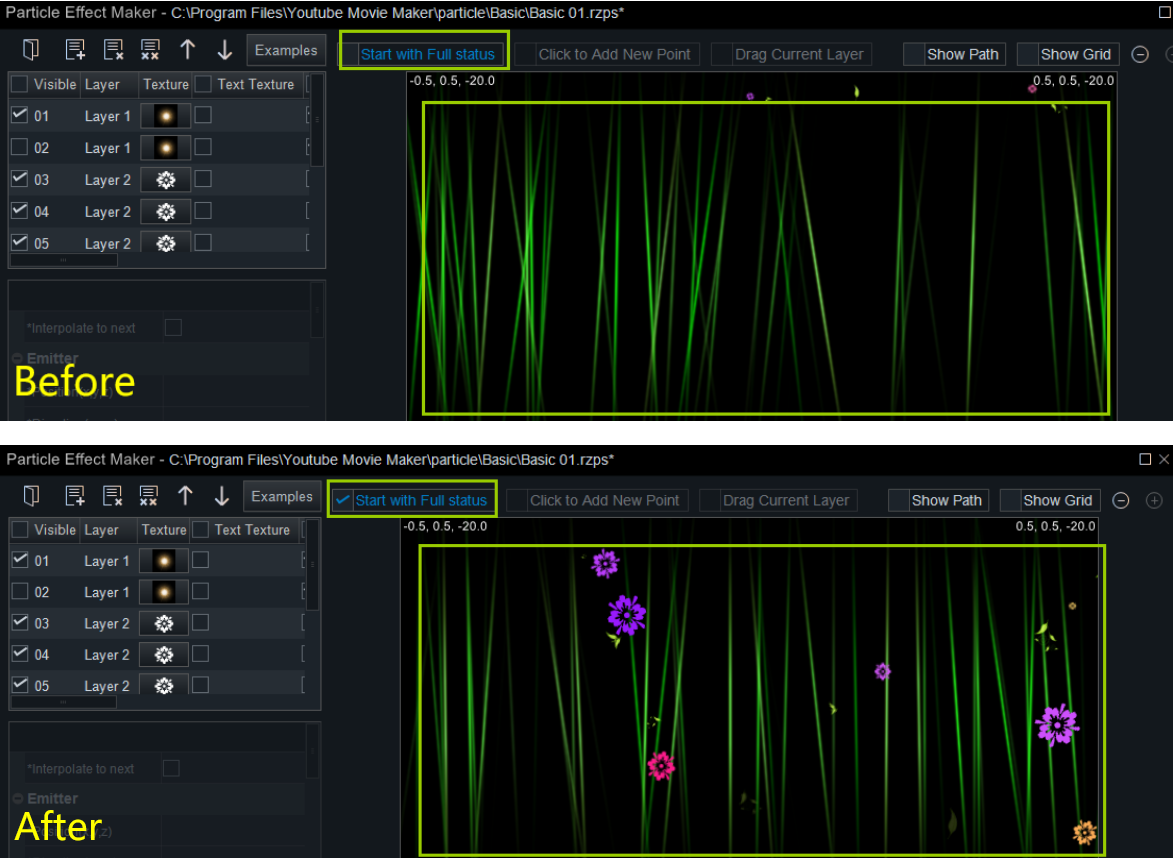
Once checking the box “Start with Full Status”, the initial emission and generation of particles will be skipped and the particle maturity status will be displayed directly.
By checking this box “Click to Add New Point”, you can casually add new emission point on the screen/in 3D space.

By checking the box “Drag the Current Layer”, you can casually move all emission points at the same time in this layer .

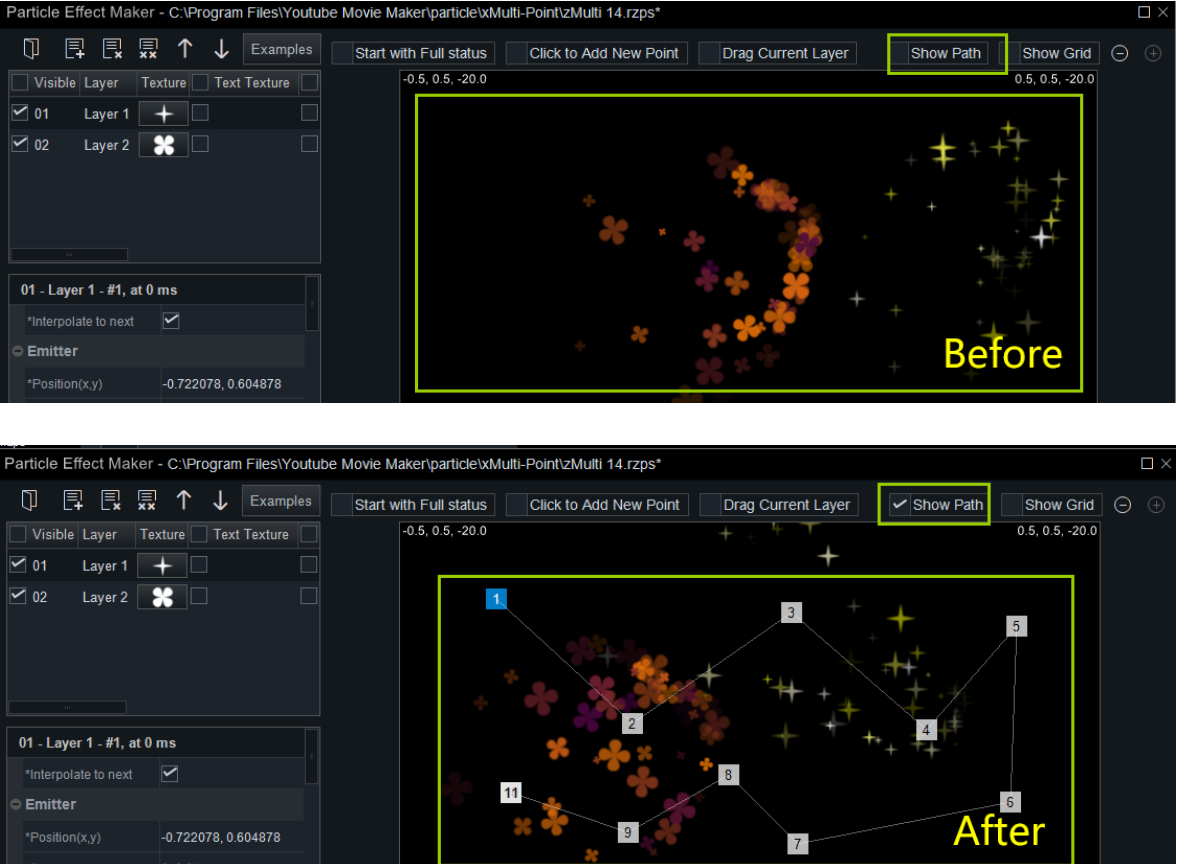
By checking the box “Show Path”, you can clearly see the path that the particles moving.
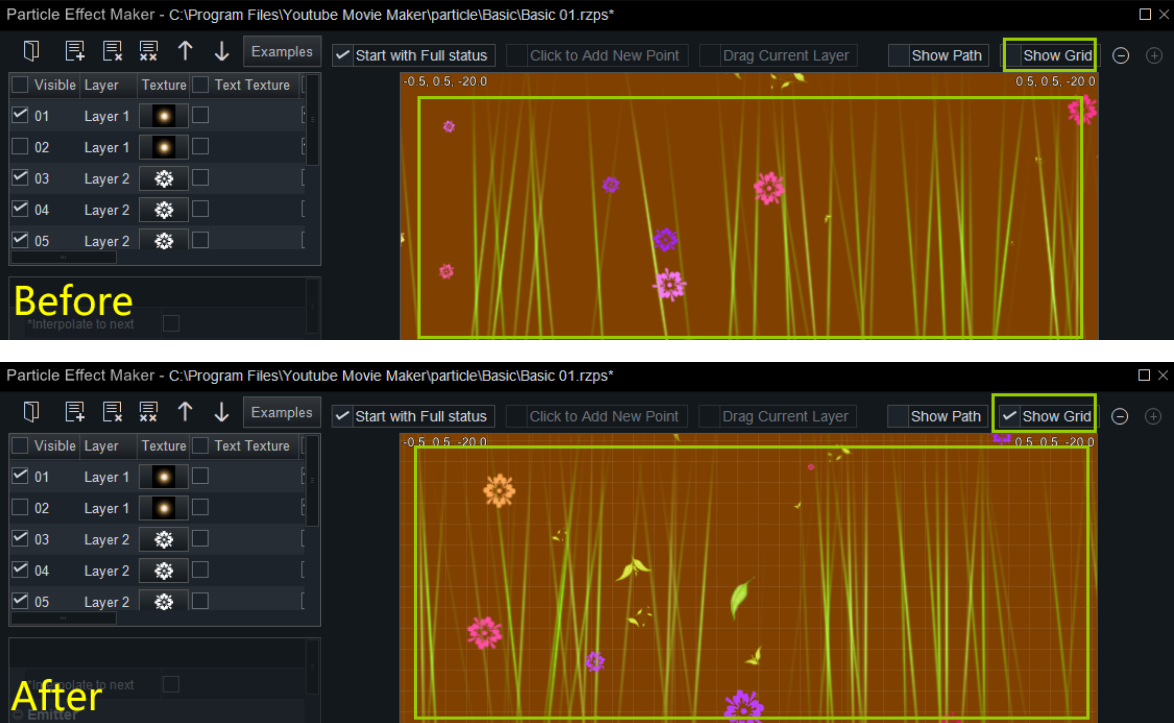
By checking the “Show Grid”, you can see a grid showing in display area of the particle effects. The grid can help you pinpoint the emission point.
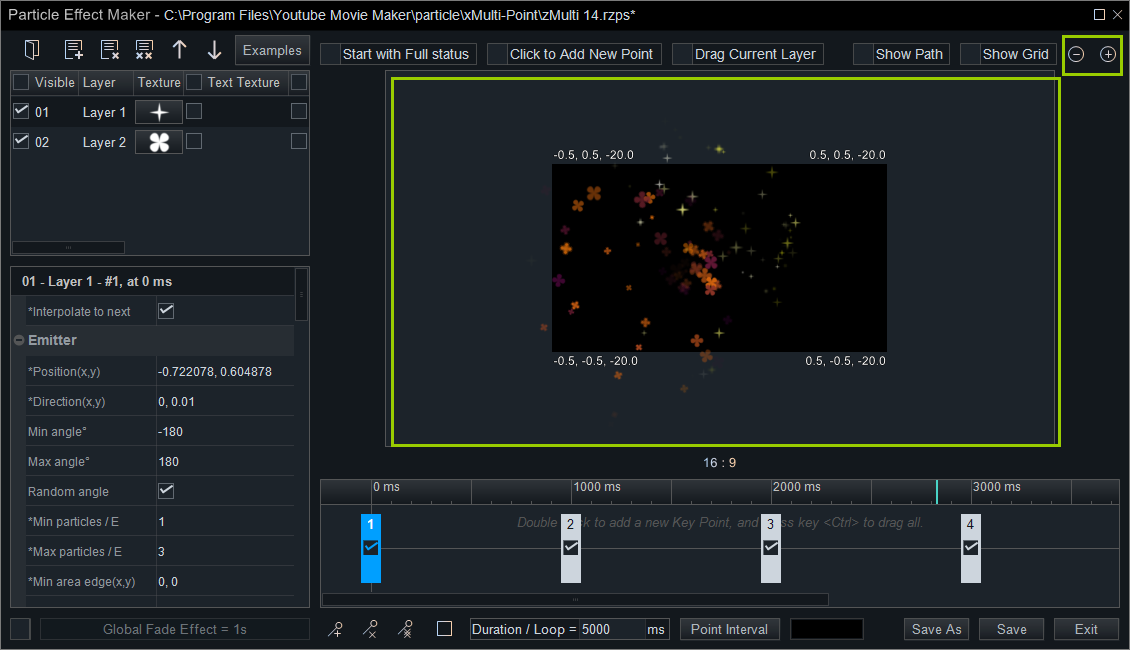
The “Zoom in”/”Zoom out” buttons are used to zoom in/zoom out the display screen of the particle effects. So you can see the particle effects from a complete view or a specific view.
This button is used to add a new emission point to create a series of moving particles
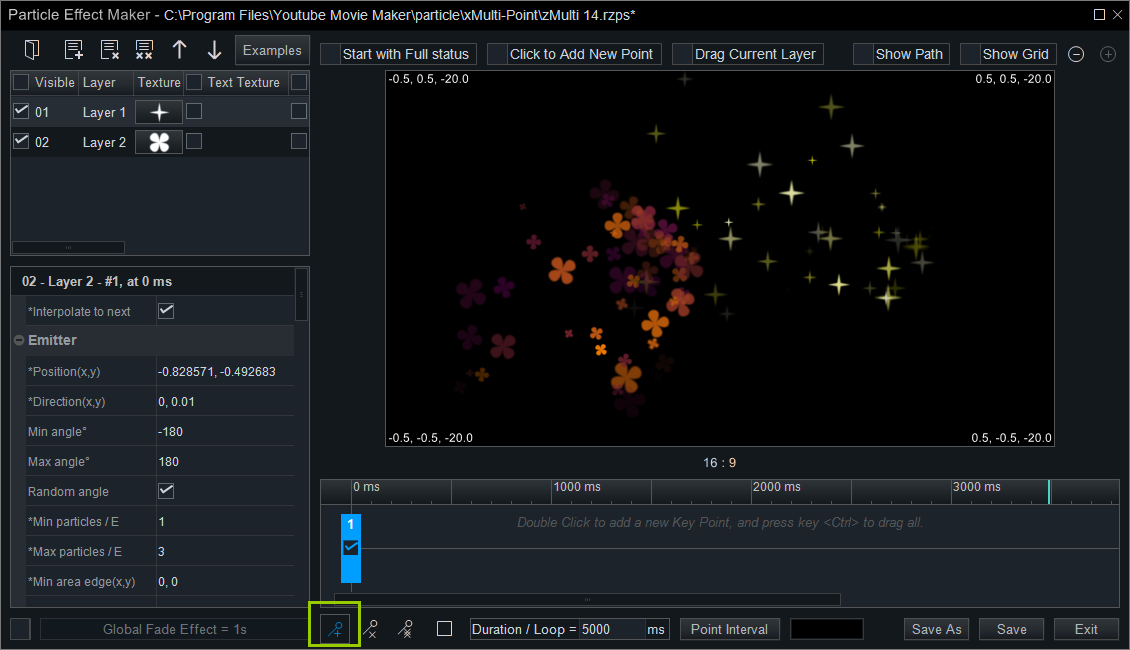
Enable the “Global Fade Effect” and click it to set the time, then you can see a fade-in and a fade-out effect on a particle effect when you add the particle effect to the timeline.
That’s all introductions of the top tool bar for now. If you find it interesting, you’re welcome to share it with your friends.
In next part, we’ll detailed introduce the features in the particle functional box. Keep learning and find it in Related Articles.


