YouTube Movie Maker can be used to create/edit/make YouTube video from various videos/movies, pictures/photos, audios/musics, texts, lyrics, subtitles, etc.
YouTube Movie Maker provides the total solution for youtube movie making and editing.
Below we provide a step by step guide about how to edit/make YouTube video with YouTube Movie Maker.
Or click here to access a YouTube Channel for more step by step video guides about how to make a YouTube Video.
How to edit, create, make YouTube video with YouTube Movie Maker.
For example: Here we have four home video clips, "travel.mp4", "maldives.avi", "hawaii.mov", "myfilm.wmv", and many photos of the trip, we want to share them on YouTube, what is the easiest way? With YouTube Movie Maker, you can easy to make a video from all your video clips and photos, and Upload this video onto YouTube.
Step 1: Run YouTube Movie Maker, Press "Make Videos" button.


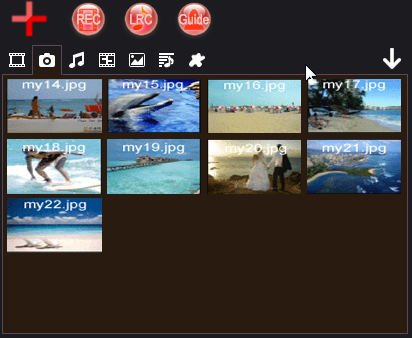
Step 2: Press "Red Plus Button " to add all source video clips("travel.mp4", "maldives.avi", "hawaii.mov", "myfilm.wmv") and photos into YouTube Movie Maker, and you will view all video clips and photos in source files list, like below.

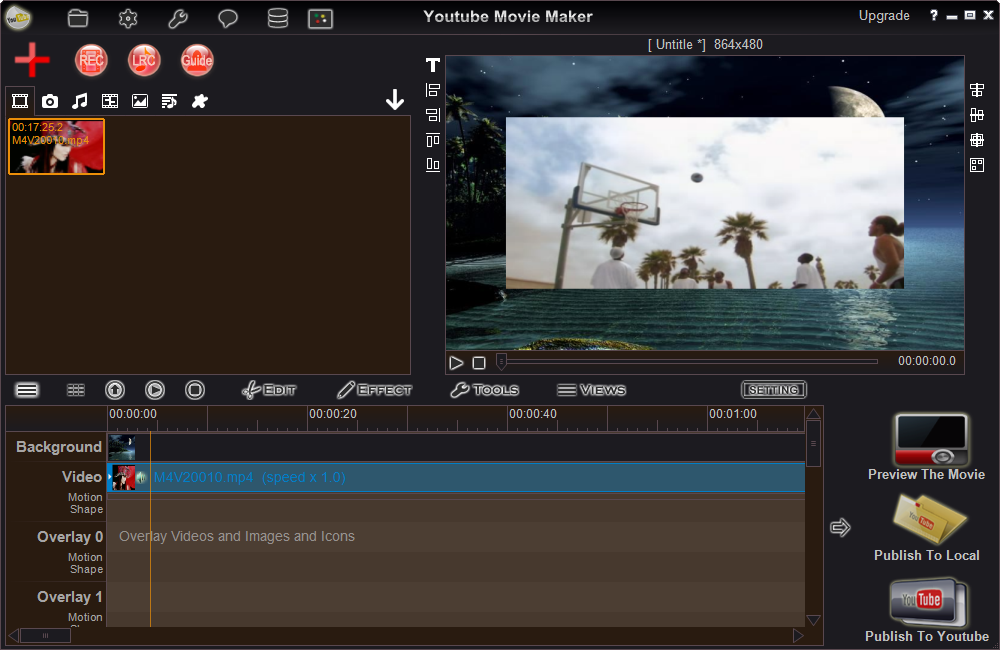
Step 3: Directly drag and drop the video clips and photos into VIDEO line from the source file list, or you can press "Add To " button to add selected video clip or photo into specified line, like below.

Step 4: At last, you could press "Preview The Movie " to preview the created movie, or press "Publish To YouTube
 " to upload the created movie onto YouTube.com directly, or press "Publish To Local
 " to save the created movie to computer hard drive.
Please Note:
1. 3D Video
with YouTube Movie Maker v10 or above, you could make cool 3D movies from video clips, images, texts, etc. Just need to simply switch "3D" tab.
 " button, or right click the item and select "3D Settings", then you could customize the X angle, Y angle, Z angle, Z position(Value from 0 to 200, the lower the value, the position more front.), and Depth, etc.
 " button, you could add one or multiple cameras, and you could customize the position(X, Y, Z value) and angle(X, Y, Z angle) of the camera, and even you could press "Append Point" button to add multiple view points in the one camera, that will helps you to get the moving 3D effect.
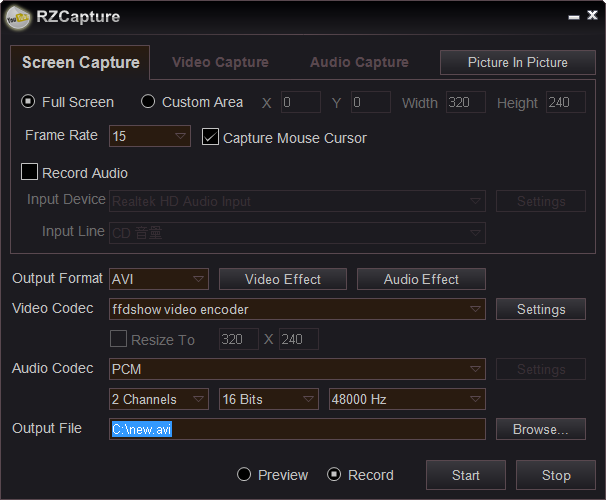
2. Capture/Record Videos
you could use YouTube Movie Maker v8.00 or above to capture/record videos and audios. simply press "REC " button goto Capture windows, then you could easy to capture/record videos from screen, capture card, cameras, or capture/record audios from any audio device or audio input pin, like below.
3. Lyrics Video Maker
you could use YouTube Movie Maker v6.25 or above to make cool lyrics video. simply press "LRC " button goto Lyric Maker, then you could easy to make cool lyrics videos with the different fonts, texts, colors, musics, special effects, backgrounds, borders, layout and words positioning, etc. like below.
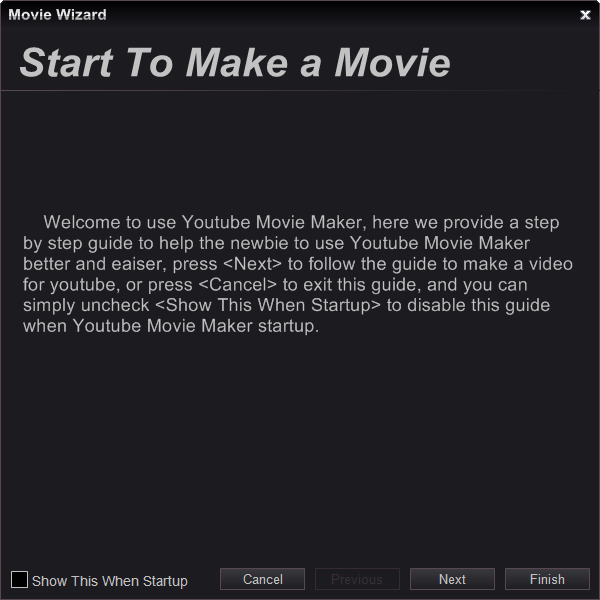
4. Movie Making Wizzard
simply press "Guide " button to run Movie Making Wizzard, then follow the wizzard to make your first video for YouTube, that will help the beginners to create youtube videos easier, like below.
5. Video Template
with YouTube Movie Maker v9 or above version, you could save any project as a Template, then simply press "Template " button to open the saved template, like below. that will help you always starting to make videos from the same objects, the program will auto keep or adjust object’s duration, position and effect, etc.
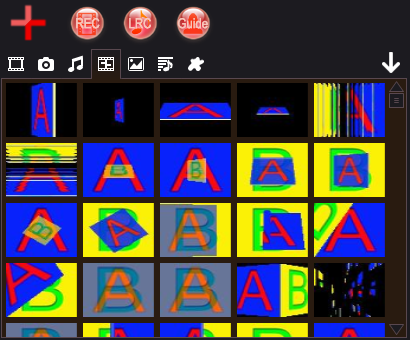
6. Transition Effects
YouTube Movie Maker provides hundreds of special transitions effects, you could press "Transitions Effects button " to view all transitions effects, and can directly drag and drop the transition effects into VIDEO line between different scenes, like below.
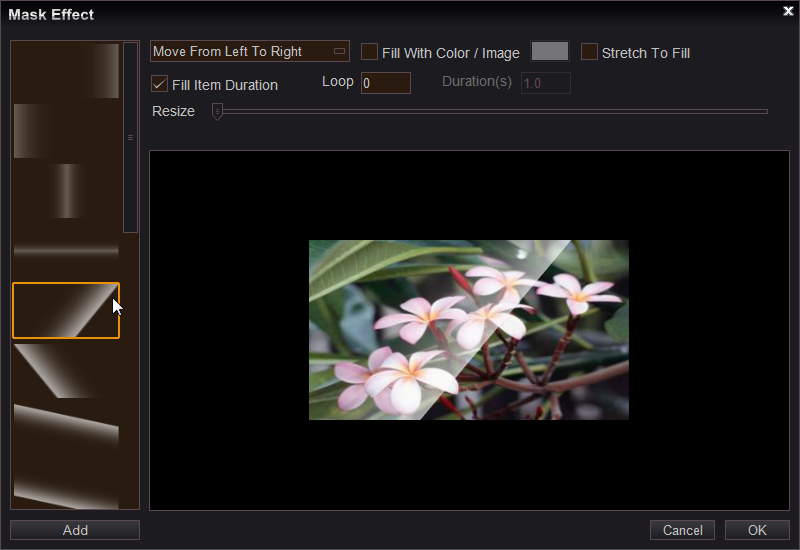
7. Mask Effects(Light and Shadow Effects)
YouTube Movie Maker v10 or above version provides cool mask effects(Light and Shadow Effects), simply right click the item(Video, Photo or Text.) in the Timeline area, and select "Mask Effect" to add cool Mask effect, like below.
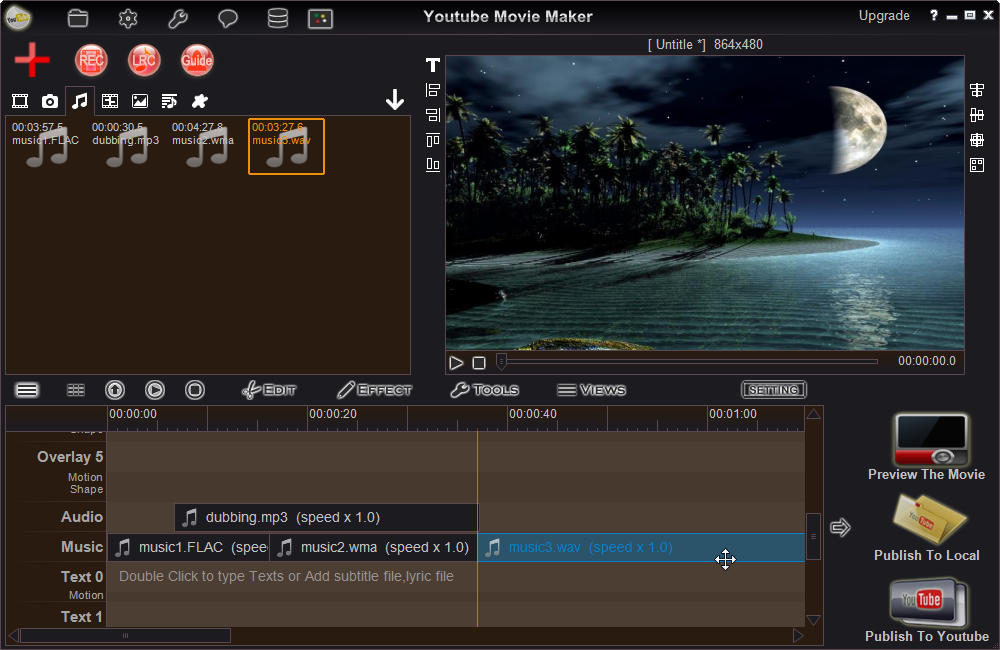
8. Add Audios
you could use YouTube Movie Maker to add background music/audio and dubbing, simply press "Add Local Files Button" to add music/audio and dubbing files into YouTube Movie Maker, then drag and drop them onto Audio or Music line, like below(by using this function, you even can directly make and upload a video onto YouTube from only audios/songs without any videos/photos.).
9. Add Texts
You can use mouse to double click "Text" lines to input Texts(Title, Lyrics, Subtitles, Words, etc.) on the video, you can directly move the texts on the screen, and right click the text and select "Select Font" to set the font, color, size, type of the texts, font effects, etc. and right click them to add cool motion effect, mask effects(Light and Shadow Effects), etc. like below.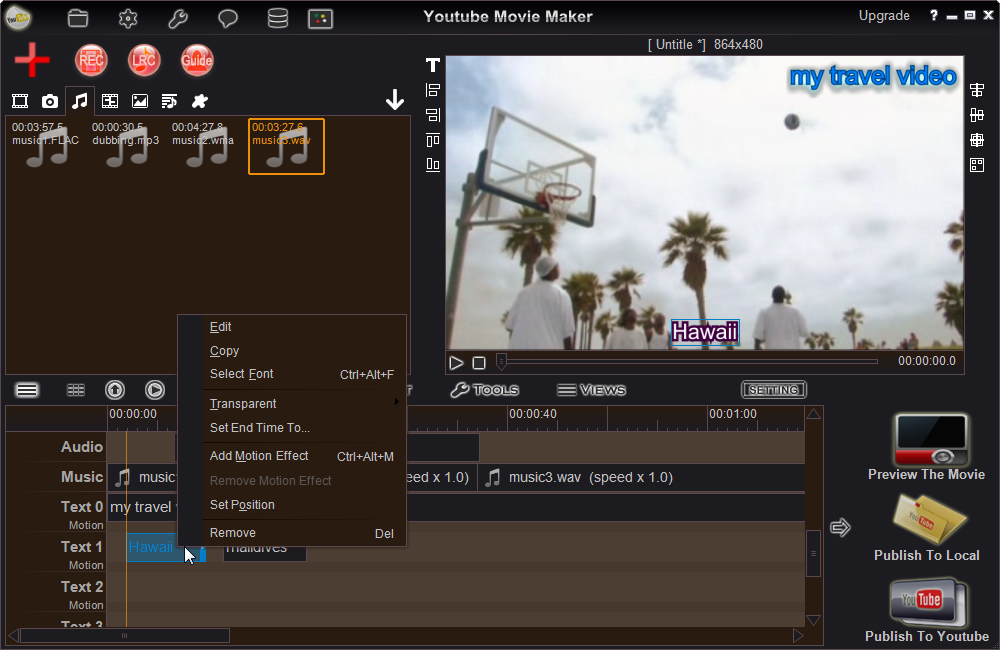
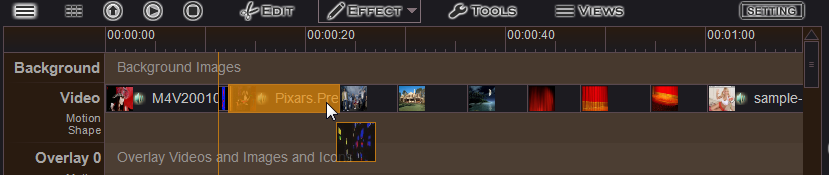
10. Overlay Videos/Photos
Drag and drop videos or photos onto overlay lines(move them on screen to change the display position, and drag the edge to change the display size, or right click them and select "Set Position" to customize displaying position and size directly, or right cick them on overlay line to add cool motion effects, mask effects or special effects, etc), with this functions you could easy to mix multiple videos/photos in the samescreen(videos in video, pictures in video, videos in picture, pictures in picture, etc). like below.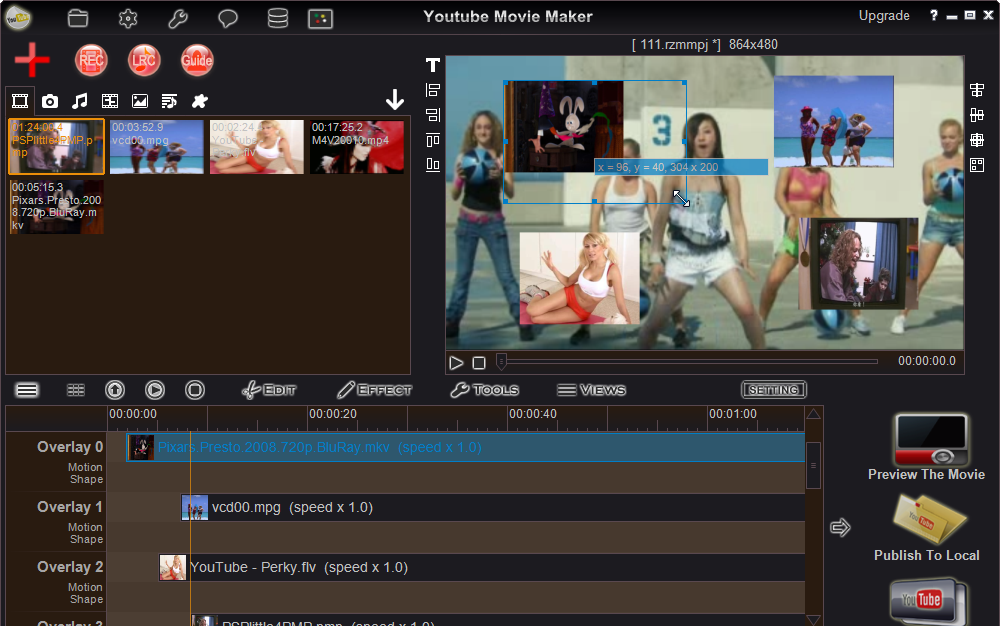
11. Add Customized Motion
For example, if we want to put a video on the pictures, first drag and drop pictures into Background line, drag and drop video into Video line, right click the video and select "Add Motion Effect" goto "Motion windows", then press "Create new motion " button and input a name for this new motion, like "Ymm-011", then press "Append a new key point
 " button, then input new position(X-axis, Y-axis) and new video frame size(Width and Height) of the video, then set Loop times of this motion in the video(0 = don't loop, 1 = loop one time, 2 = loop two times, etc.), at last you can press "Preview Motion
 " button to preview the current motion, and press "Save motion
 " button to save the current motion, or directly press "OK" button to save and enable this motion, like below.
" button to add a new Key Point, each Key Point will has its own order, the video will move in accordance with this order, of course, you could press "Up
" button to save the current motion, or directly press "OK" button to save and enable this motion, like below.
" button to add a new Key Point, each Key Point will has its own order, the video will move in accordance with this order, of course, you could press "Up " or "Down
 " to change the order, and press ""Remove Key Point
 "" button to remove the selected key point.
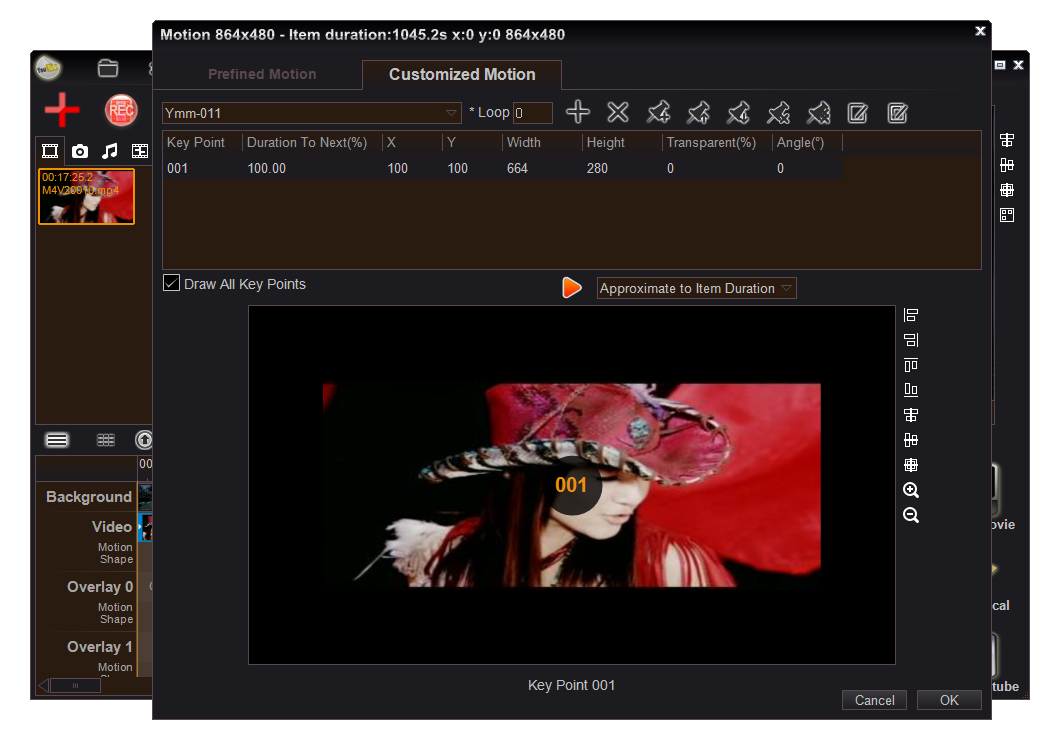
12. Editing Menu
You can use mouse to right click items in TimeLine to edit them, for example: cut, split, adjust playback speed(speed up/speed down), re-size, crop, rotate, add border, change video/image shape, add transition effects, add motion effects(add predefined cool motion effects, or customize motion effect by adjust frame size, position, transparence, angle, appearing type, disappearing type, etc.), adjust volume, disable audio, add audio effects, video chroma key(right click the item on the Overlay line, and select this function to remove specify color in the overlay video, like remove background green color from a green screen video), etc. like below.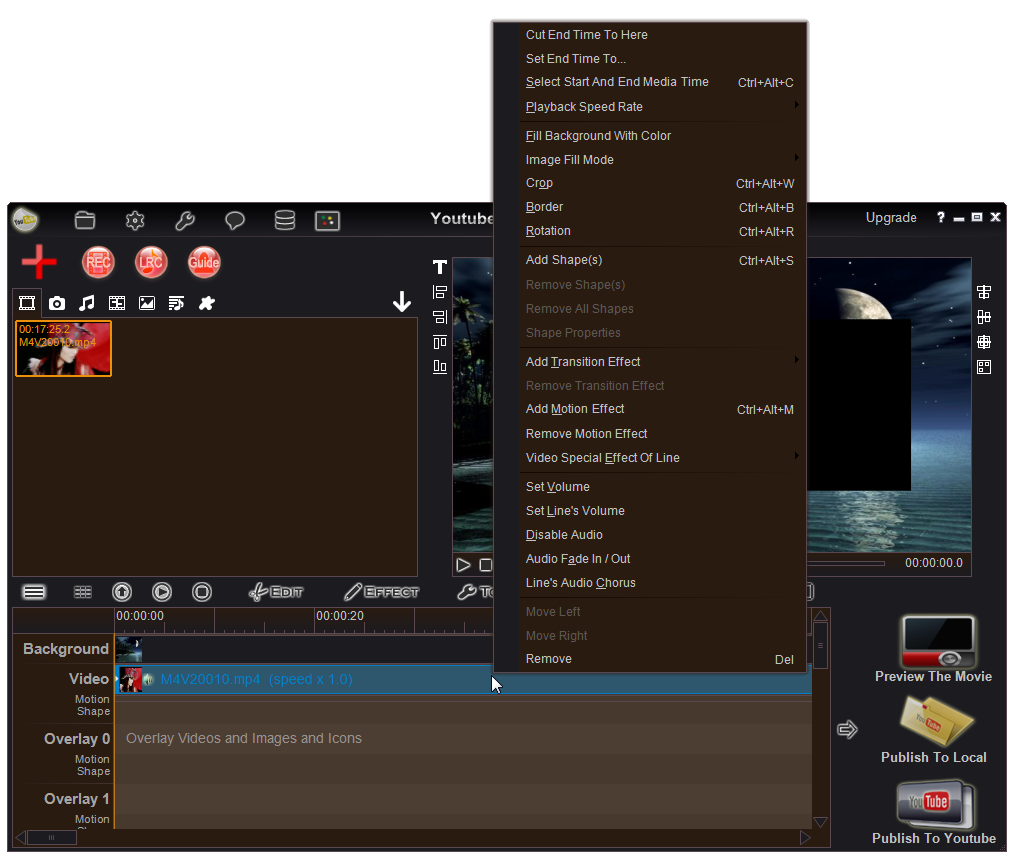
13. Timeline buttons
press these buttons" " to Display/Hide specified lines, Change Timeline mode, Expand the Timeline area, Preview Timeline, Edit Timeline items, Add Effects for Timeline items, Import subtitles from subtitle file(.srt, .ass, .ssa, etc.), Save inputed texts as subtitle file, Save current project, etc.
14. Output Setting
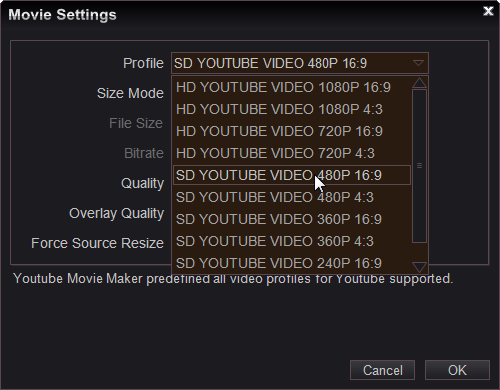
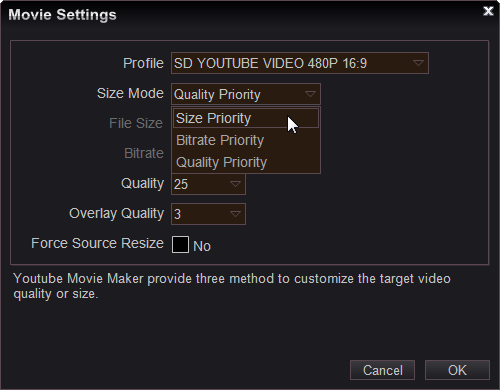
Simply press "SETTING " button to select a target profile for YouTube, YouTube Movie Maker predefine all YouTube SD and HD video profiles, you can simply choose a profile for your project, and here you can specify the video quality or video file size of the created video, like below.
15. Please note
YouTube Movie Maker Free Edition won't add the annoying watermark, but limits the length of the created single video.
Watch Online Video Tutorials
YouTube Movie Maker
Access our YouTube Channel for more step by step video guides.