As we know, there are several parts to make a video. Besides the early creativity and shooting, post-editing and processing are equally important. Sometimes we find that the color of the finished work is not ideal. It may not be bright enough, or the color may be dim.
Encounter these situations, how to adjust the color of the video, so that our works more beautiful? We can do this using Free Color Video and YouTube Movie Maker.
Correct Video Color in Free Color Video
If you only need to adjust the video color, you can choose the Free Color Video. Free Color Video is a free color change software. You can optimize the color, brightness, saturation, contrast, and so on. It is also easy to use because of its focus on functionality.
First, we click on the “red plus” button to import the video you want to adjust.
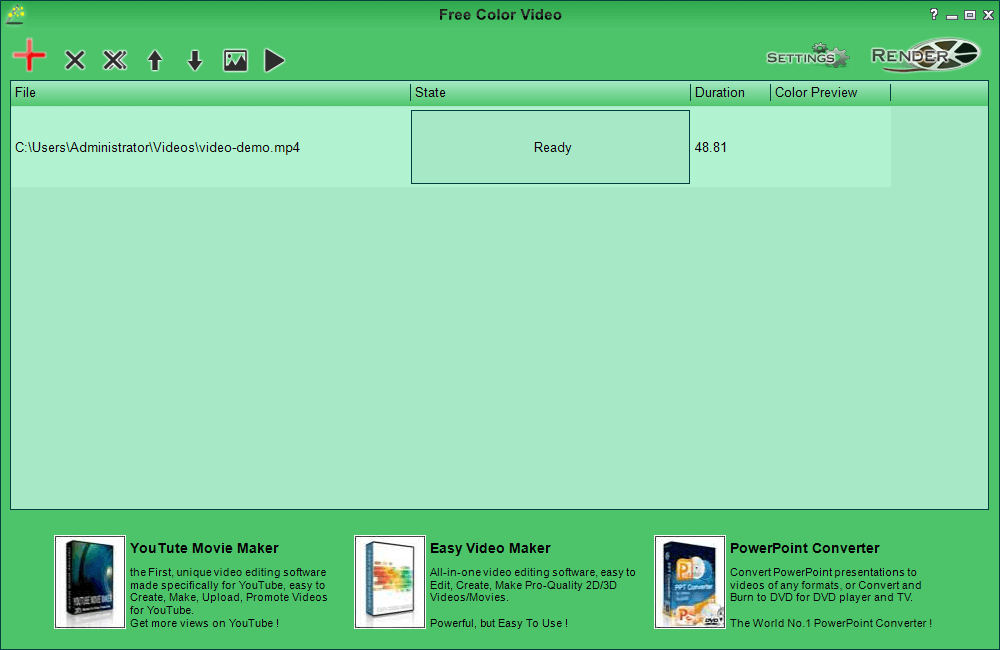
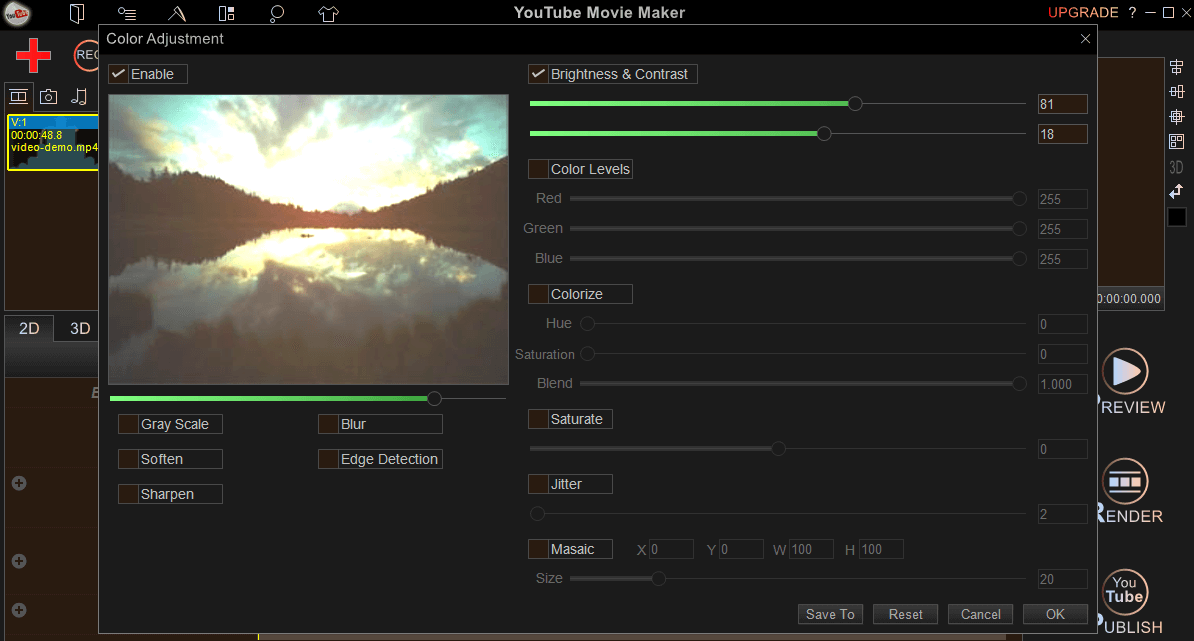
In the second step, click the “color adjust” icon, where we can see many adjustment parameters. All we need to do is select the parameters
we want to adjust.
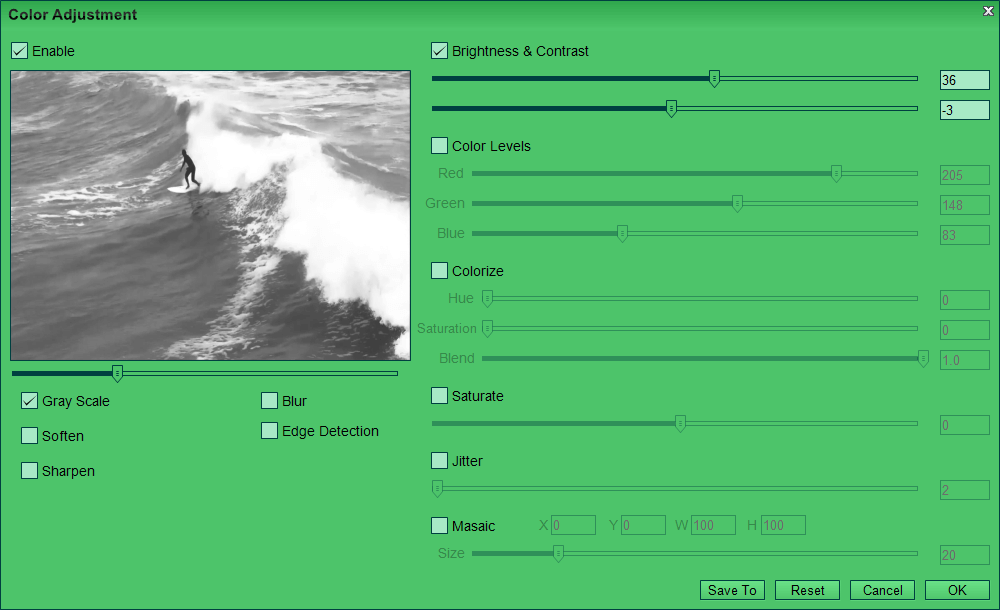
For example, if the video is a little dark, we want to use the Free Color Video to adjust the brightness. We need to check the video “Brightness and Contrast” option, and then drag the cursor below it.
While dragging the cursor, you can preview the change effect in real-time in the preview window on the left, very intuitive.
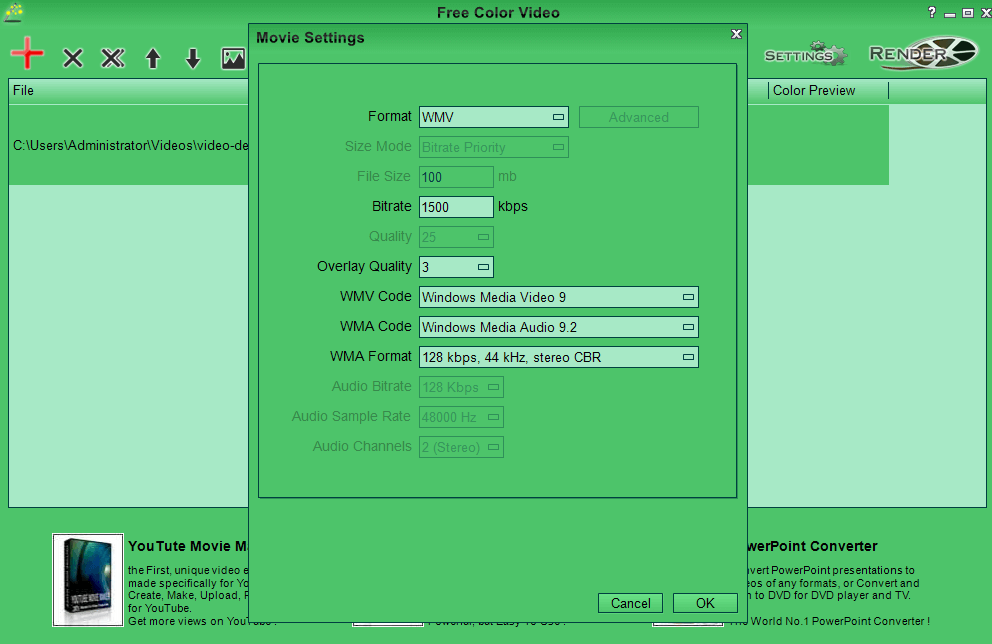
The third step, we can set the file format and quality in the “Settings”. After the adjustment is complete, click “Render”, and then save the adjusted video.
Correct Video Color in YouTube Movie Maker
If you have more requirements for video color adjustment, you can choose to use YouTube Movie Maker. YouTube Movie Maker is an all-purpose video editor, and color adjustment is one of its features.
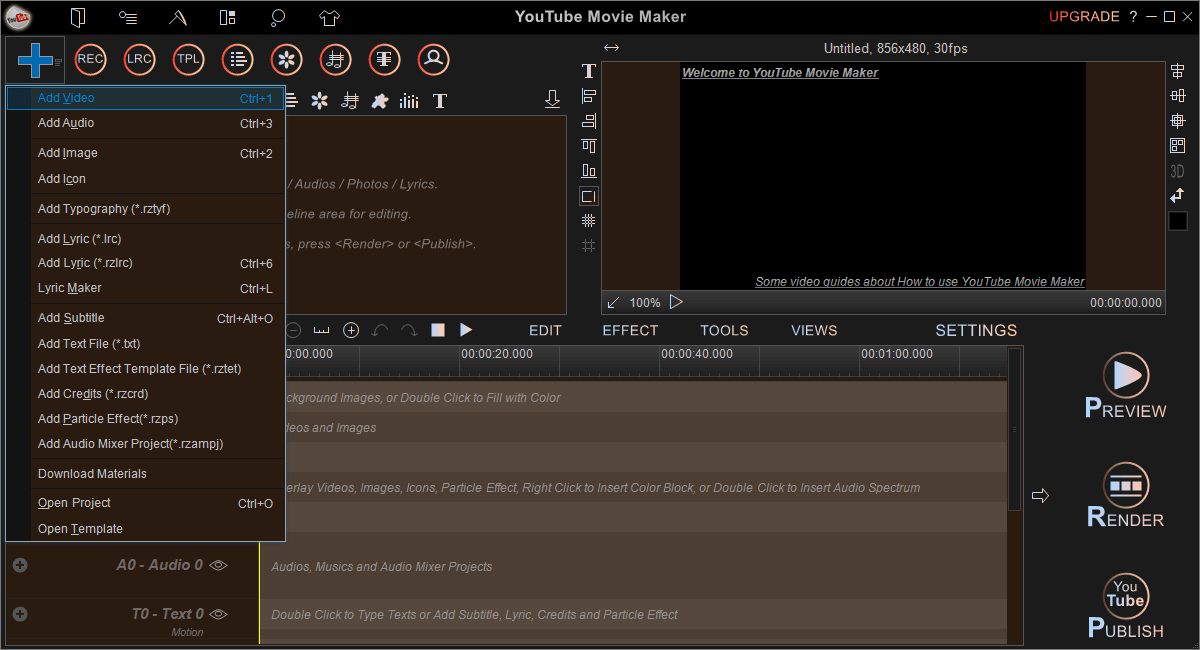
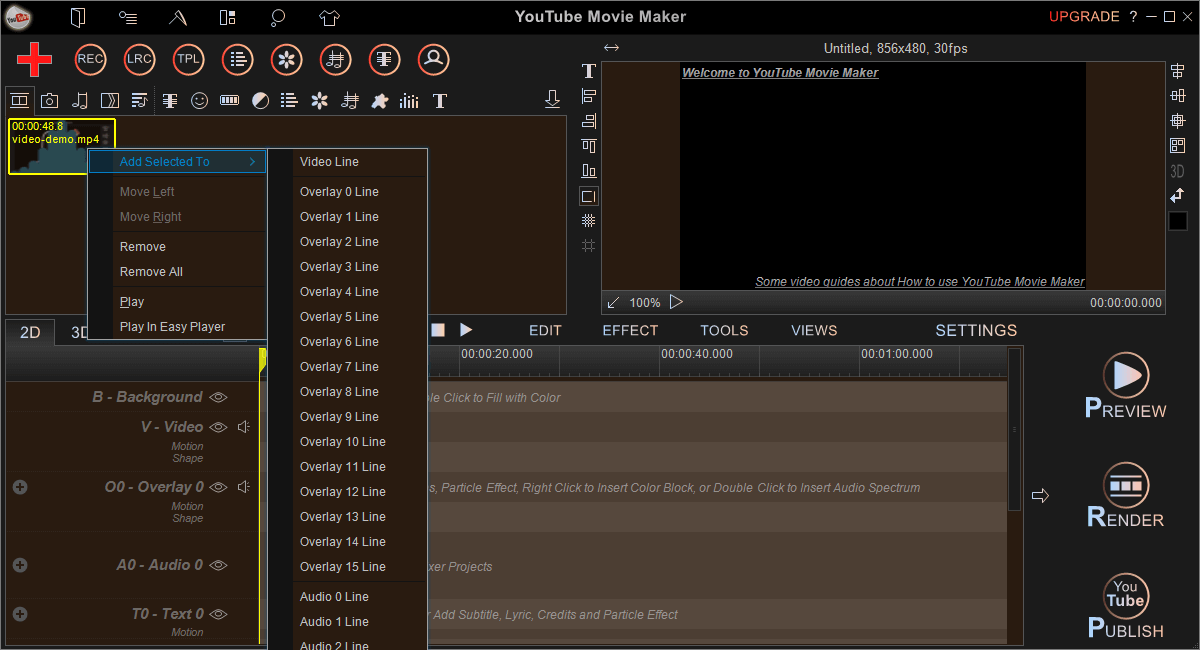
In the first step, we also click on the “red plus” button, add the video to the software. Then right-click on the video, select “Add Selected to — video line”.
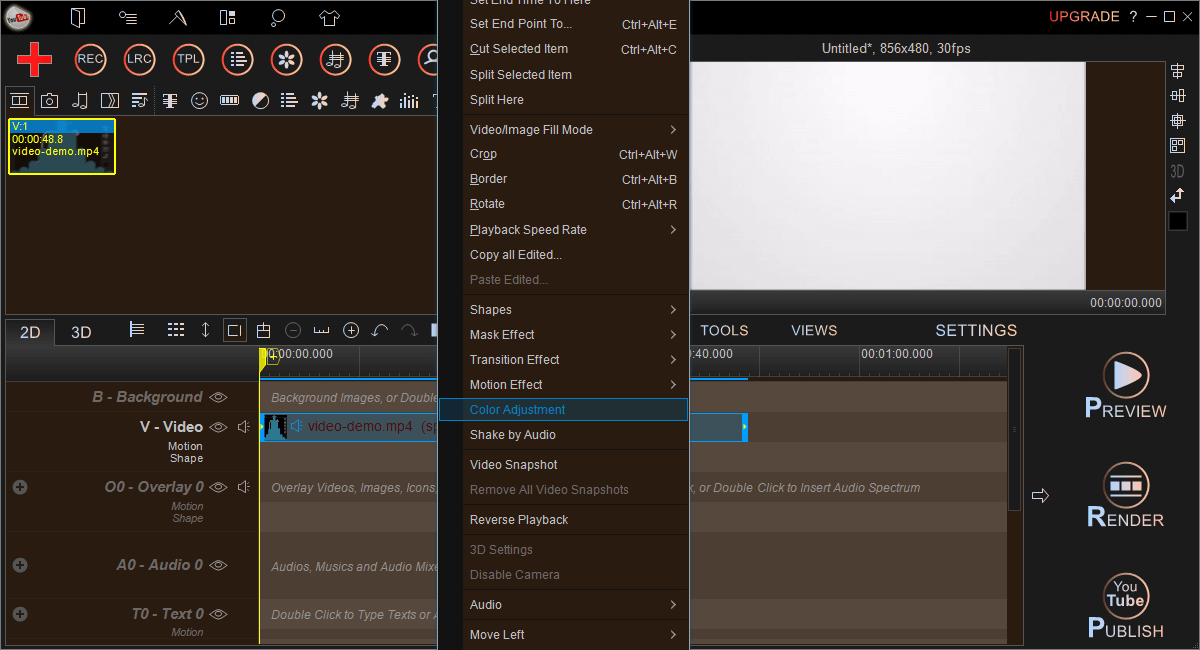
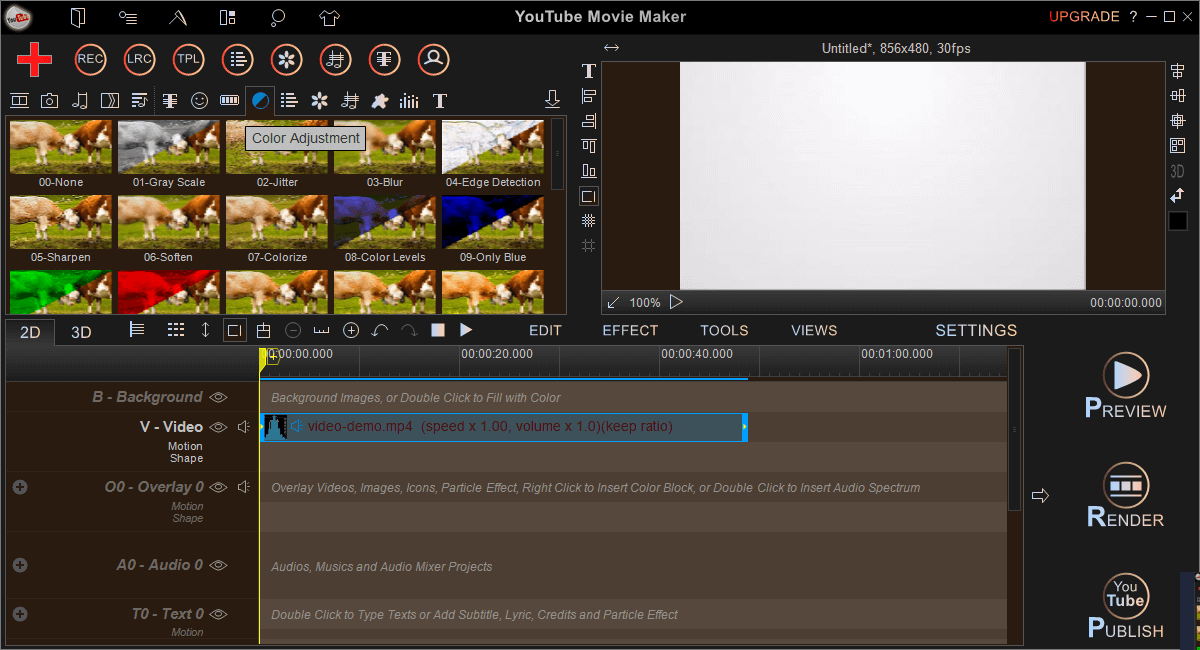
step 2, right-click in the edit window of the body to select the added video. Then select “color adjustment” from the menu.
Step 3, in the pop-up color adjustment box, we can see multiple adjustment options. Similar to the previous operation, we can choose the option we want to adjust.
Besides this way, we can also use the software’s built-in template to adjust color.
After adding the video, we select the color adjustment icon at the top. You can then see a variety of color-coded templates in the template library. Select the effect we want and add it to the video line by dragging or right-clicking “set to video line”.

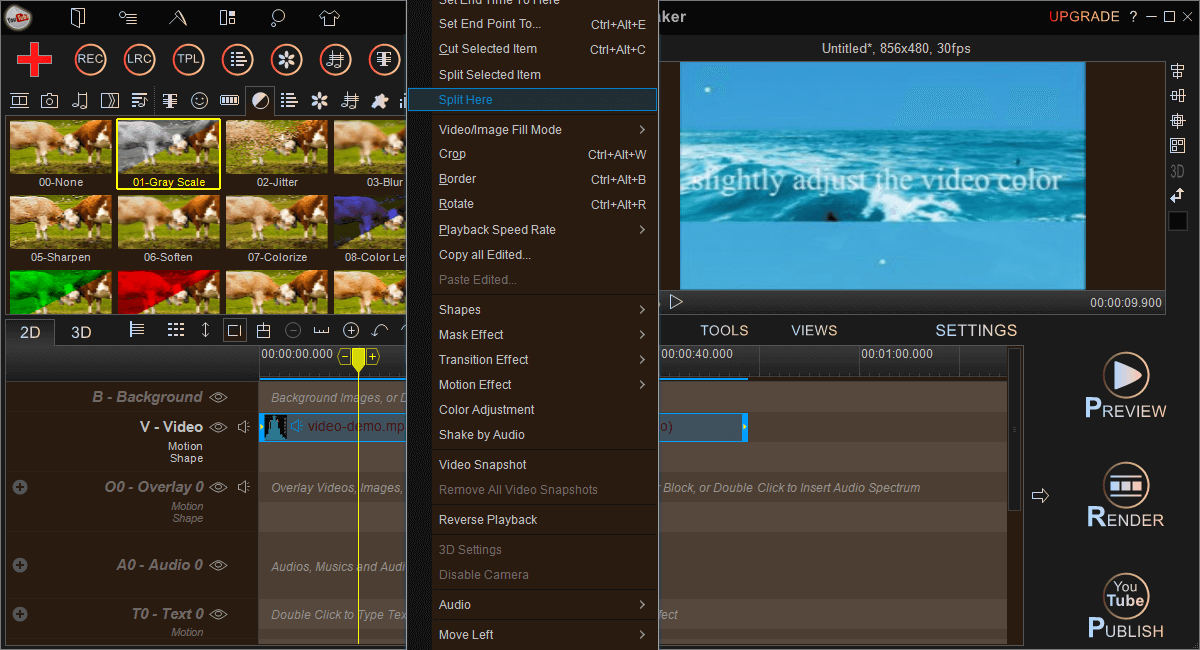
In addition to color-correcting the entire video, YouTube Movie Maker also can adjust video segments. We can do it by splitting the video.
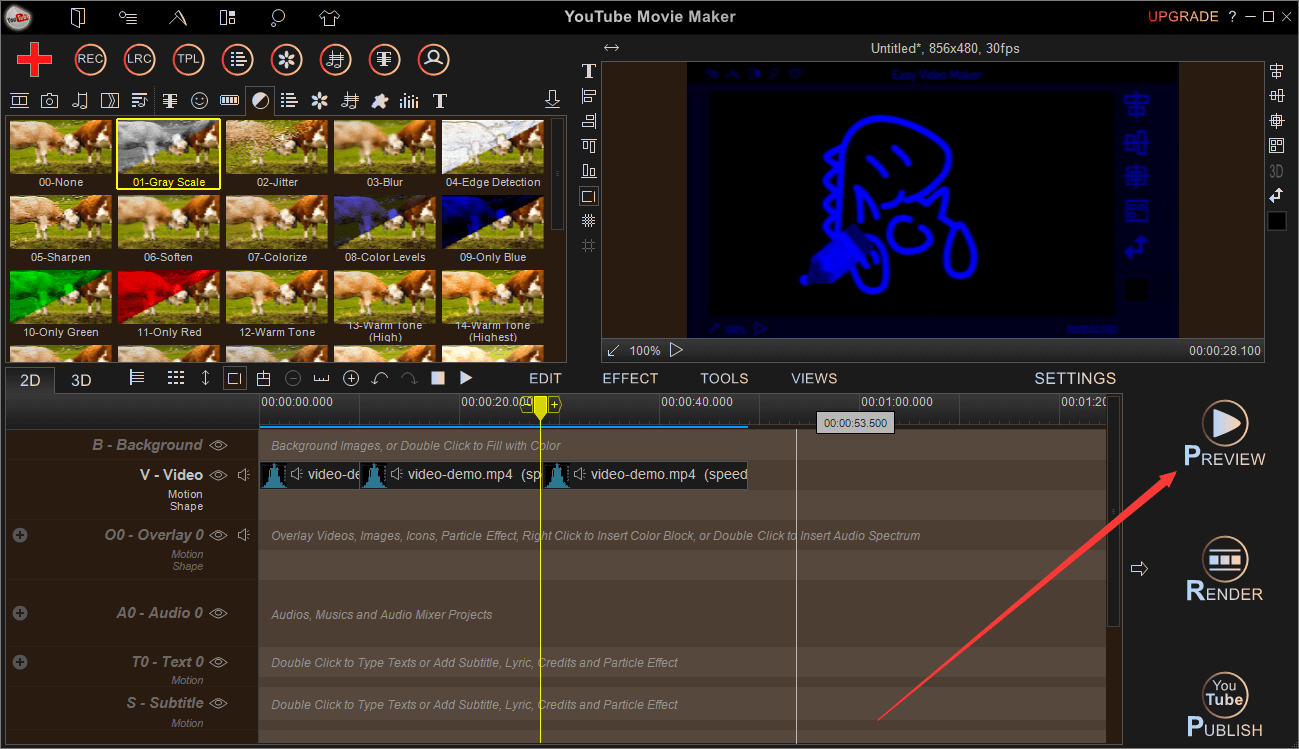
For example, we wanted to add three color effects to the video. Gray Scale for the first two minutes, Only blue for the middle two minutes, and Only Green for the last minute.
First, drag the cursor on the timeline to the location you want to split, then right-click on the video and select “Split Here”. Repeat this step to split the video into three parts.
After that, We first select the “Gray Scale” effect, drag it to the first video, and so on, drag “Only blue” and “Only Green” into the second and third videos,.
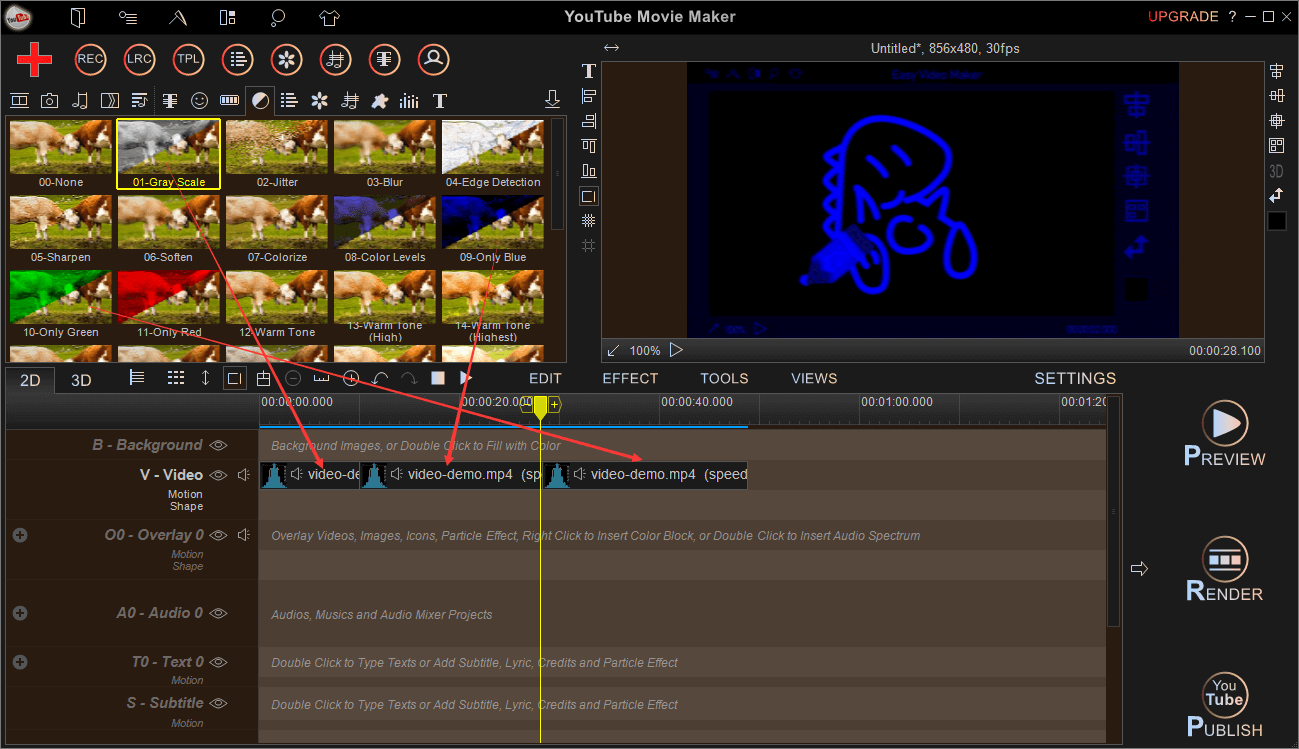
“Only blue” and “Only Green” to the second video and Only Green to the third video. Similarly, here we can also use the previous drag adjustment option to adjust each video.
Once it’s done, we can click on the “Preview” button to watch the adjusted effect of the video. If the video is up to par, we can save it. Just click the render button and choose the save location.
In the end, you get the final color-adjusted video.
The Bottom Line
As you can see, if the entire Video requires only a simple color adjustment, you can choose the Free Color Video. If you want to adjust each part of the video, as well as other clips, YouTube Movie Maker is a much better choice. Therefore, YouTube Movie Maker has many powerful and convenient functions for users who often need to edit videos. We recommend it be used as the main video editing software.


