If you use a static image as the background, the video will look dull. And usually the image’s aspect ratio is not suitable for the video. But we don’t want to stretch the image, which will cause the image to distort, or remain annoying black edges on videos. Therefore, we can solve similar problems with PAN and ZOOM EFFECTs.
So when we use a static image to make video, how to make the static image move like a video?
We broke this tutorial into two parts.
In the first part, we’ll discuss how to use Pan and Zoom effects to make the static image right/left move smoothly. We’ll remain the second part in next article.
Here we go.
Video Tutorial:
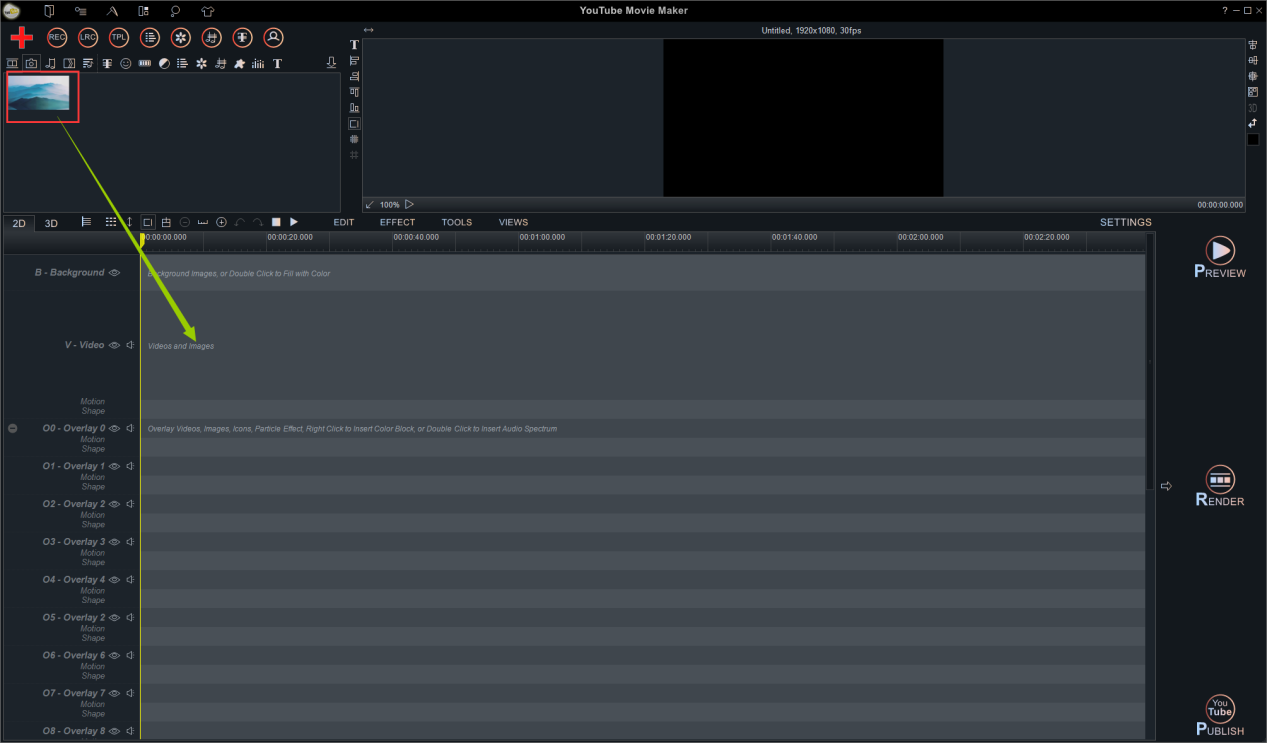
Step 1: Run your “YouTubeMovieMaker” , and then click “Make Videos”.
Step 2: Drag and drop your static image file into the program.
Here we choose a beautiful nature panorama to make you see the change clearly.
Step 3: Drag it to the Video Line
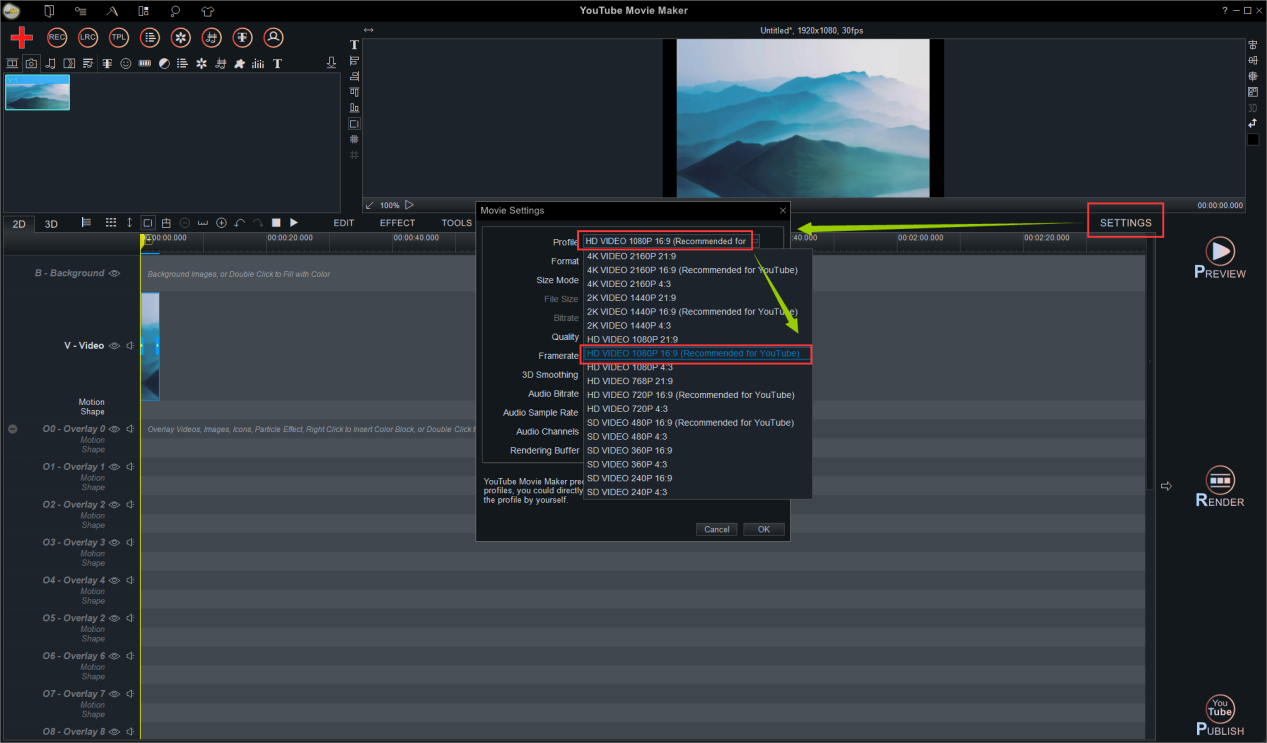
Step 4: Choose a video resolution.
We have to choose a suitable video resolution first.
Click the “Settings” and choose a video resolution in the “Profile”. Here we choose “HD VIDEO 1080P 16:9 (Recommended for YouTube)”.
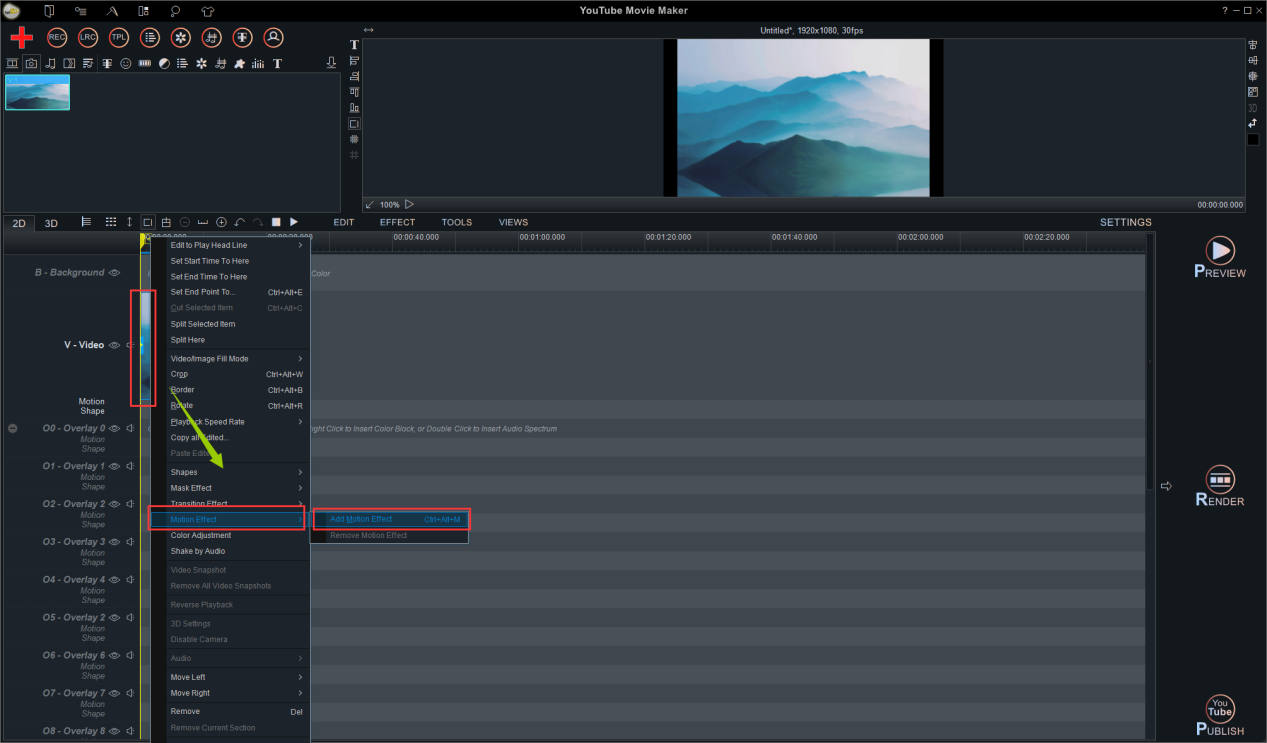
Step 5: Right-click the image and find “Motion Effect” in the right-click function menu.
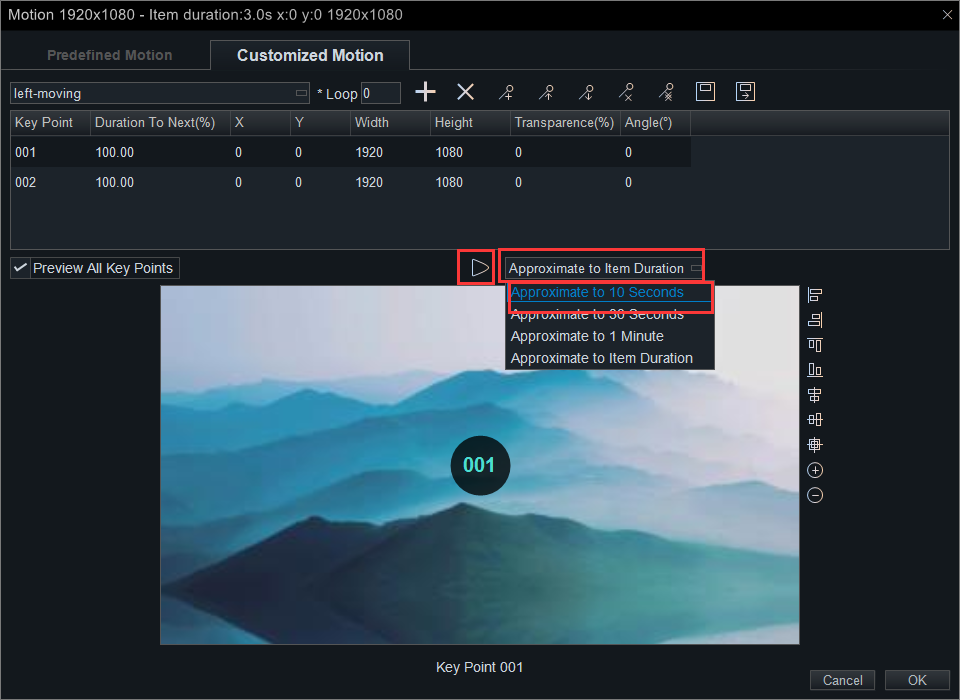
Step 6: Click the tab “Customized Motion” in the “Motion” UI.
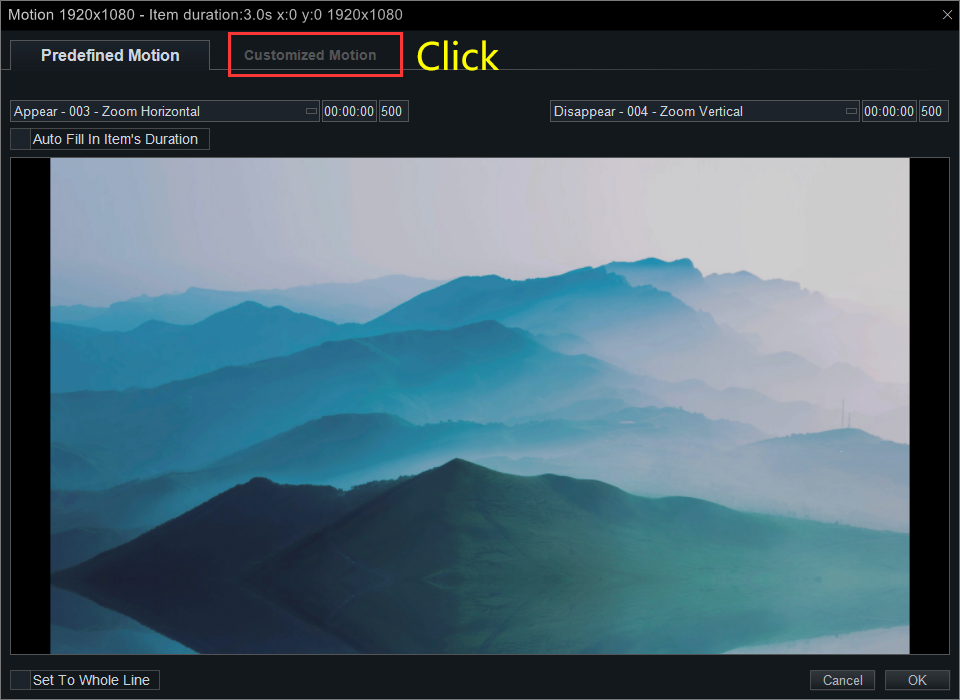
We can see a top tool tab here.

![]() We use this button to create a new motion effect.
We use this button to create a new motion effect.
![]() We use this button to remove the current motion effect.
We use this button to remove the current motion effect.
![]() We use this button to append a new key point.
We use this button to append a new key point.
![]() We use this button to move the selected key point up
We use this button to move the selected key point up
![]() We use this button to move the selected key point down.
We use this button to move the selected key point down.
![]() We use this button to remove a selected key point.
We use this button to remove a selected key point.
![]() We use this button to remove a selected key point.
We use this button to remove a selected key point.
![]() We use this button to save an existed motion effect with new changes.
We use this button to save an existed motion effect with new changes.
![]() We use this button to save the current customized motion effect as a new motion effect.
We use this button to save the current customized motion effect as a new motion effect.
Step 7:Click “![]()
” to add a new motion effect, and name it.
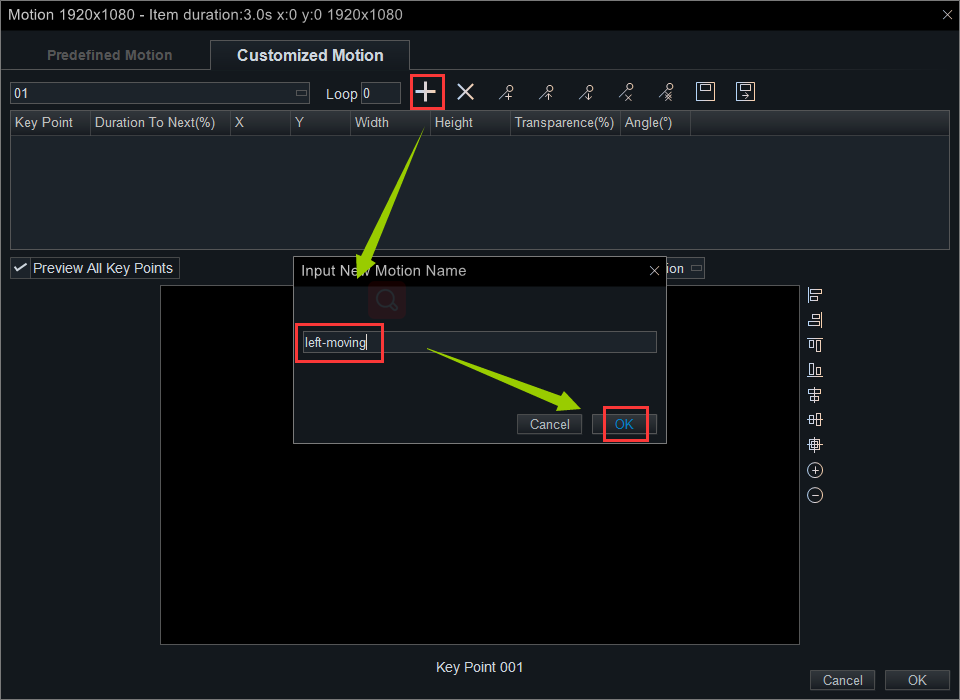
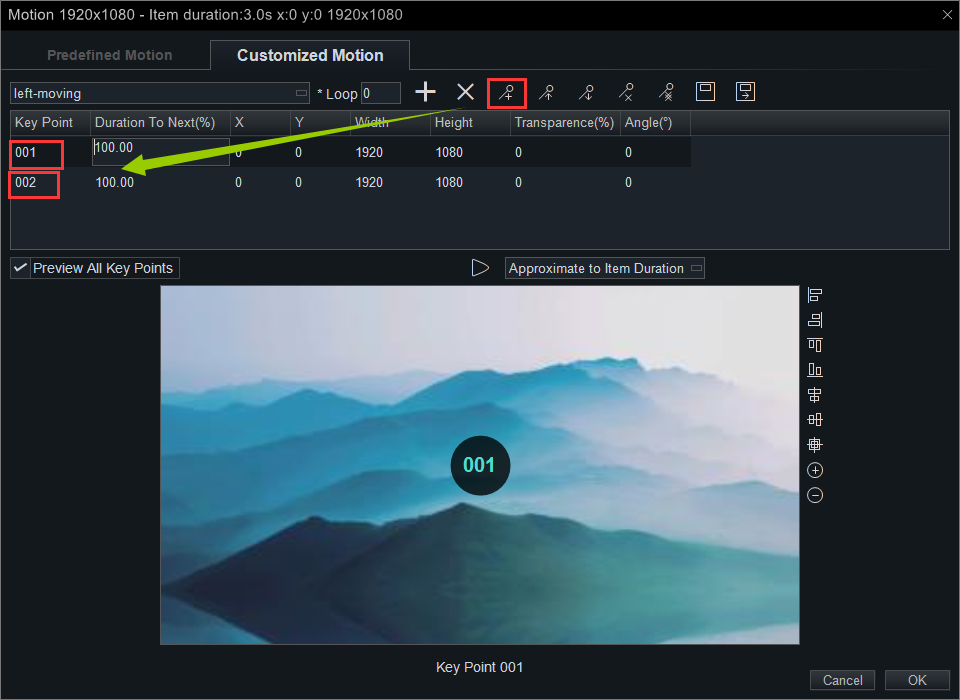
Step 8: Click “” to append two new key points. Then the image can move from the position of 001 to the position 002 when we make pan and zoom effects to the image.
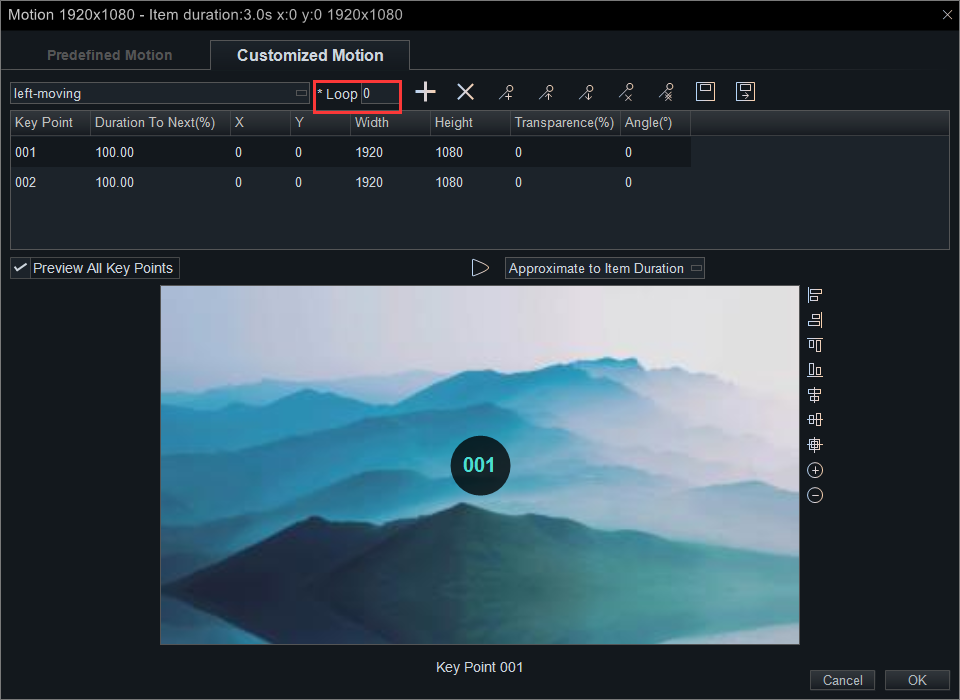
Loop Times: The MOTION EFFECT is displayed in the image loop for the duration based on the number of times it is set. If it is set to 0, it does not loop.
If the duration of image is long, you don’t want to spend long time to preview the motion effect, here you can set the “Approximate to item Duration” as 10 seconds.
Before we reset the values of these parameters, we have to know some basic points.
As you know, we set the video resolution as 1920×1080. So all images in the “Motion” window would be stretch to the default.
What we here to do is to make pan and zoom effects for the image.
How to use the Pan and Zoom Effects to make the whole image move horizontally?
Example 1:
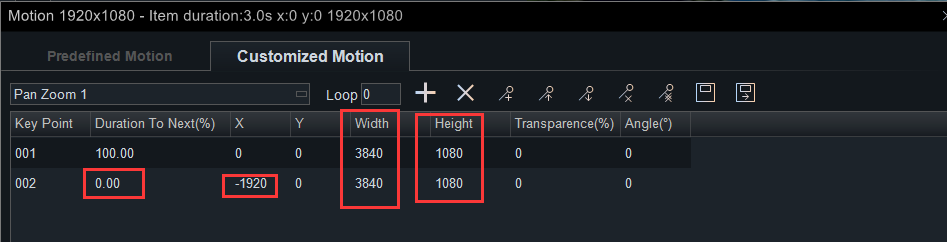
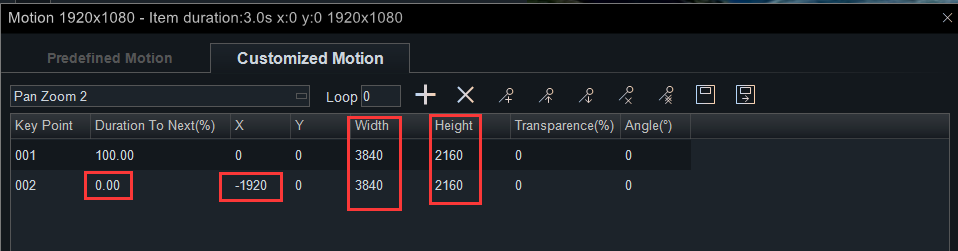
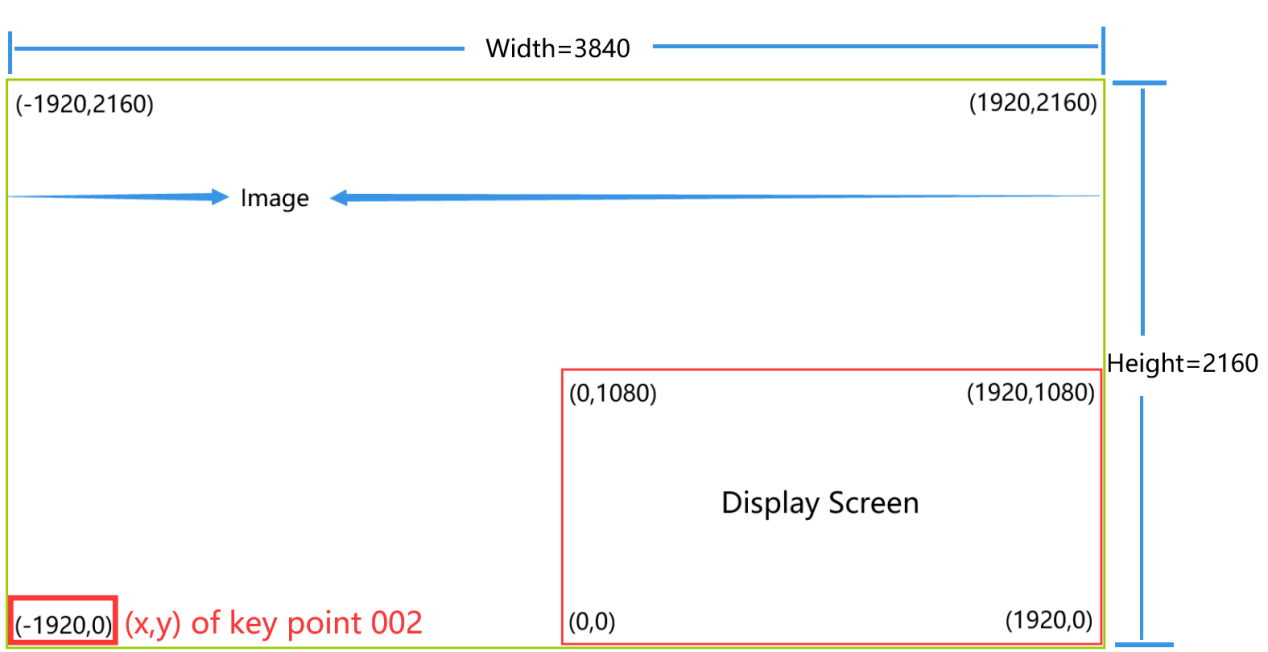
We change the “Width” of “Key Point” 001 and 002 from “1920” to “3840”. And then, change the value of X-axis of key point 002 from “0” to “-1920”.
Why we have to do this?
We change the “Width” from “1920” to “3840” is to make the image cover the screen while the image is left-moving. Of course, you can change the “Width” to any number greater than “1920”.
If you want to keep the original image ratio, you can set the width and height according to the original image ratio. If you don’t need to keep the original ratio, you can simply enlarge the image by 2 times or more here.
In order to keep the image move stable along the X-axis, we need to keep the “Width” of 001 and 002 the same value, the same as the value of Y-axis.
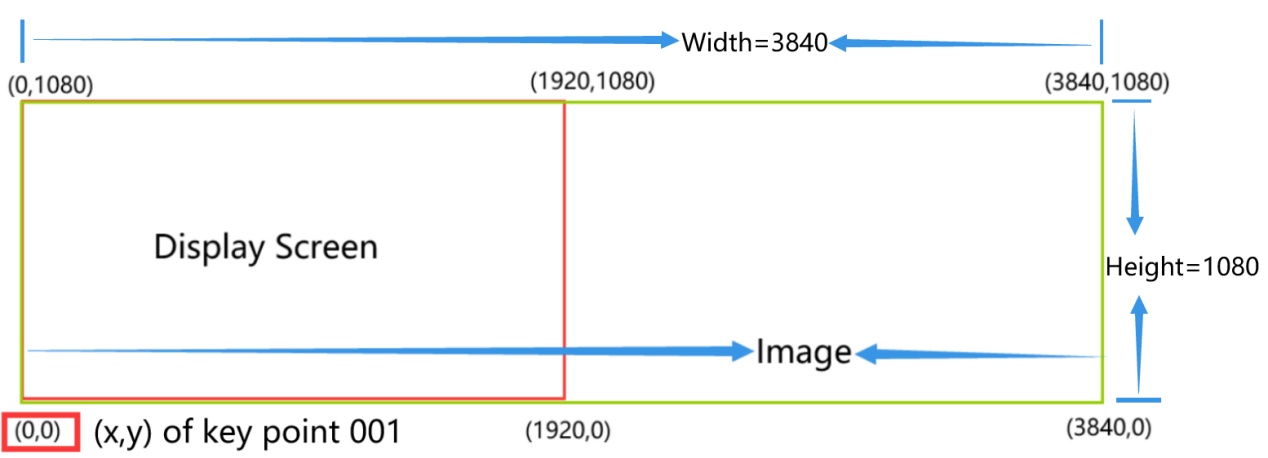
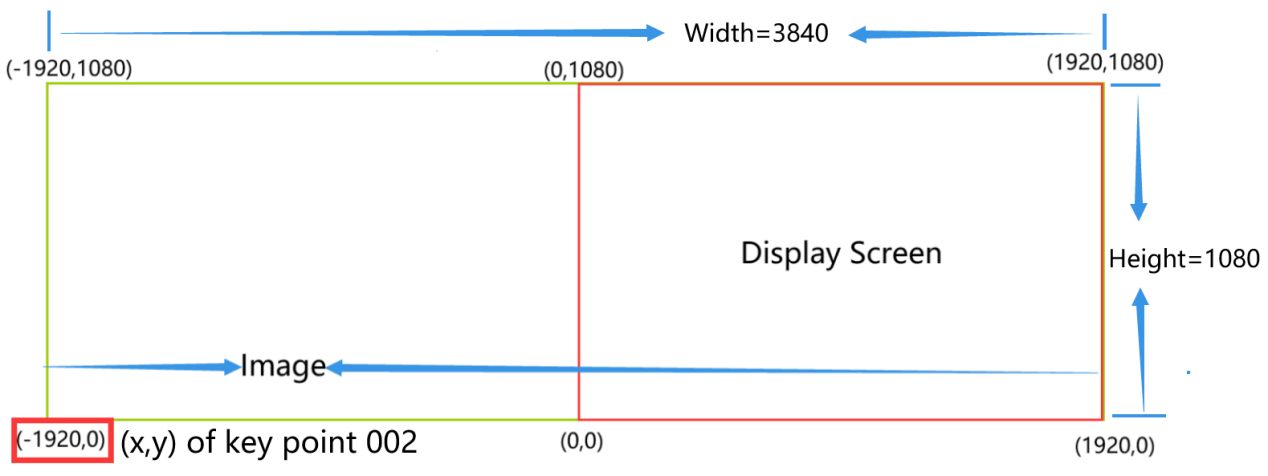
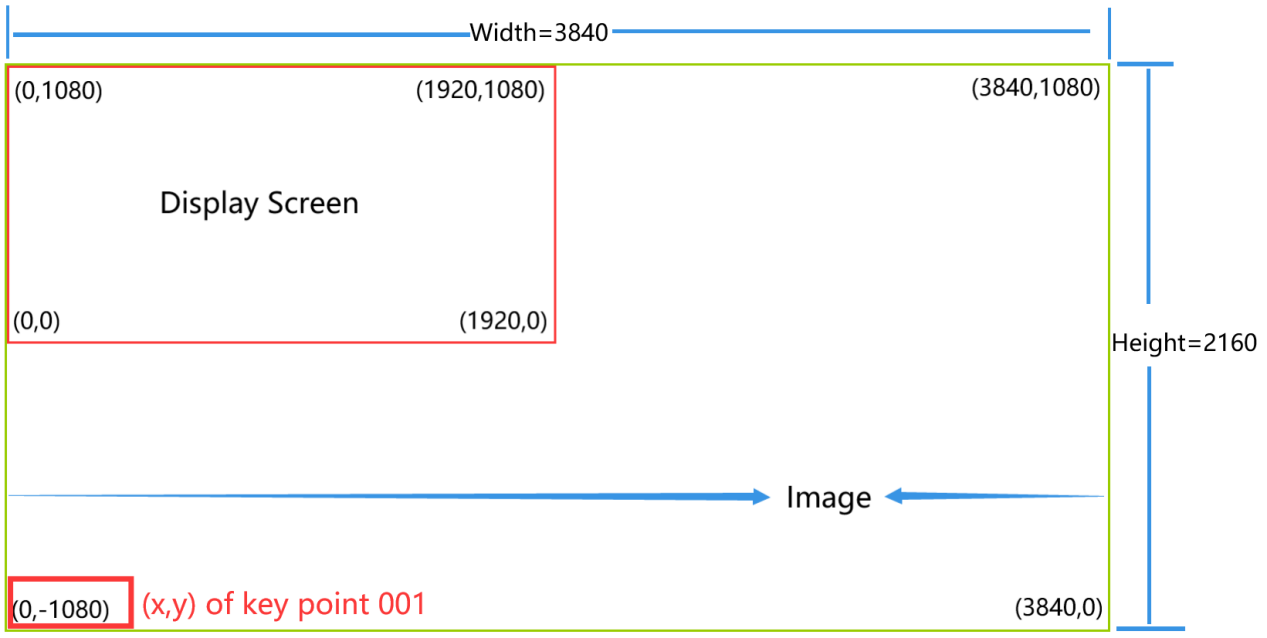
The X-axis and Y-axis of the start point 001 is (0,0), so the end key point should be 002 (-1920,0).
We also need to change the value of the “Duration to Next(%)” to key points. This value means the duration that the image move from key point 001 to key point 002, and the position of key point 002 is where the image stop. So, the “Duration to Next” of 001 key point should be 100%, the “Duration to Next” of 001 key point should be 0%.
Key Point 001 as shown in the figure: (The red box area is DISPLAY SCREEN, and the green area is the image.)

Key Point 002 as shown in the figure: (The red box area is DISPLAY SCREEN, and the green area is the image.)

How to use the Pan and Zoom Effects to make the top half of the image move horizontally?
Example 2:
We change the “Width” of “Key Point” 001 and 002 from “1920” to “3840”. And then, change the value of X-axis of “key point” 002 from “0” to “-1920”. Next, change the “Height” of “Key Point” 001 and 002 from “1080” to “2160”.
Why we change the “Height”?
On the one hand, we change the “Height” of the two key points to capture a specific part of the image, and then make pan and zoom effects to the part. On the other hand, we double the value of the image’s “width” and “height” at the same time, so the image will not deform.
Key Point 001 as shown in the figure: (The red box area is DISPLAY SCREEN, and the green area is the image.)

Key Point 002 as shown in the figure: (The red box area is DISPLAY SCREEN, and the green area is the image.)


How to use the Pan and Zoom Effects to make the bottom half of the image move horizontally?
Example 3:
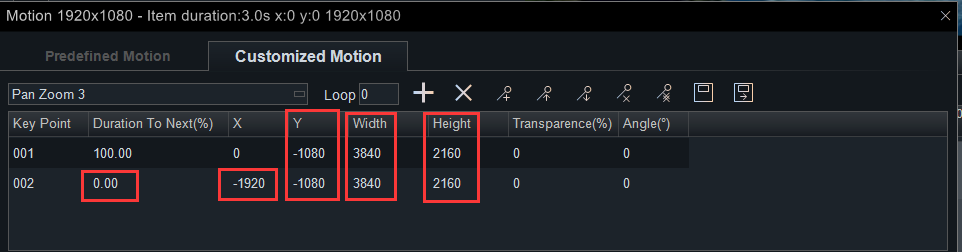
We change the “Width” of “Key Point” 001 and 002 from “1920” to “3840”. And then, change the value of X-axis of “Key Point” 002 from “0” to “-1920”. Next, change the “Height” of “Key Point” 001 and 002 from “1080” to “2160”. Last, we change the value of Y-axis of “Key Point” 001 and 002 from “0” to“-1080”.
Why we change the value of Y-axis of the two key points?
As we mentioned in example 2, the picture will change as the value increasing. The picture is a part of the complete image. The width and height determine which part remains on the screen.
You can directly drag the image on the screen up/down to find the part you want to remain. And make sure both the height and the value of Y-axis of “key point” 001 and 002 must be the same. Then the image can smooth move along the X-axis.
Remember to keep the image spread over the screen while dragging the image up/down.
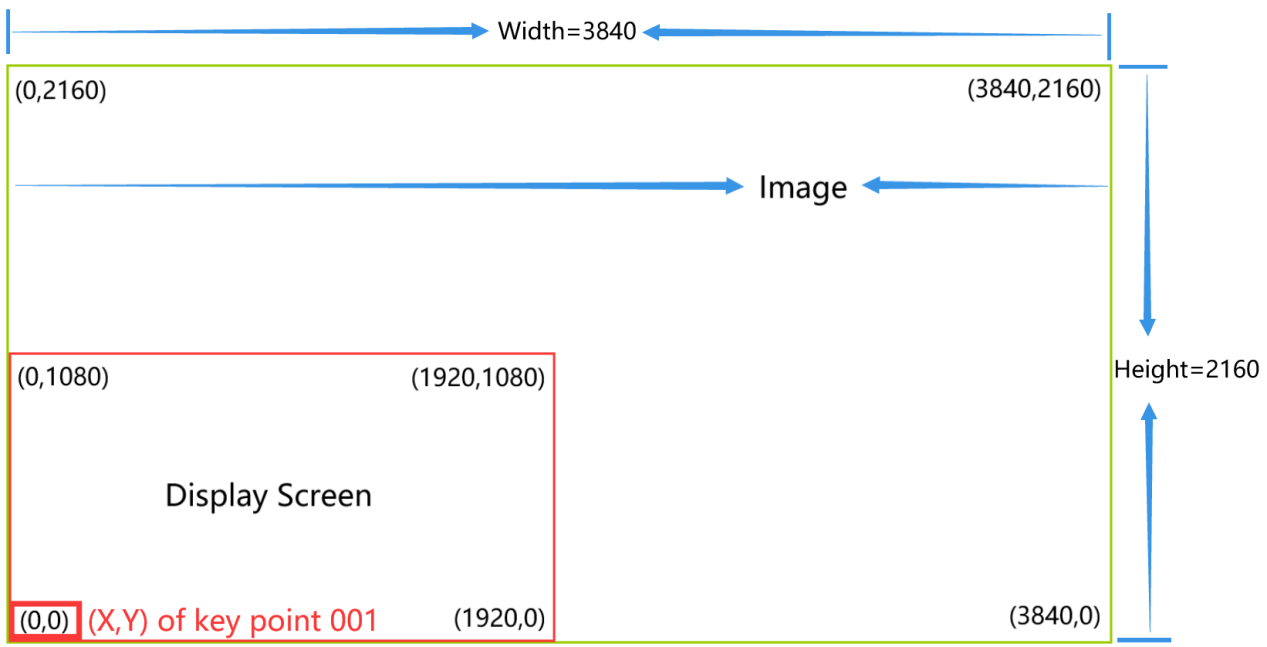
Key Point 001 as shown in the figure: (The red box area is DISPLAY SCREEN, and the green area is the image.)

Key Point 002 as shown in the figure: (The red box area is DISPLAY SCREEN, and the green area is the image.)

That’s all steps for how to make pan and zoom effects. It’s really helpful when showing your family photo. Everyone’s face can be clearly seen just like a sliding film in old movies. We’ll update an article about how to create Pan and Zoom Effects to make a static image move vertically. If you use this effect to a panorama, you’ll find it’s amazing. Try it yourself to see what will happen! Welcome to share with your friends.


