The inspiration of this article comes from a user aking us how to add background to text. When I tell him how to use overly line to make a simple text background, more ideas came into my mind. We can use overlay line to make so many fantastic video elements to bring our videos to a new high, Let’s dive into it right now!
Here’s a list of what I am going to share with you in this article in case you wan to skip to a specific section.
Run YouTube Movie Maker software and go to the “Make YouTube Video” button (not only YouTube video but there are also so many video formats that can be chosen).
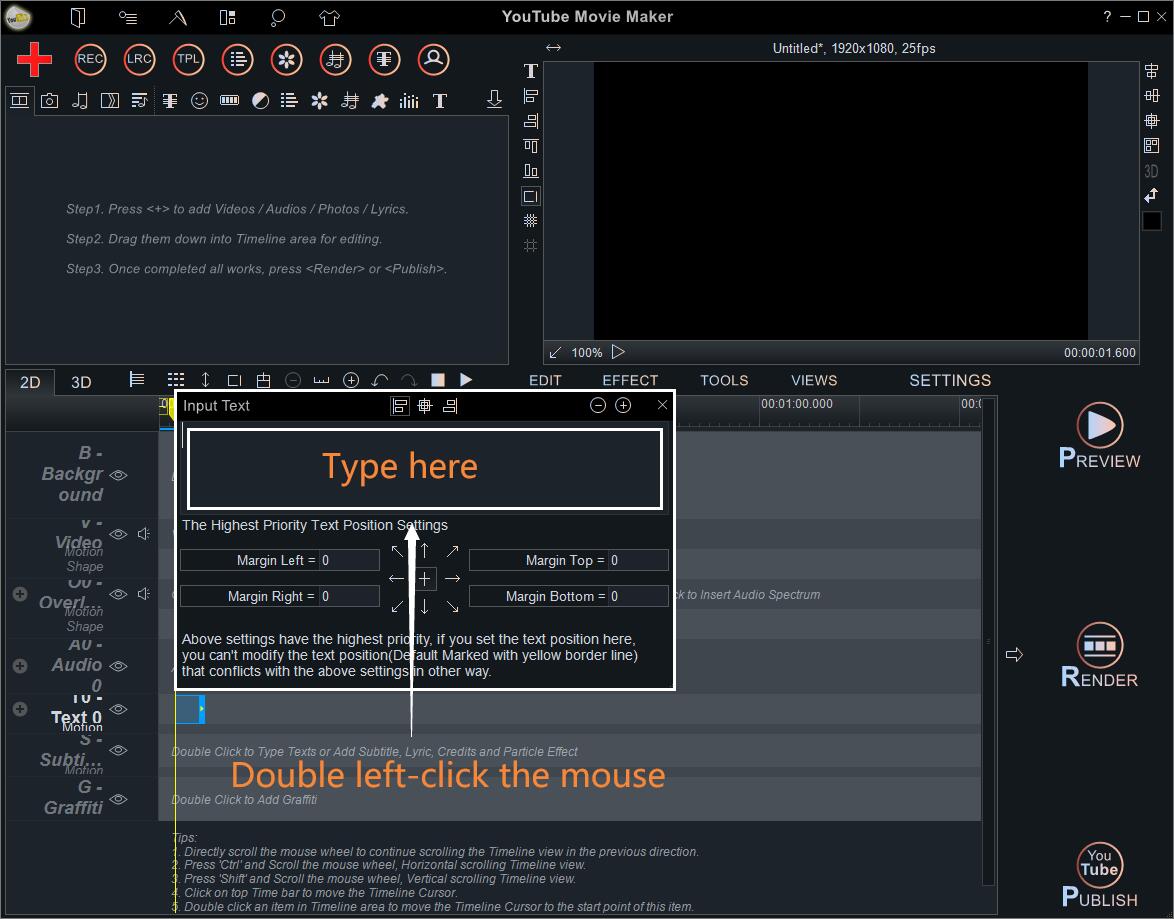
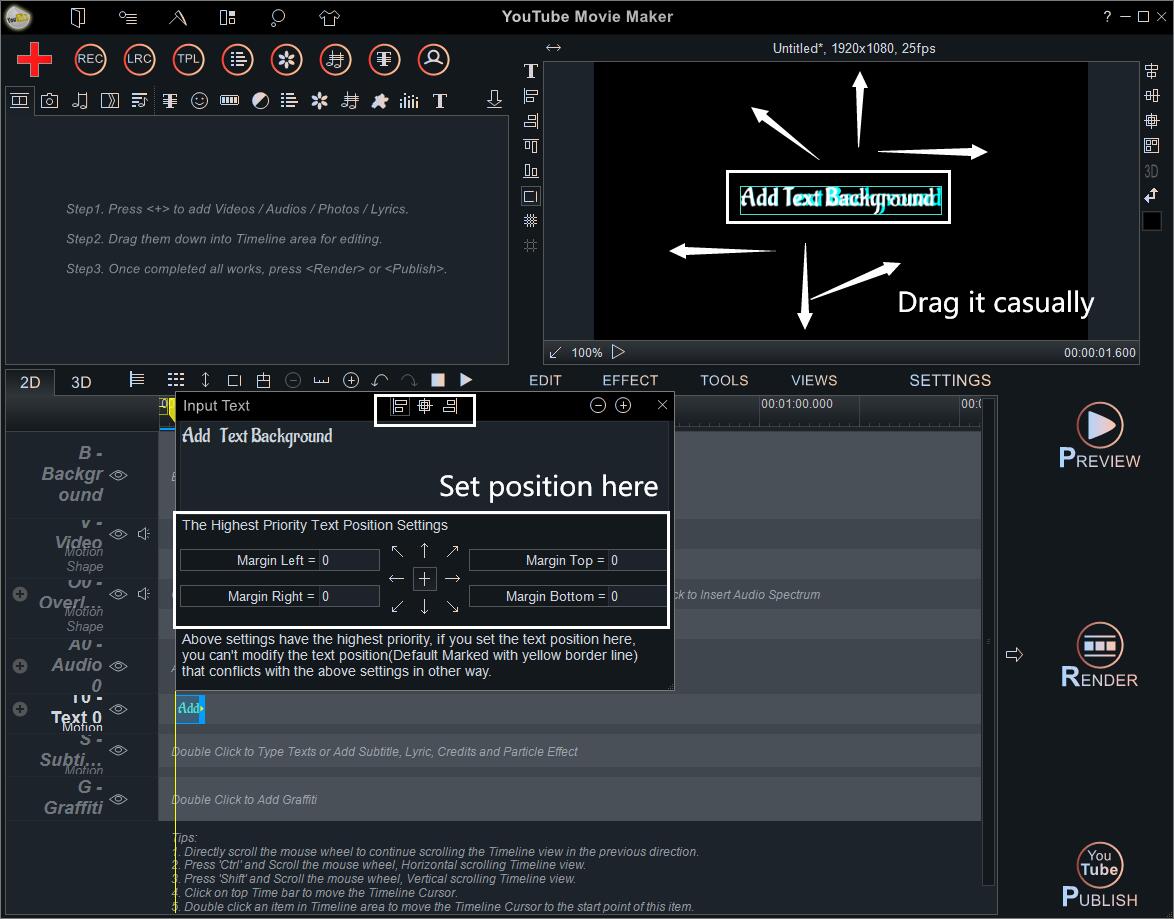
Double left click the Text/ Subtitle Line to type in the Text Panel. Then reset the text position in the below “Position Settings” or use your mouse to grab the text on the screen and drag it to a proper position directly.
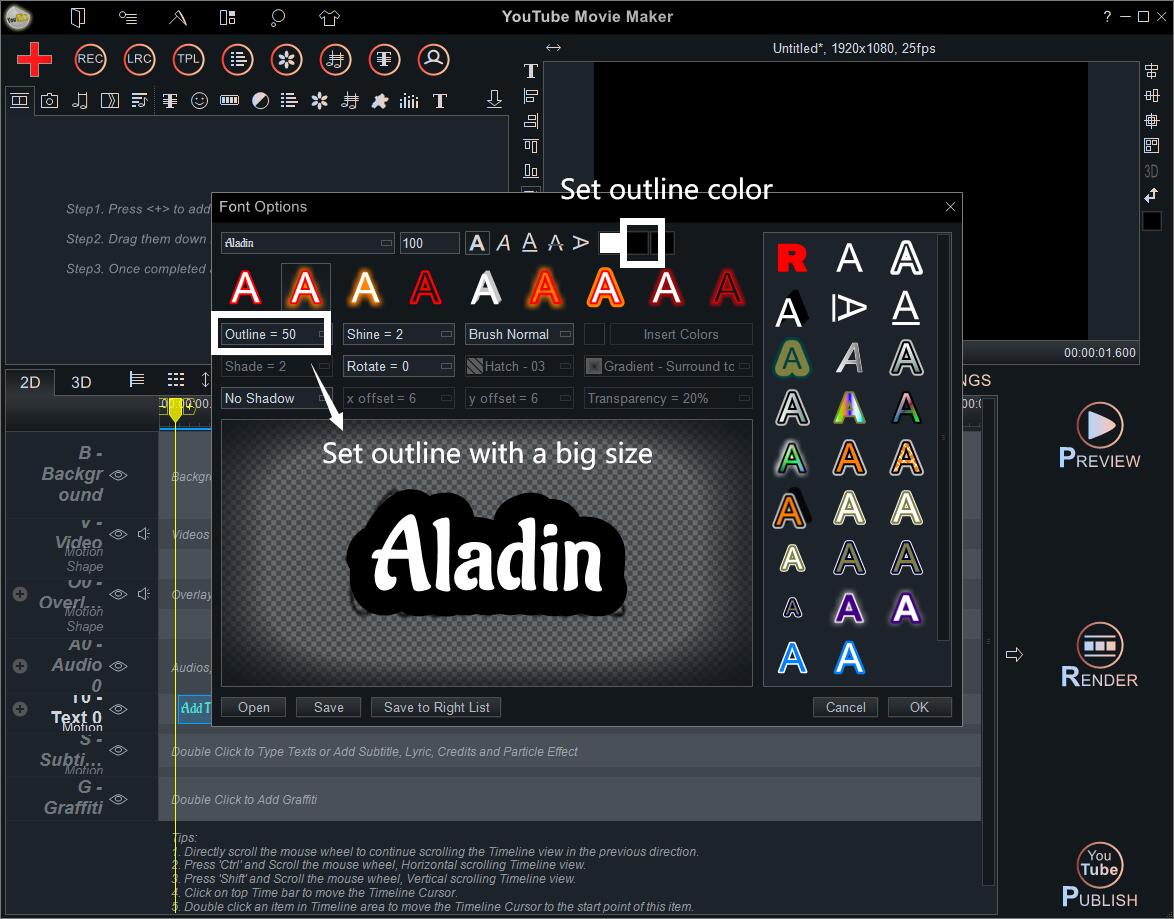
Right-click the text in “Text Line” to set its fonts.
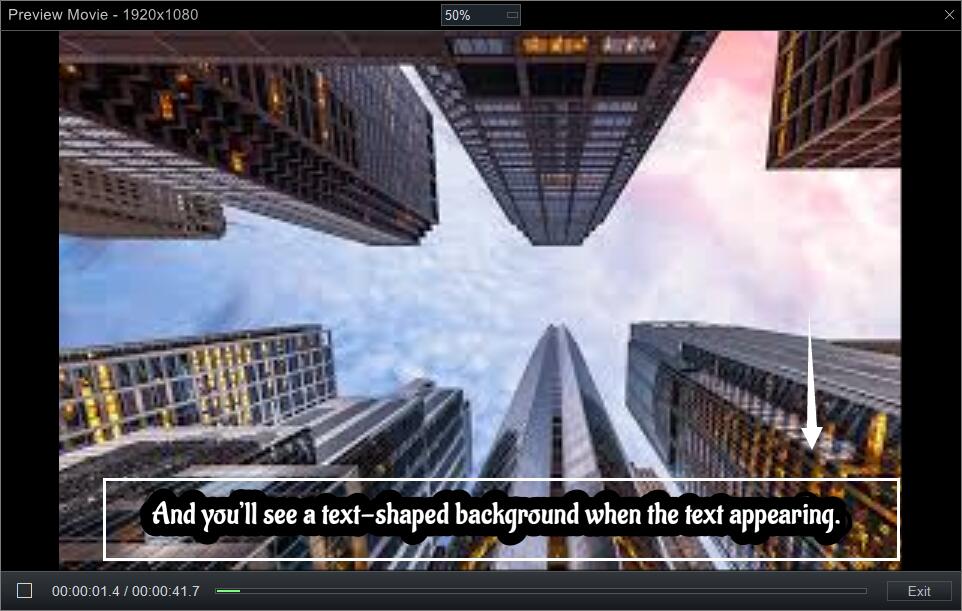
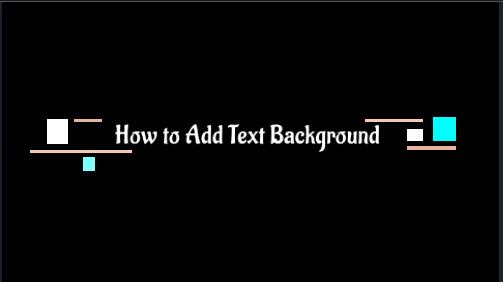
Choose a font style with an outline, so that you can set the outline with big size and set the outline color as you wish.
And you’ll see a text-shaped background when the text appearing.
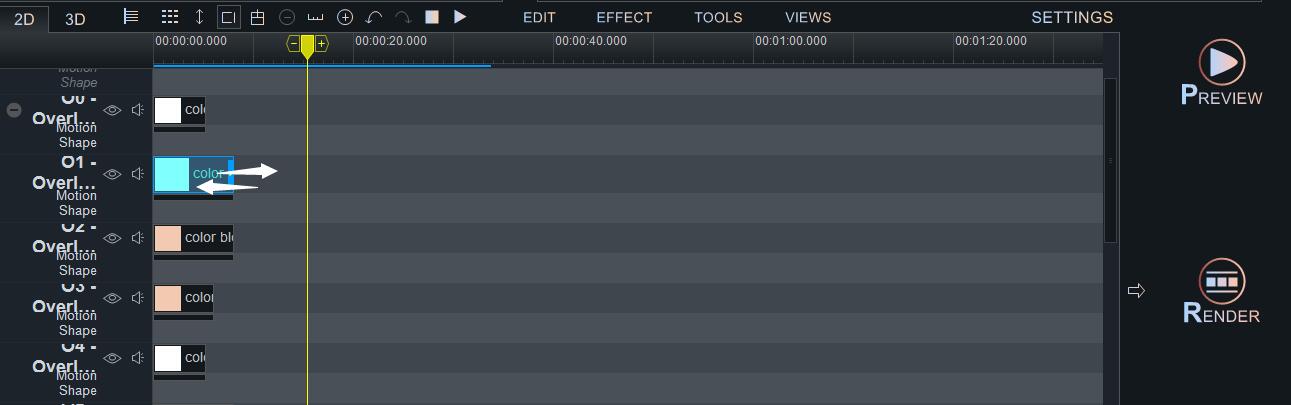
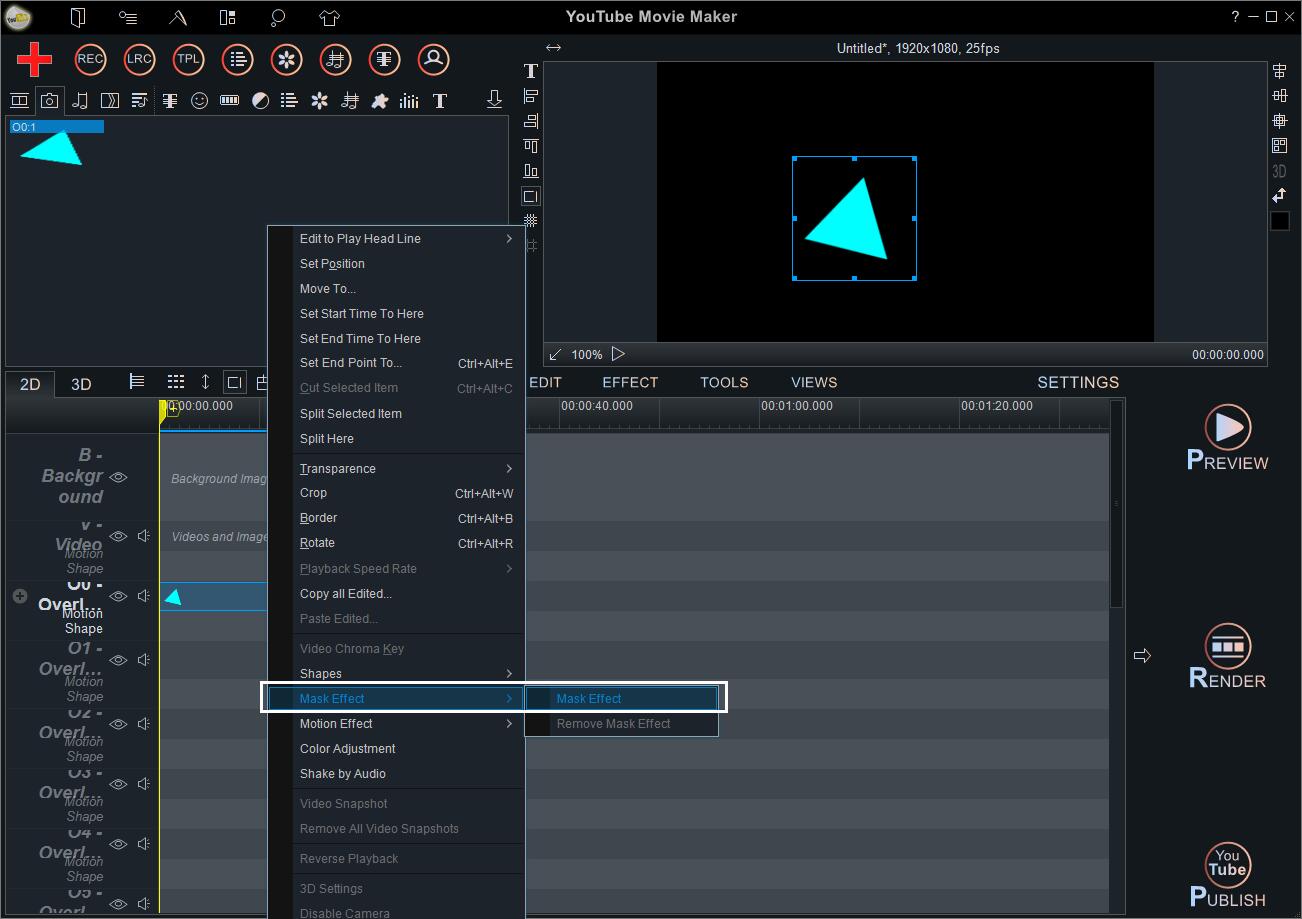
Right-click one of the overlay lines to insert a color block.

And you’ll see it on the screen like this.
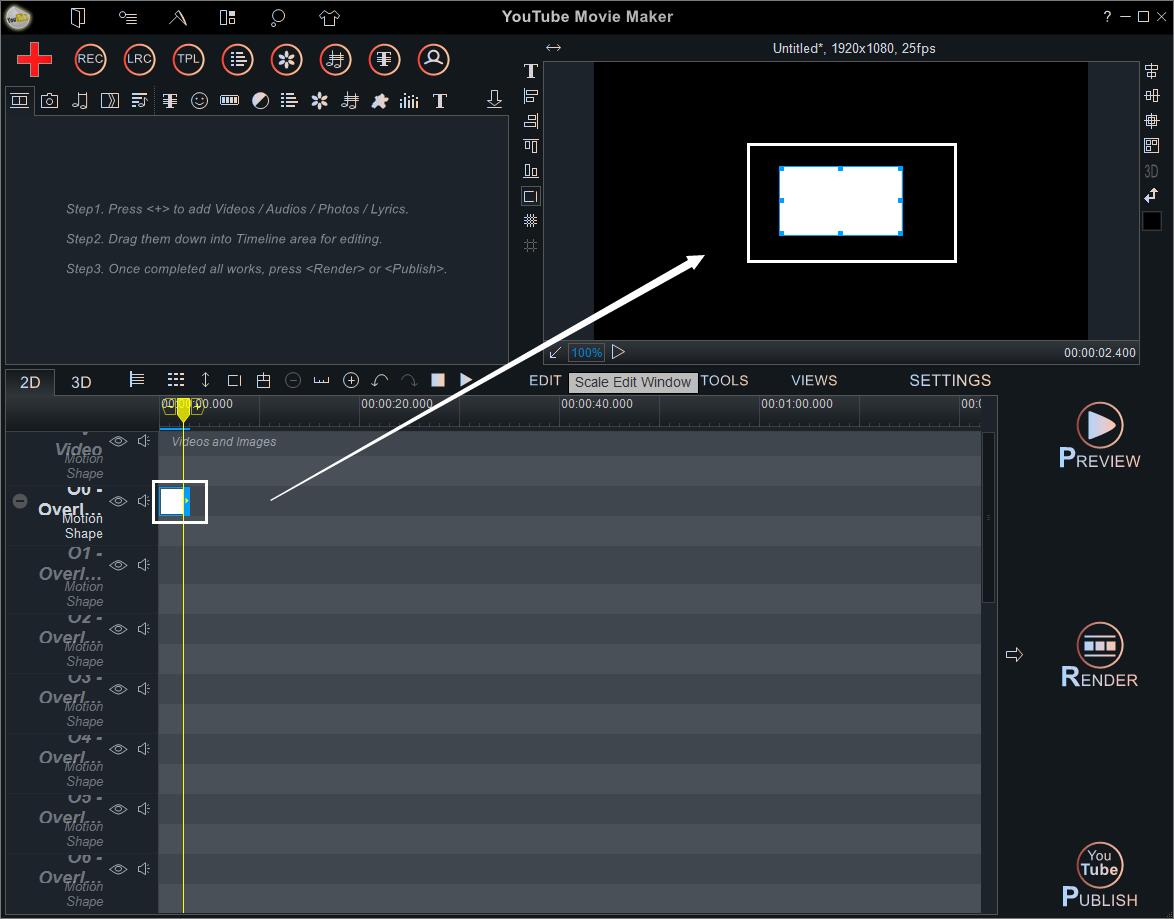
Then you can zoom in or zoom out it by draging the top corner arrows.
Grab the color block on the screen and move to replace it.
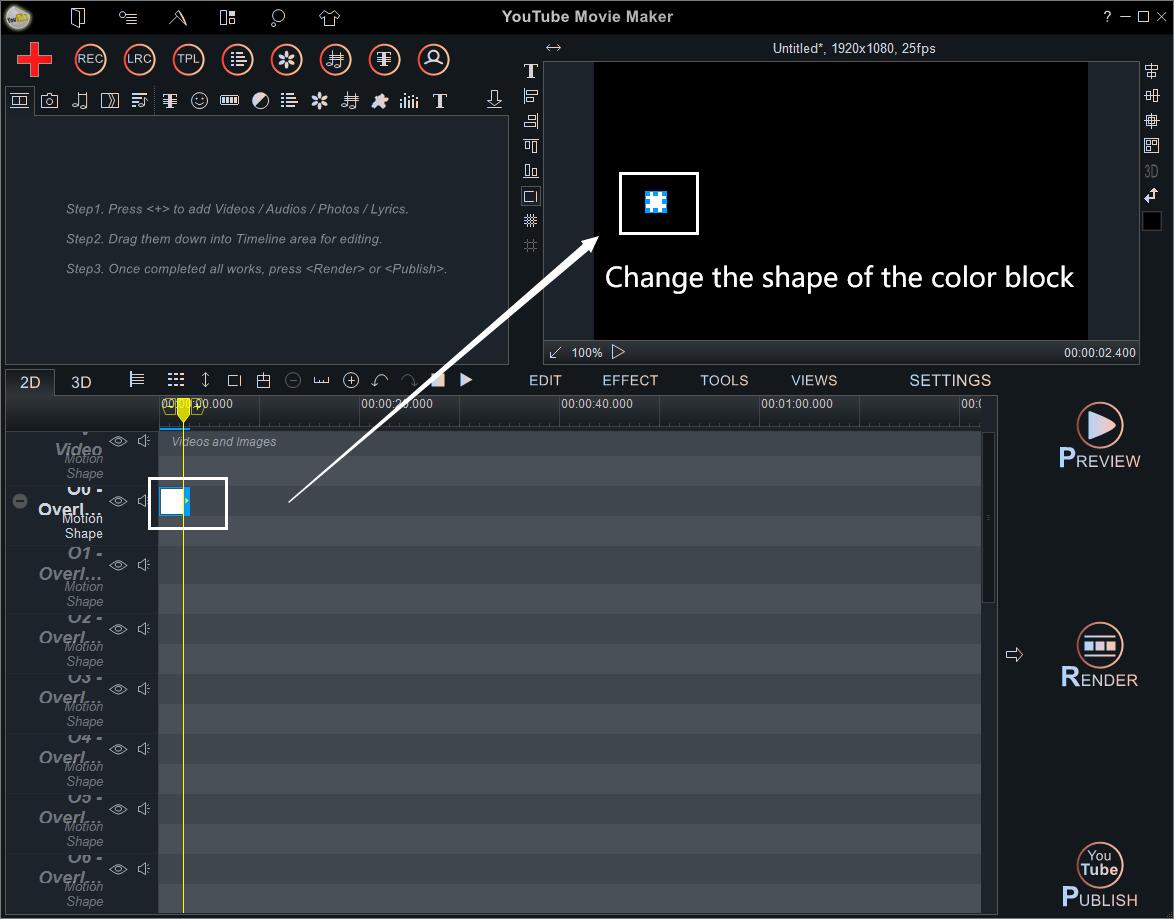
Here, you can choose to make a simple text background or a creative text box as novel text background.
If you prefer the former option, you just need to change the shape of the color block into a rectangle, like this:

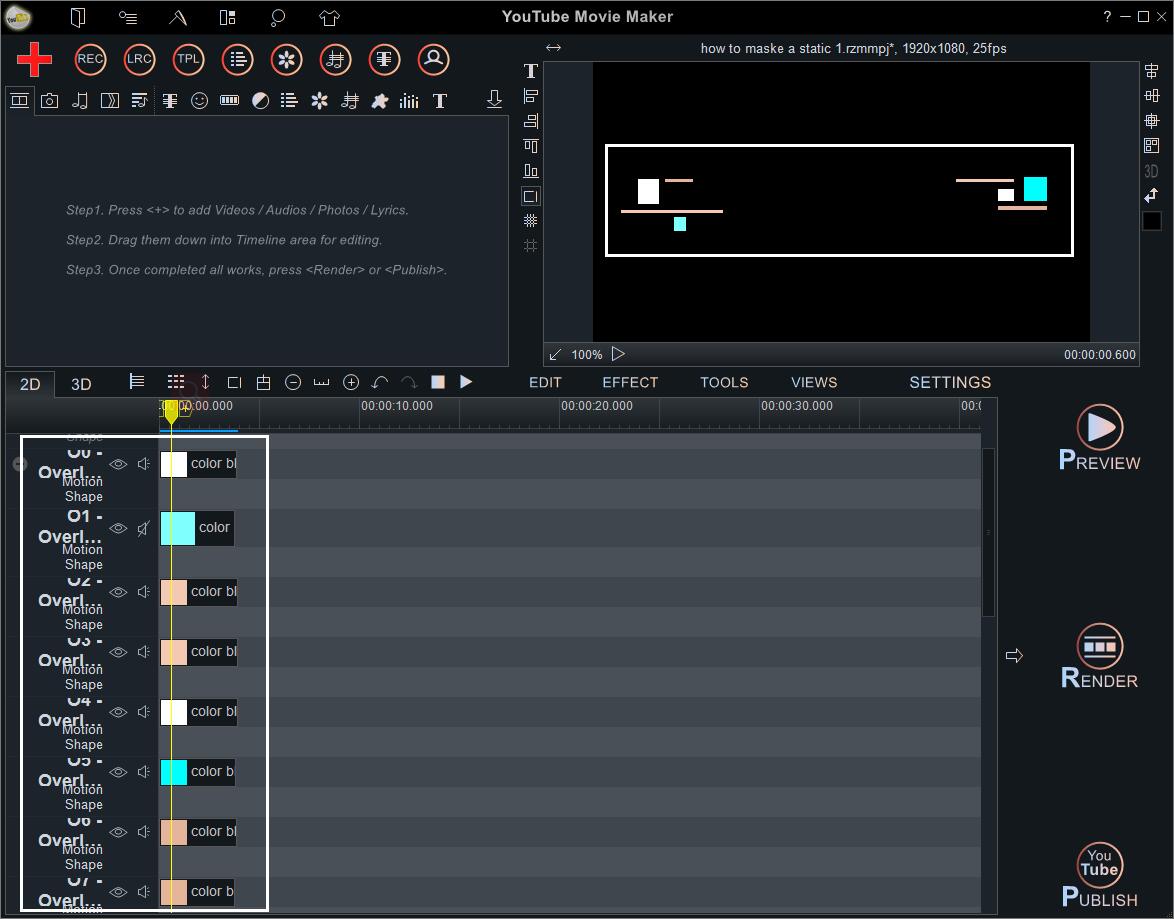
If you prefer the latter option, you need to repeat the following steps to add more different color blocks and place them together.
Add your text to the Text Line like Brand Name, Video Title or something else.
This is the simple way to make your text standing-out, and you can also use *.png images to make a fantastic one like the below one.
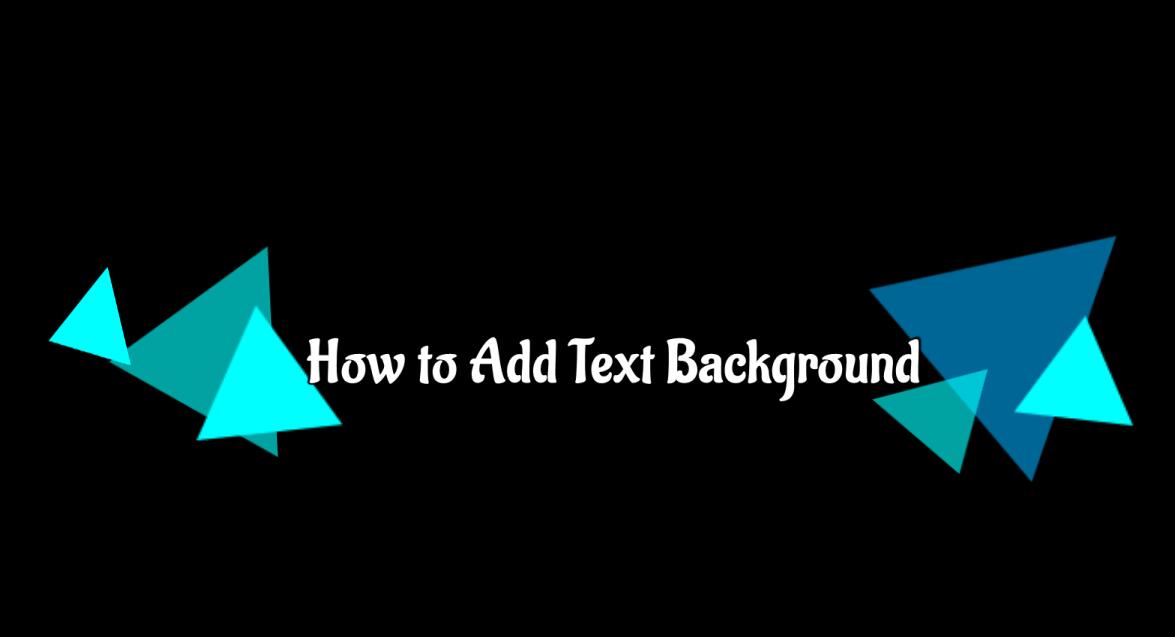
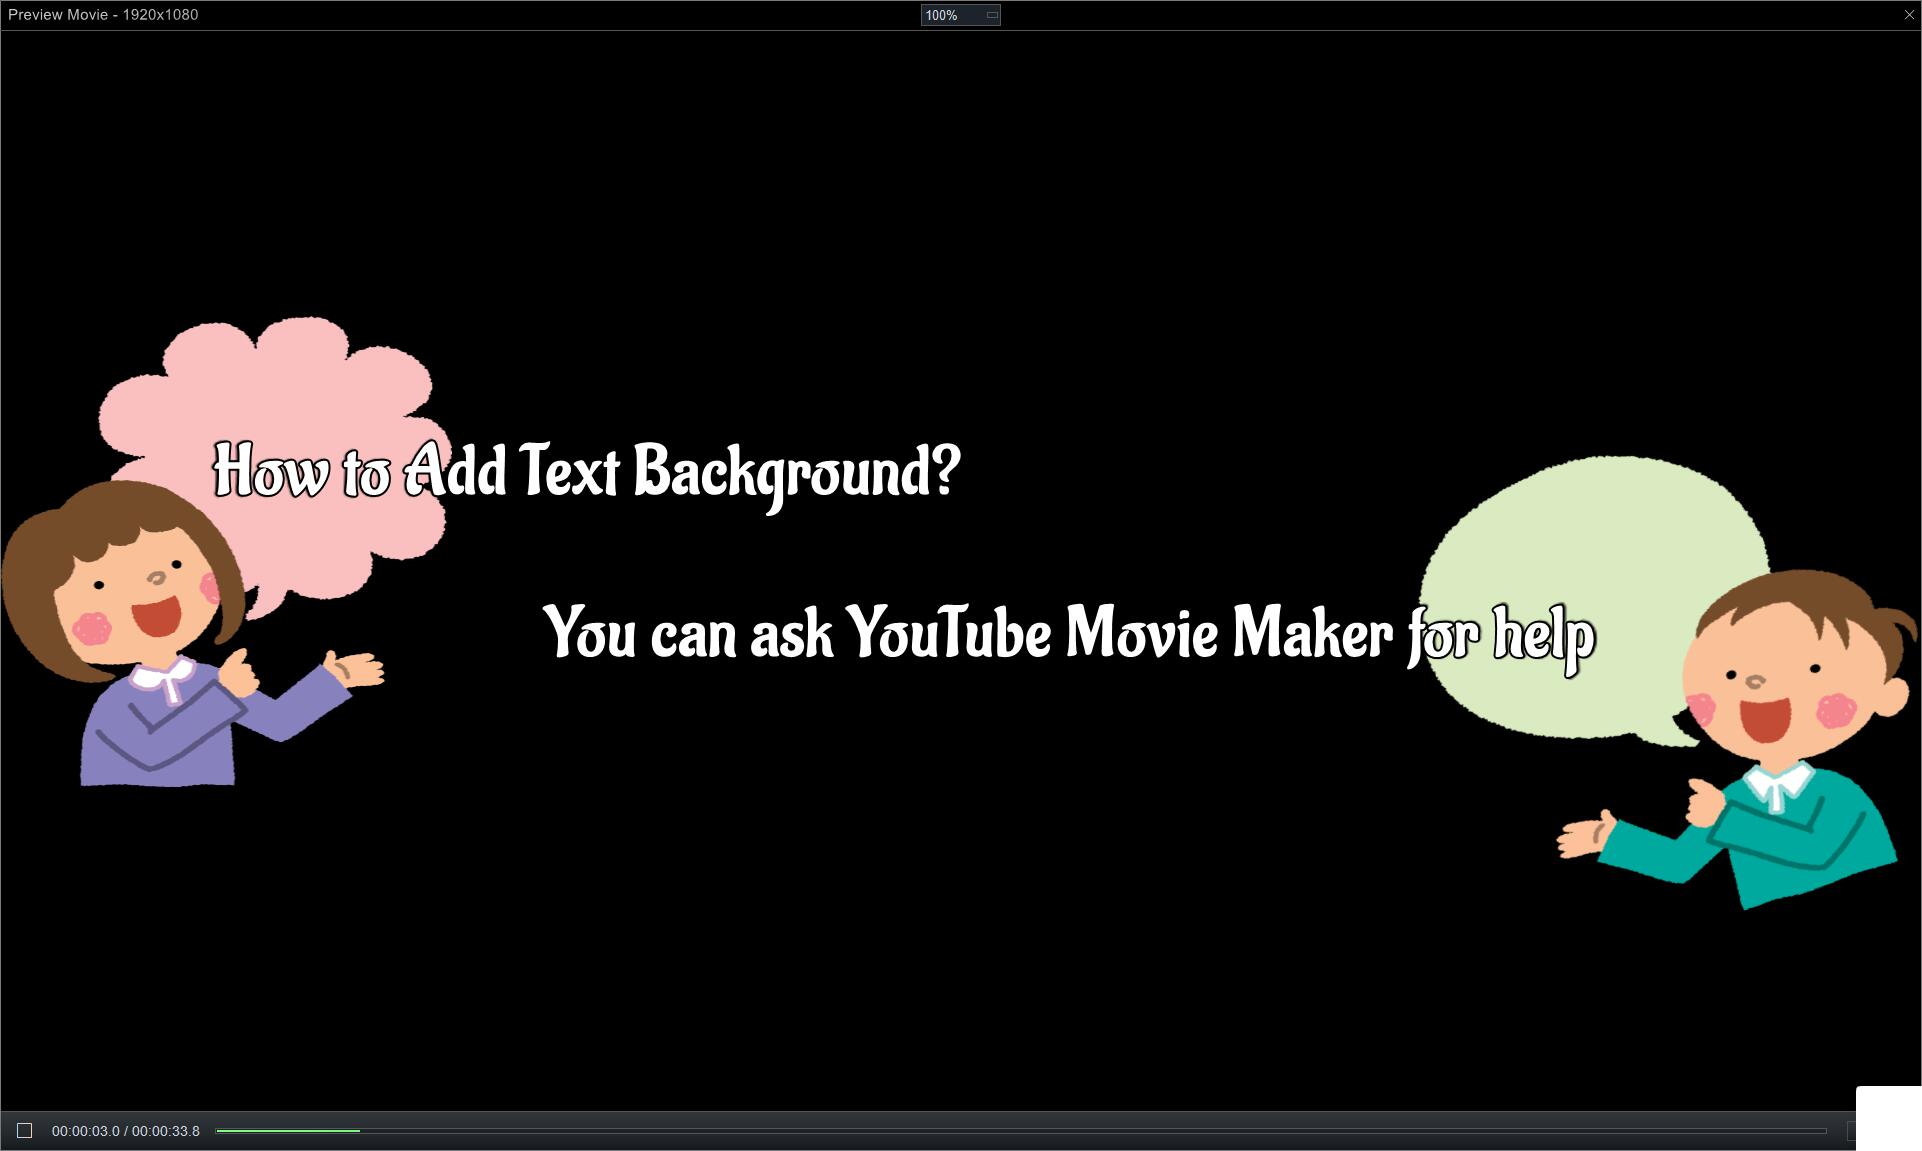
You can also use it to make creative frames, for instance, the dialogue scenes in videos.
There is a way to make simple motion graphics within a few clicks based on the former steps.
Since we’ve added all color blocks or *.png images into Overlay Line, we can set the motion effect to each of them.

There are many ways of appearing and disappearing for each image/color block on Overlay Line.
And you can also decide the duration of the appearing and disappearing.
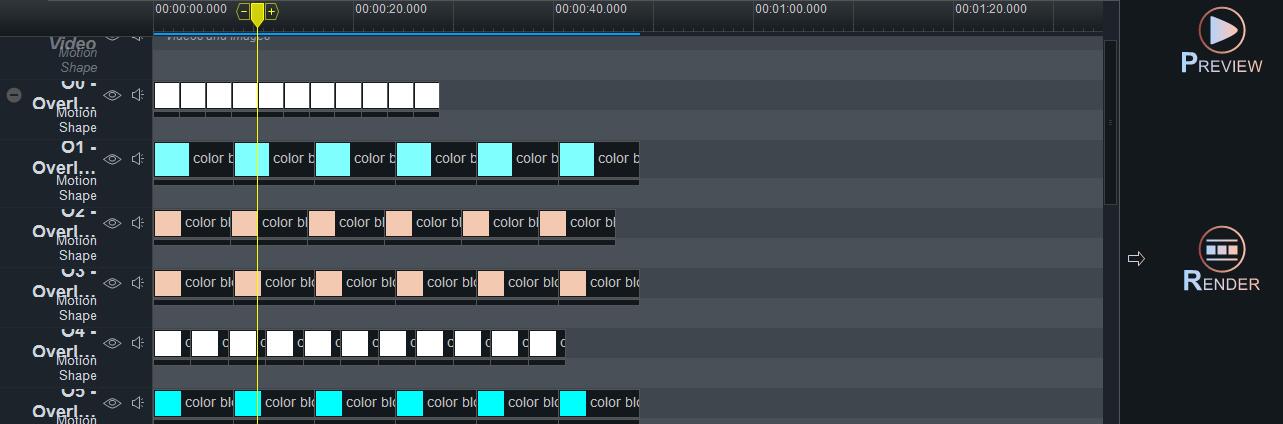
After you set motion effect to all items, you can go to the next step. Lengthen or shorten the color block on the Overlay Line to change the whole duration from showing up to disappear.
Right-click to append clone operations.
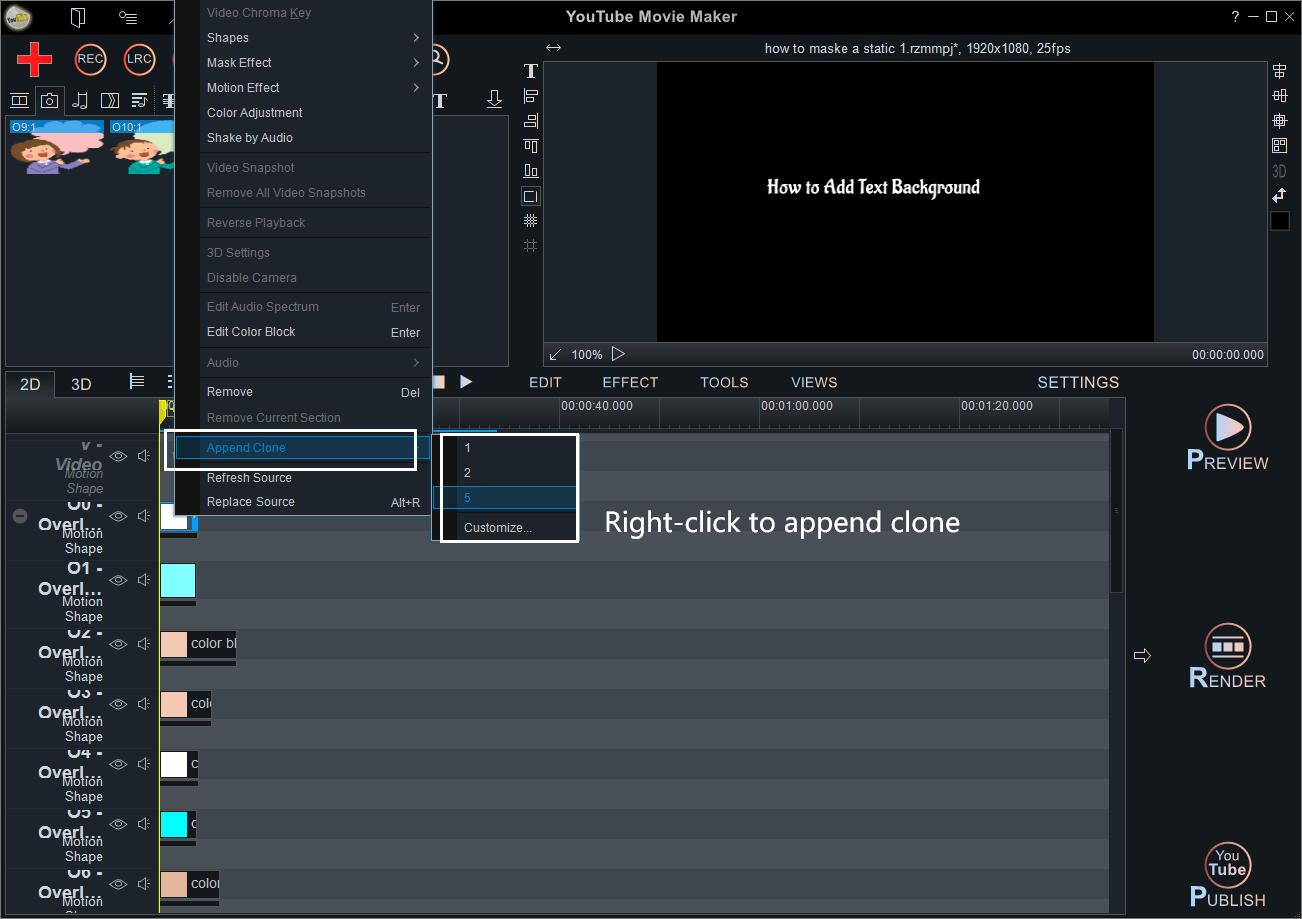
You can customize how many you want to append.
Finally, click “Preview” to see the result.
We also make other video demos for you
A basic one that is made of different color blocks.
A more creative one is made of Png images.
This one can be used to add a Title or Brand Name.
This is much proper for hints or info.
At the very beginning, let’s watch a demo made for the tutorial How to Make A Split Screen Video. In this demo, we can see the blue triangle moving in a path that we prefined before.
So how can we make it?
We add a color block or an image into the Overlay Line
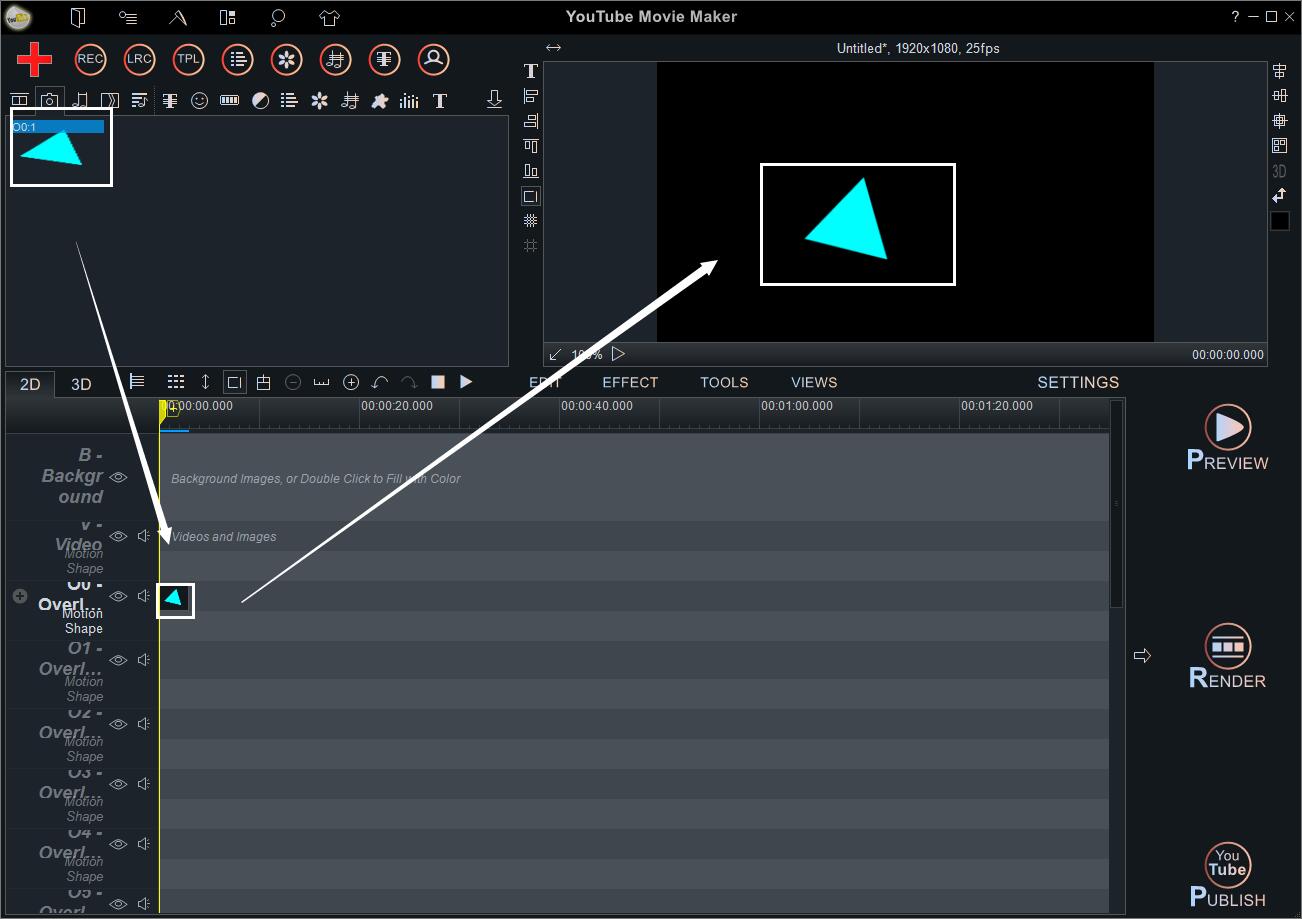
Then lengthen its duration.

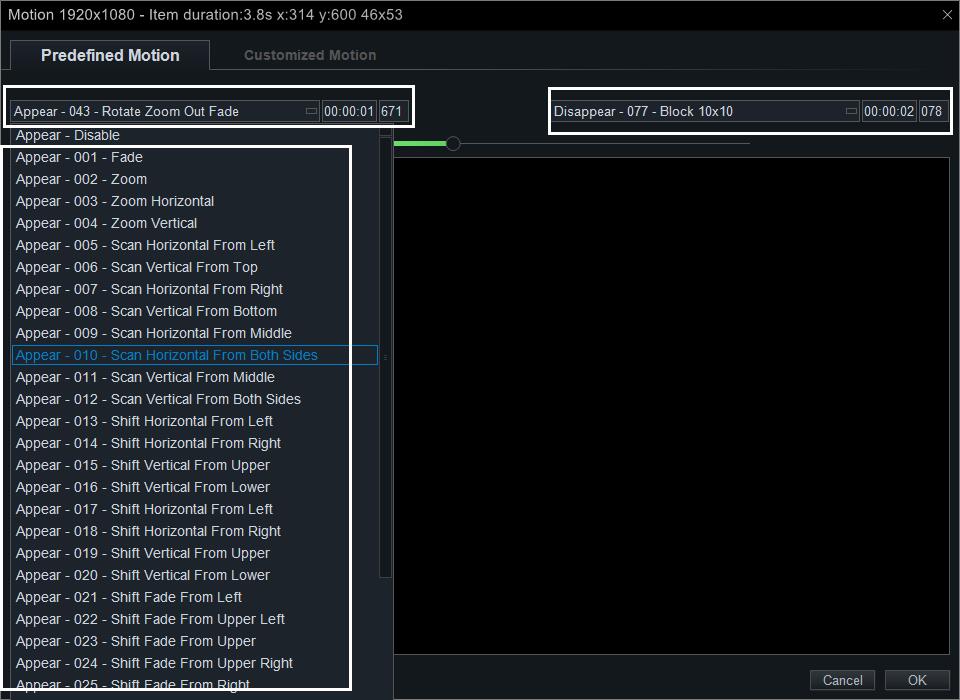
Right-click the image to add “Motion Effect”.
Click the “Customized Motion” button.
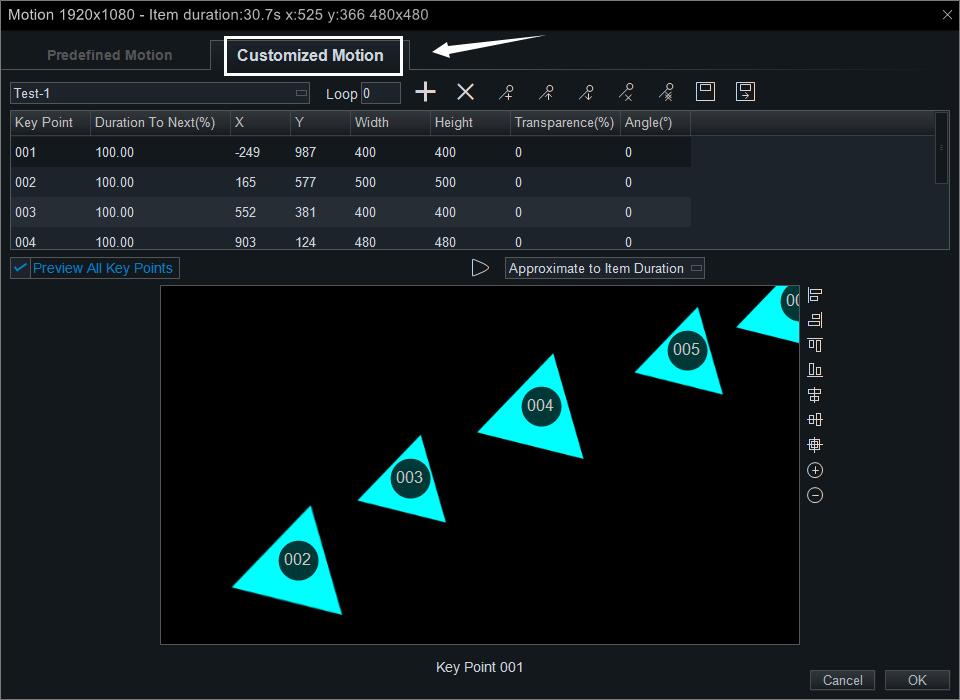
You can choose one of the templates to change it or directly create a new one.
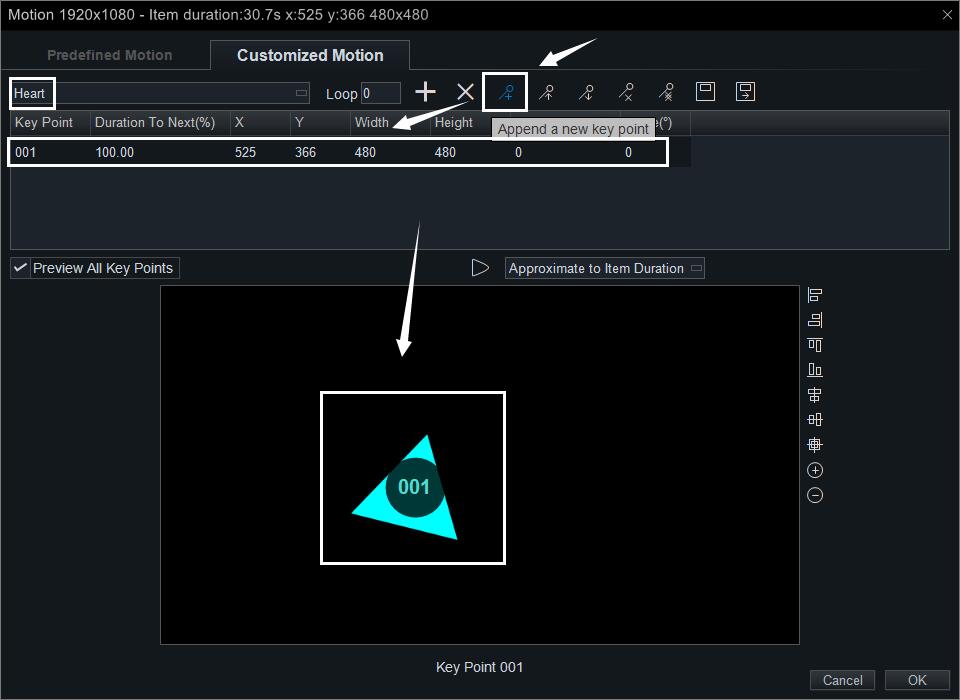
Let’s create a new one here. Click the “+” to name the new motion.

Click the button next to the “X” to append the first key point of the motion.
and then the second, the third…until all key points are connected to form a complete path.
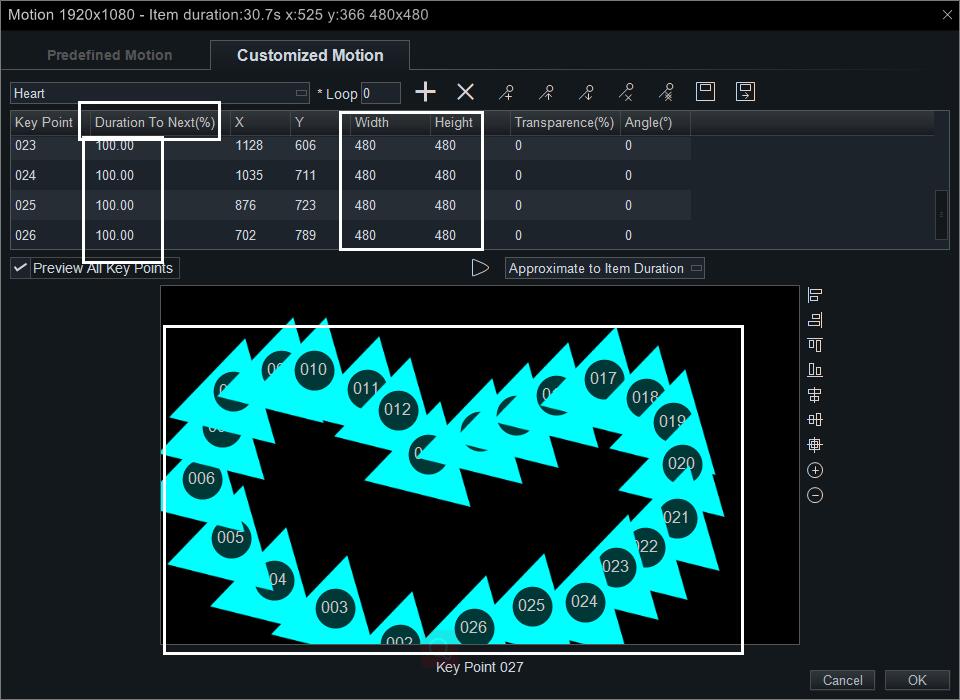
Pay attention that the parameter of the “Duration to Next” must be 100. The “Width” and “Height” are used to define the size of the image. The “X” and “Y” are used to define the position of each key point. Since we can directly drag the image on the screen to set a proper position, we don’t have to care about the value of “X” and “Y” here.
In my new motion, we prefined the path as a heart shape, so the image may move like drawing a heart on the display screen. After you set the path, you can click a triangle button “Preview the Motion”. If there is a mistake, you could fix it at once.
If you want to see a heart was drawing on the screen, you can add more overly lines and apply the “Heart” motion template to them, Finally, arrange them like this.
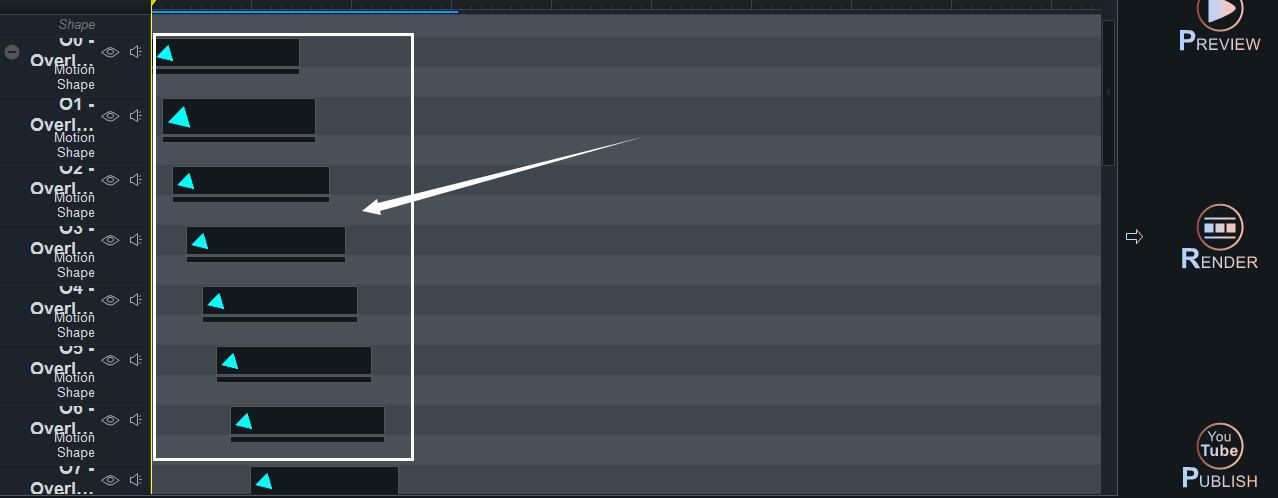
Let’s see the final result.
If you’ve got the technique to make simple motion graphics, you can try it now or get more powerful tips to make sting videos.


