A few weeks ago, we updated several articles about understanding the usages of the buttons in the Particle Effect Maker UI and the detailed settings of the particles’ parameters.
However, a large number of users are still confused about how to make a particle effect themselves.
So this time, let’s practice the theory in operation.
We’ll take snowing effect as an example, and show you every step of the whole produce progress.
Two ways for you to make a snowing particle effect. The first one is kind of convenient and easy, which you needn’t spend much time to amend the parameters. While the second choice is more challenged, once you make it yourself, you’ll full of sense of satisfaction and achievement.
Go straight to the point.
The shortcut of making a snowing particle effect is to change the TEXTURE, with the image download, of the existed examples. This could help to avoid annoying parameter adjustment.
Run your “YouTubeMovieMaker”, and then click “Make Videos”.
Click the “![]() Create the Particle Effect” button in the main tool bar. Then, you see an operation UI like this. A default particle is emitting on the screen.
Create the Particle Effect” button in the main tool bar. Then, you see an operation UI like this. A default particle is emitting on the screen.
Click the “Examples” button and choose “Snow”. Pick one of these options.
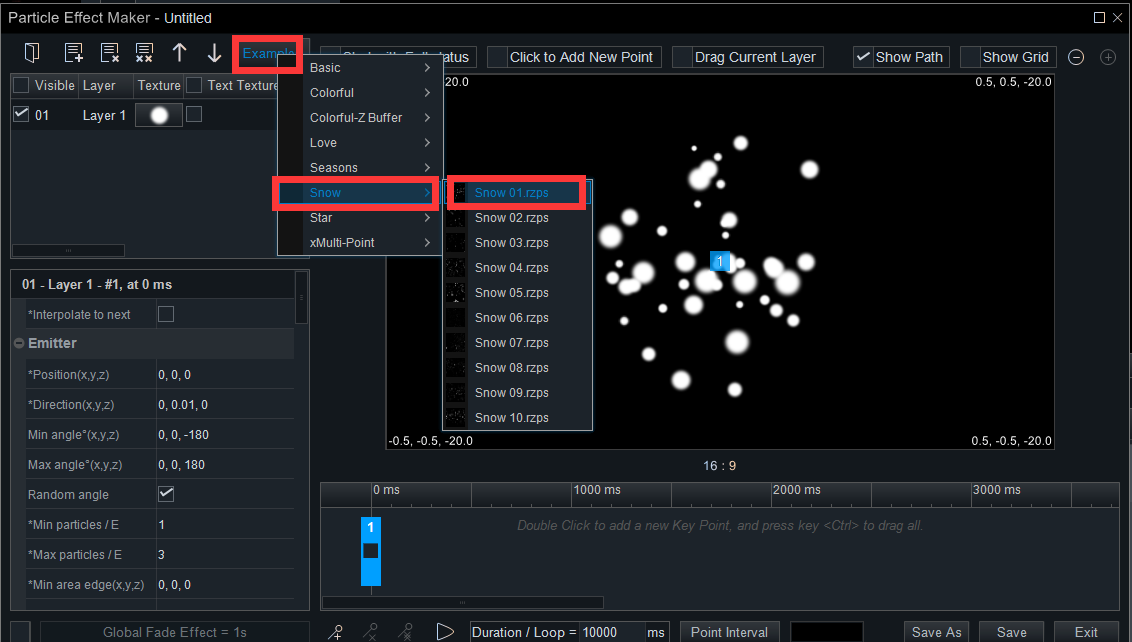
Next, we’ll see a beautiful scene that snowflakes flying downward on the display screen.
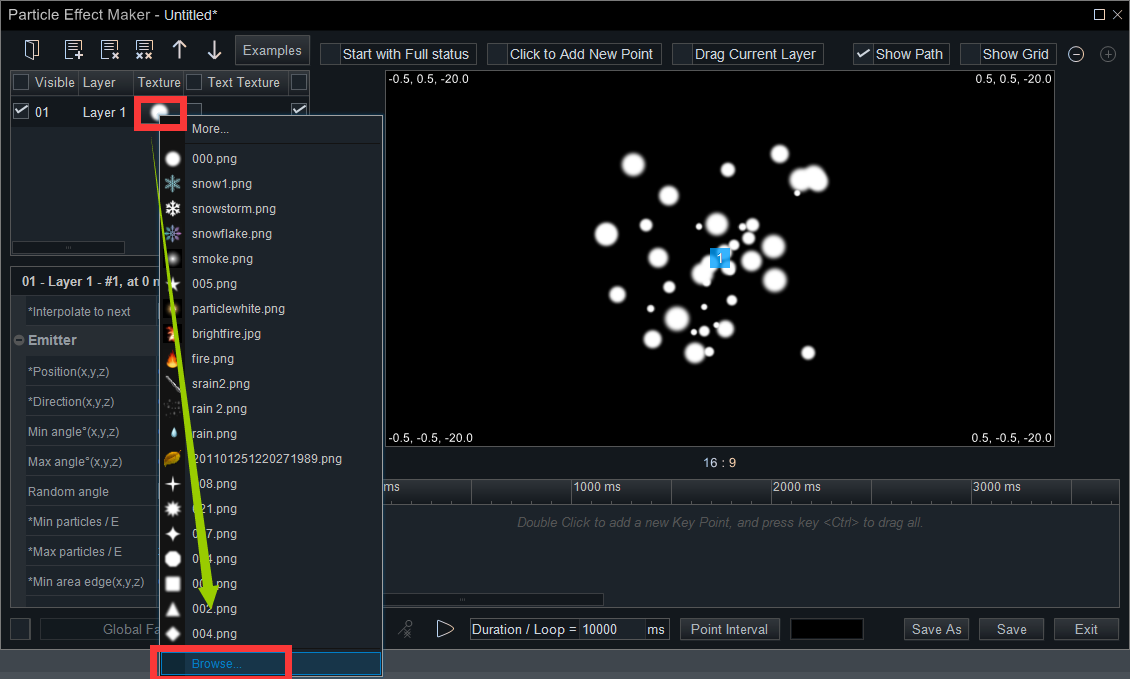
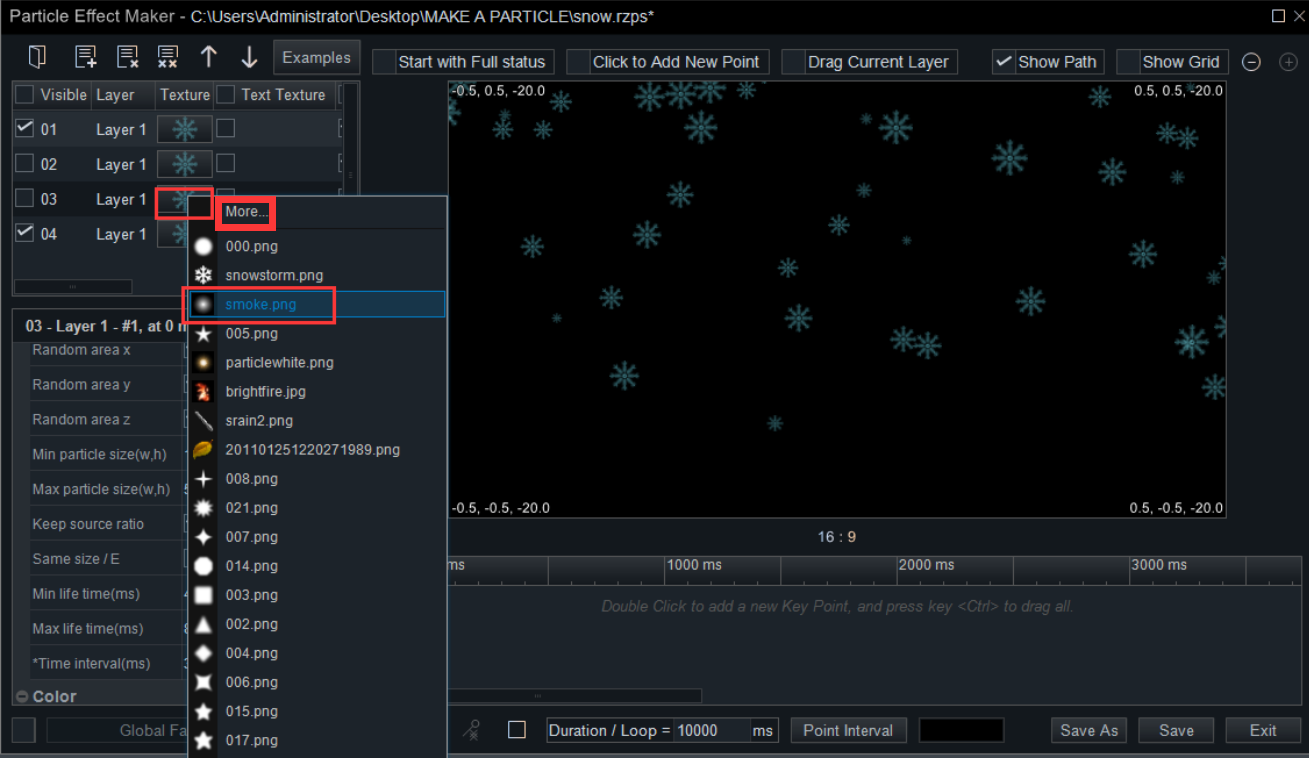
Then, click the particle item under the “Texture” row, and switch the original image to the image downloaded.
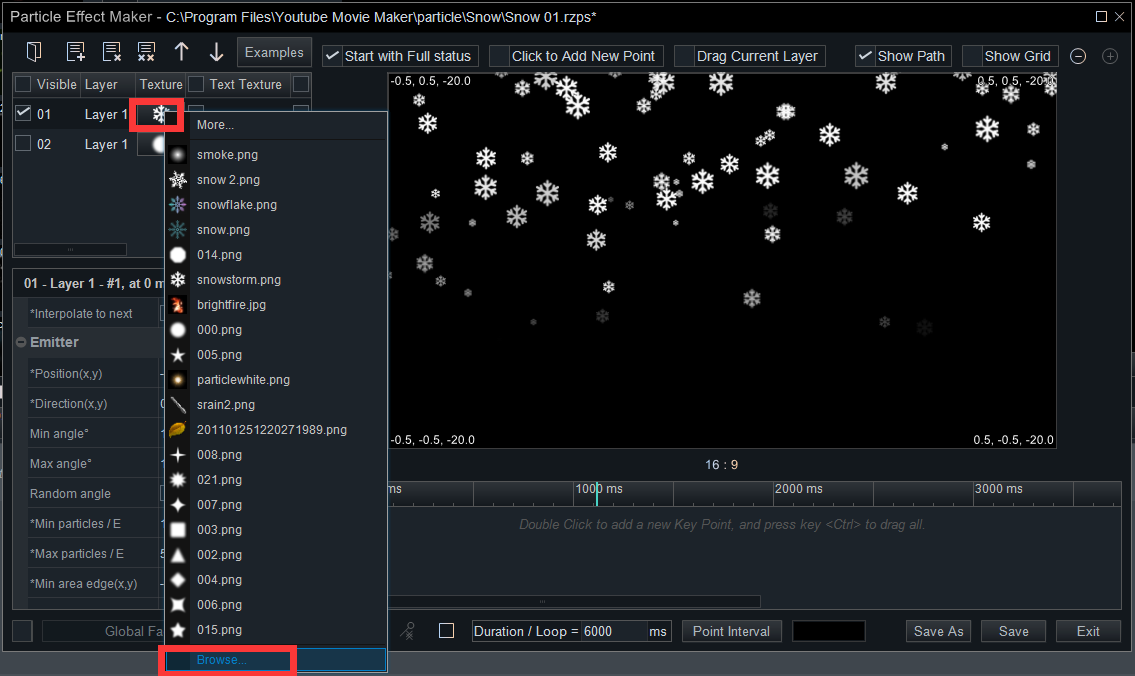
Or, you can click the particle item under the “Texture” row, and find many particle items by clicking the “More”.
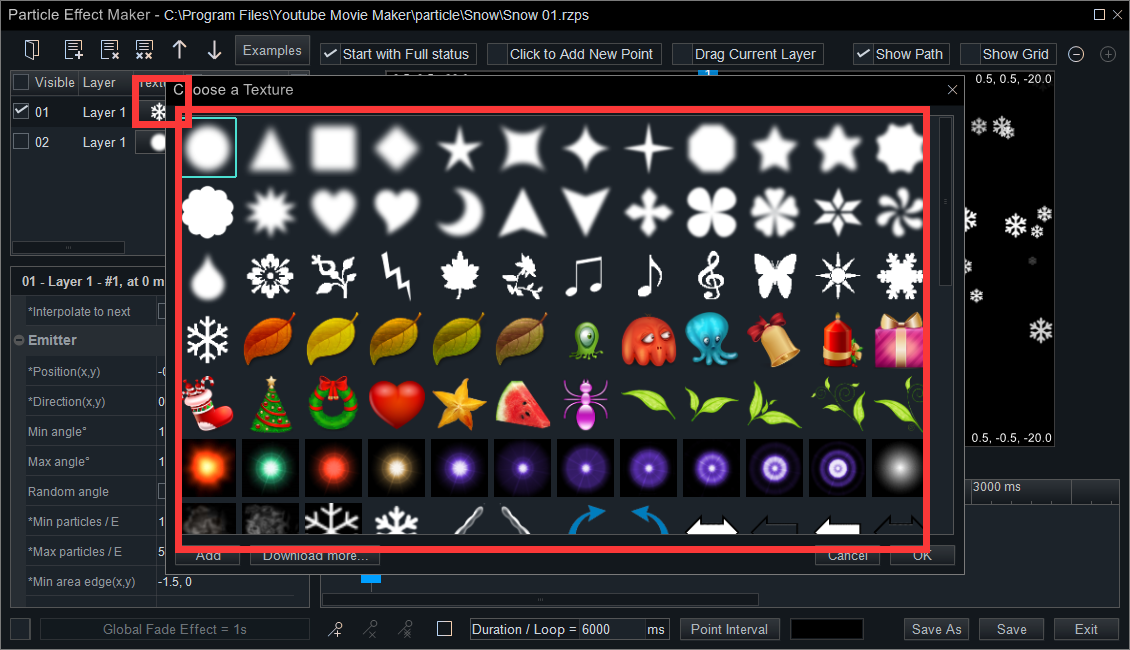
Choose one of them, and you’ll see an example of it as follows.

Save your changes as *.rzps files on your computer.
In the second method, you need to adjust the parameters. Though it is full of challenges, users need creativeness and spacial imagination. It is worthy of trying.
But before we start, we need to prepare a *.png image of a snowflake. We can download one from Google. No matter what kind of particle effect you want to create, you have to prepare a single *.png image of it.
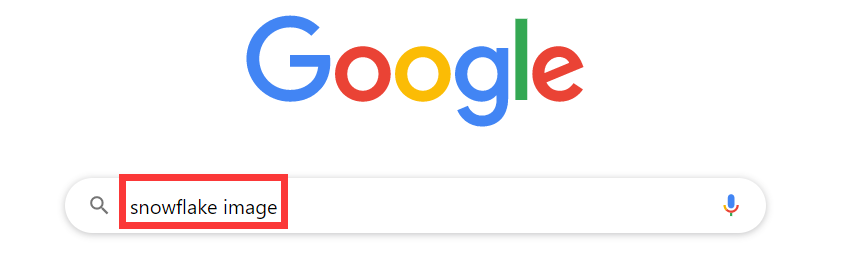

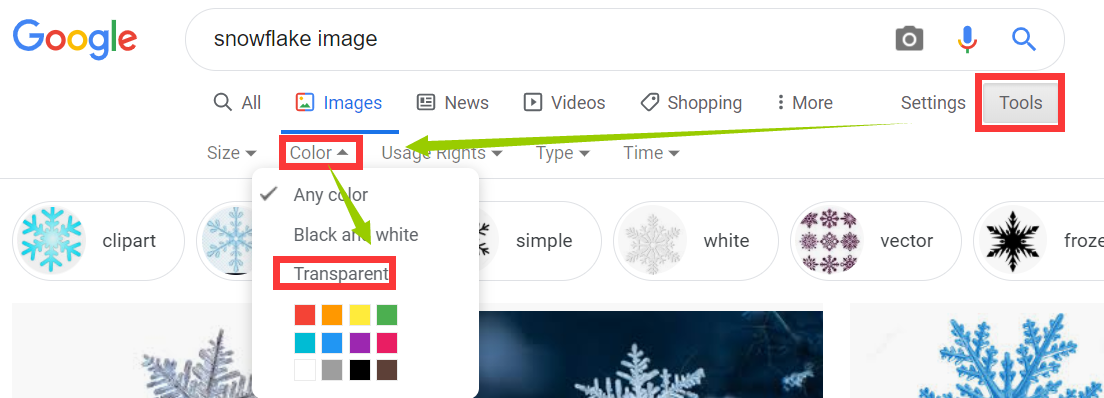
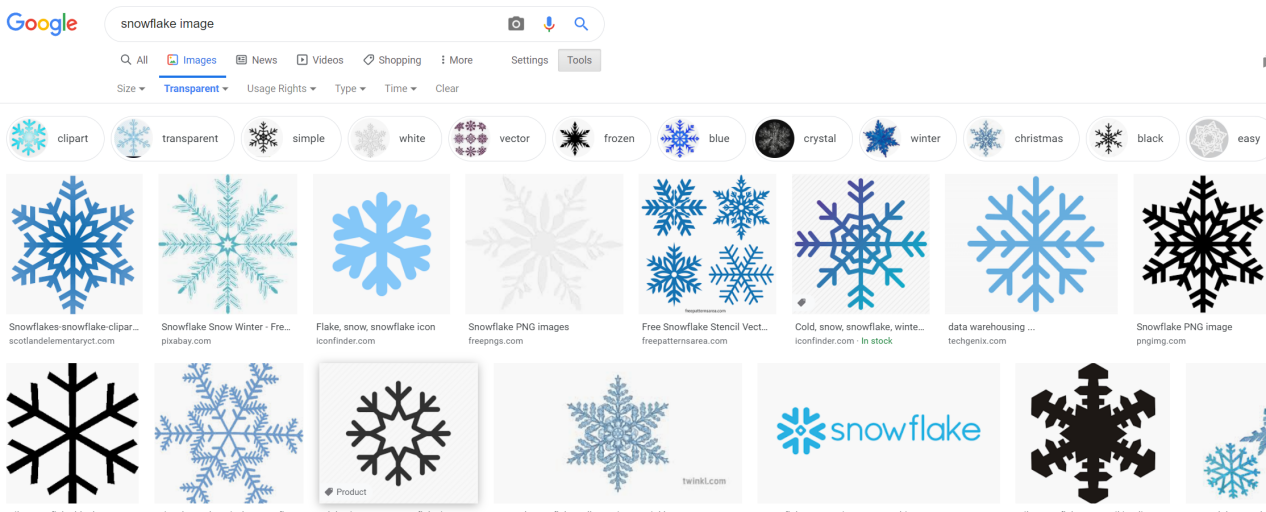
And then, you can download one of them as a particle item. But remember that the image format must be png and it’s better to be a single snowflake with a light color.
We broke this tutorial into 11 steps.
Step 1: Run your “YouTubeMovieMaker”, and then click “Make Videos”.
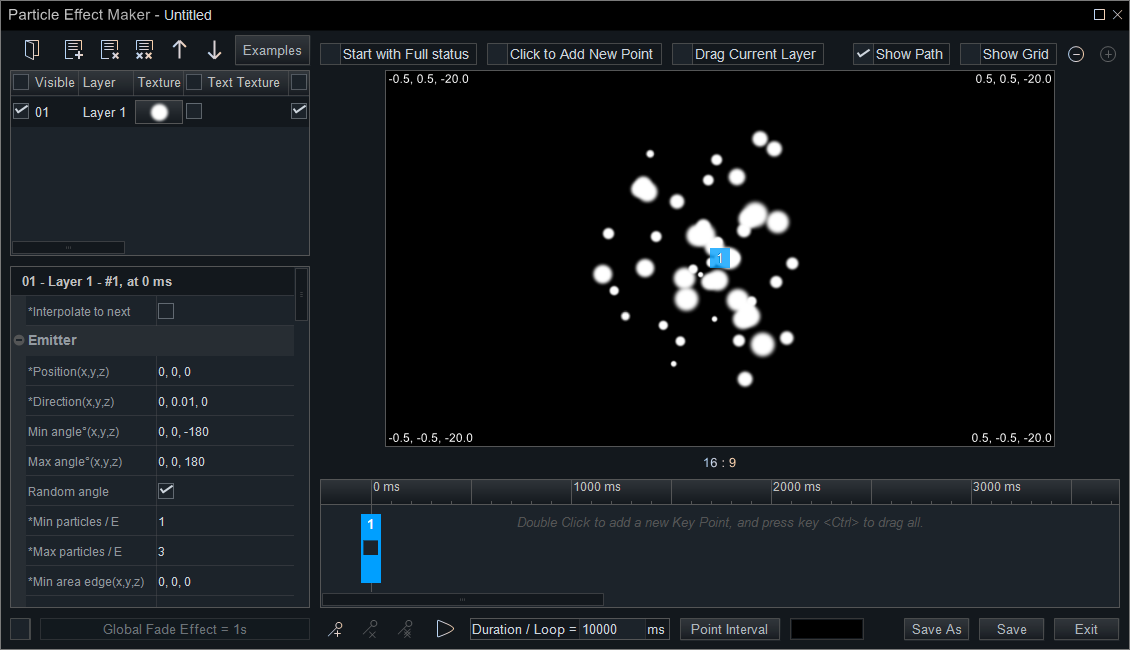
Step 2: Click the “![]() Create the Particle Effect” button in the main tool bar.
Create the Particle Effect” button in the main tool bar.
Then, you see an operation UI like this. A default particle is emitting on the screen. And its parameter allocation is settled. So we just need to make a few changes to it later.
There are many operational buttons on it. If you want to figure out what they are for, you can check the article (What Are the Features in the Particle Functional Box for ? ) to get a clear explanation.
Step 3: Click the image under the “Texture” row, and find “Browse” in the function menu. Next, we’ll load the image of a snowflake we saved from Google.
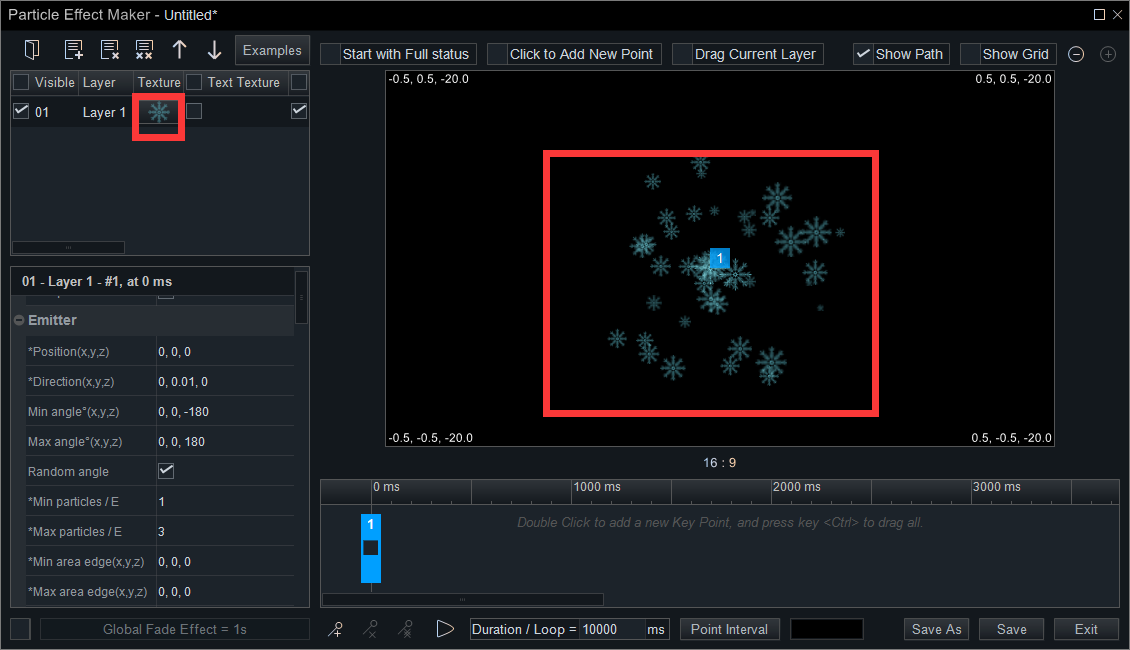
Then, we can see the particles emitted are the snowflake we download before.
In the following steps, we need to create a real-like snowing effect by changing some detailed parameters of each layer.
As to questions like what the parameters mean can do, we’ve explained completely in the article.
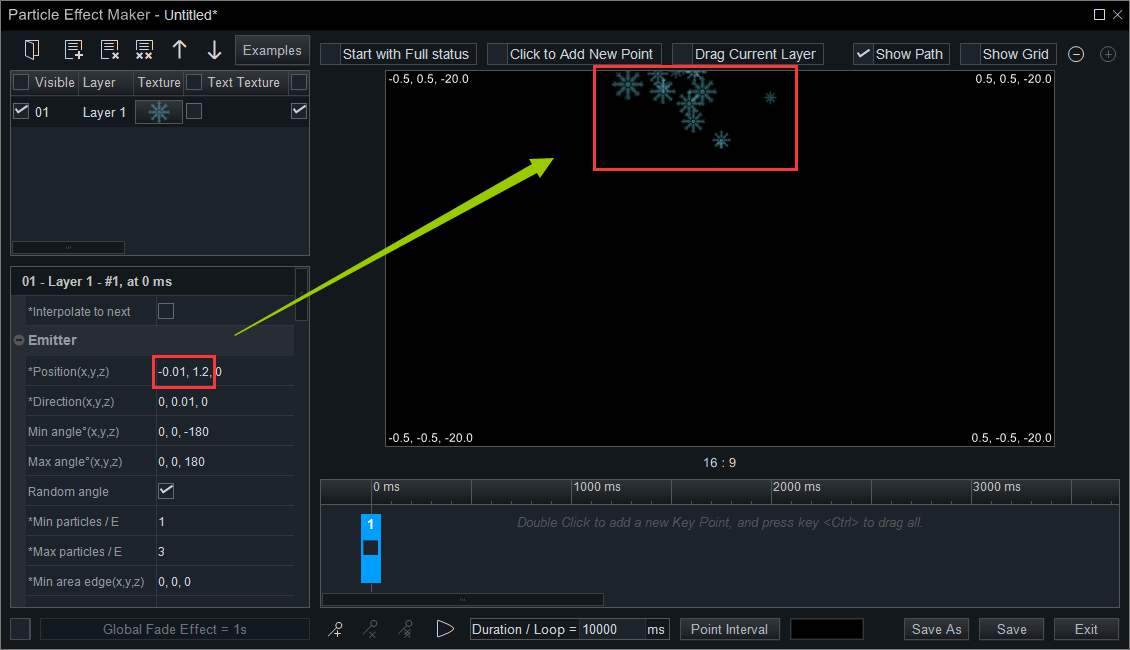
Step 4: After that, we set the value of the position of the X-axis and the Y-axis as -0.01 and 1.2 separately.
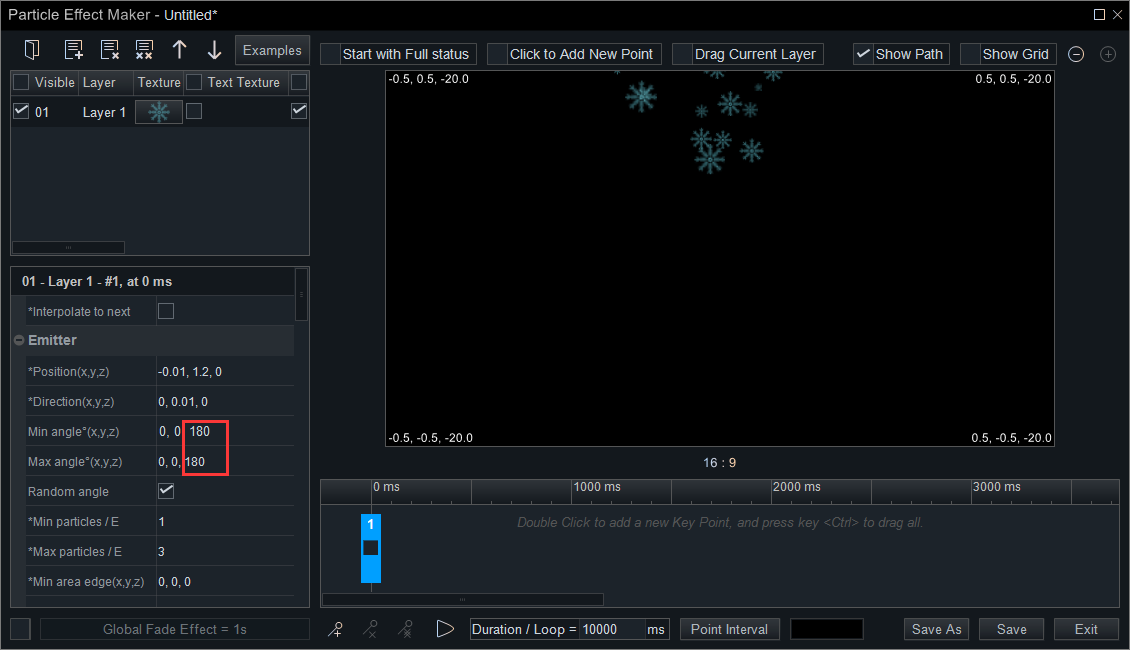
Step 5: Next, we keep the value of the direction of the Y-axis as 0.01, and set the value of the min angle and the max angle on the Z-axis as 180.
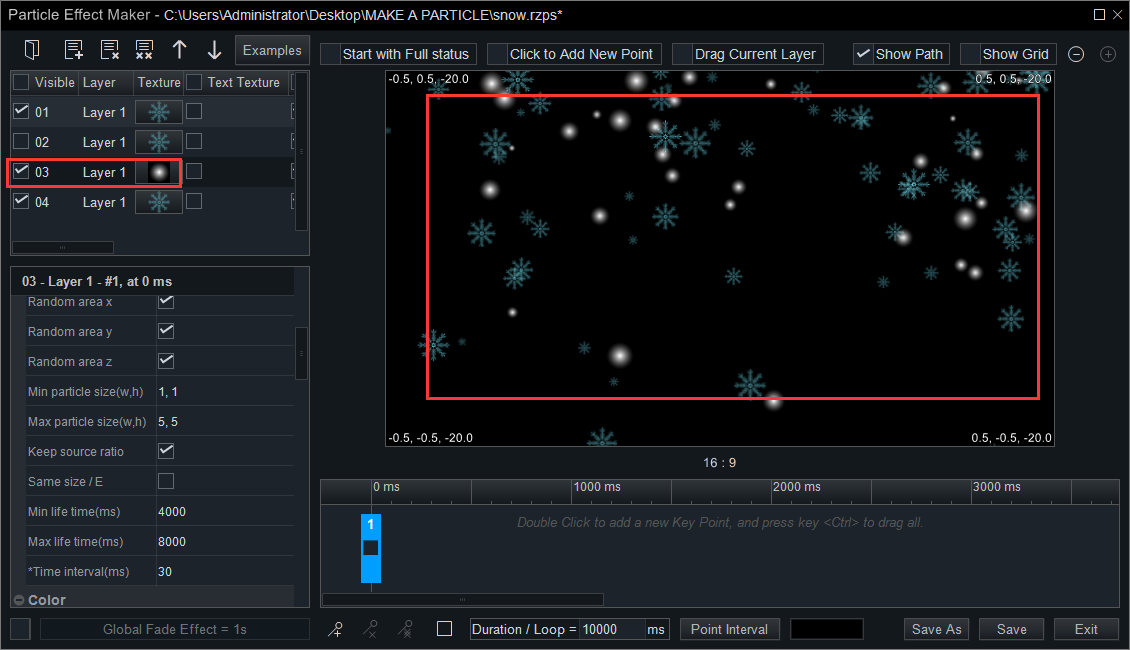
Step 6: Then, we set the value of the min area edge and the max area edge on the X-axis as -2 and 2 separately. We’ll see the particles are falling from the top along the X-axis.
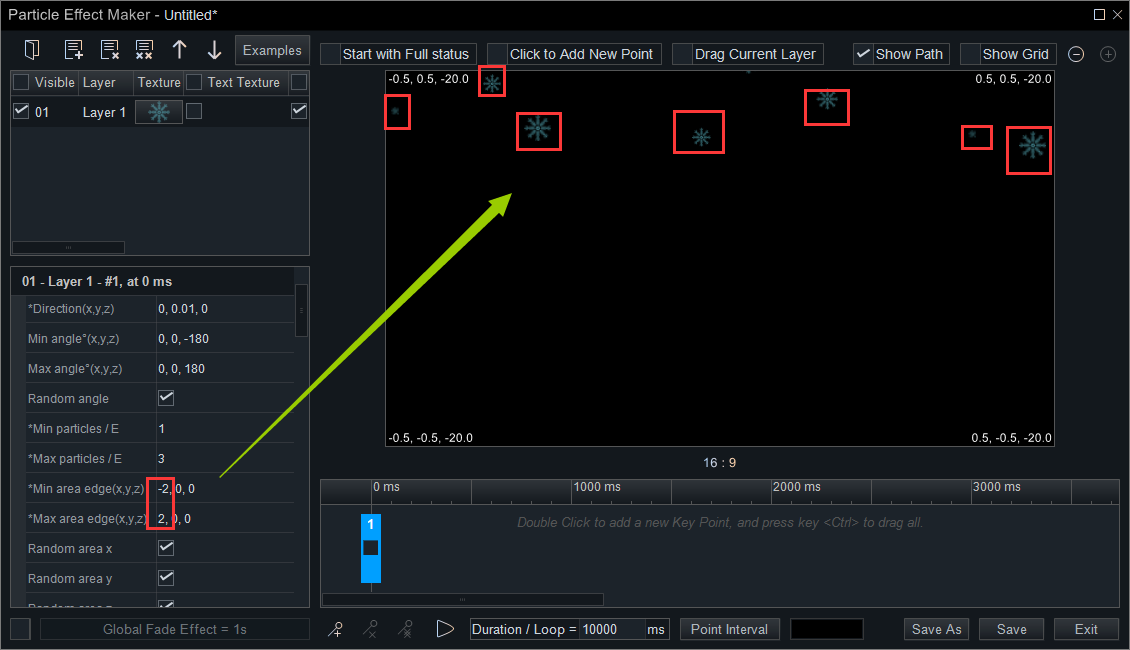
You can also change the value of the “Min particles/E” and the “Max particles/E” to find a proper particle number that emitted per unit.
Since the duration of the particles is too short, they will quickly disappear not even reach the bottom. So we have to prolong the particles’ life time.
Step 7: We change the value of the “Min lifetime” and the “Max lifetime” as 4000 and 8000 separately.
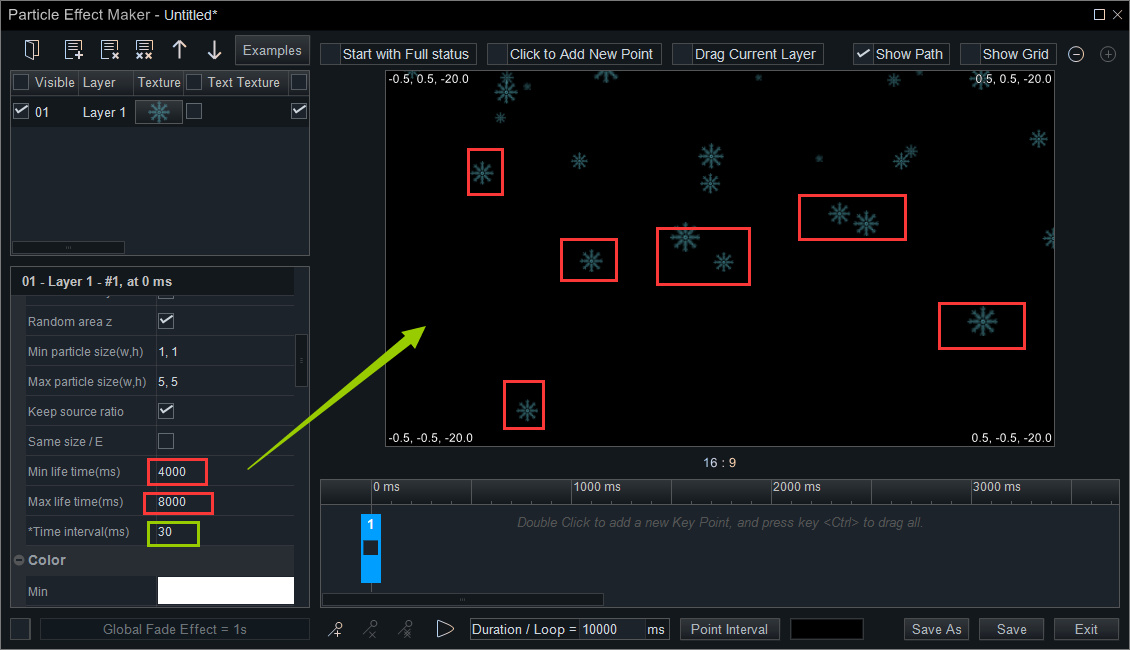
You can also change the value of “Time Interval” to increase the density of snowflakes. If you want a heavy snow effect, you can reset the value of “Time Interval” or add more copied layers of this one.
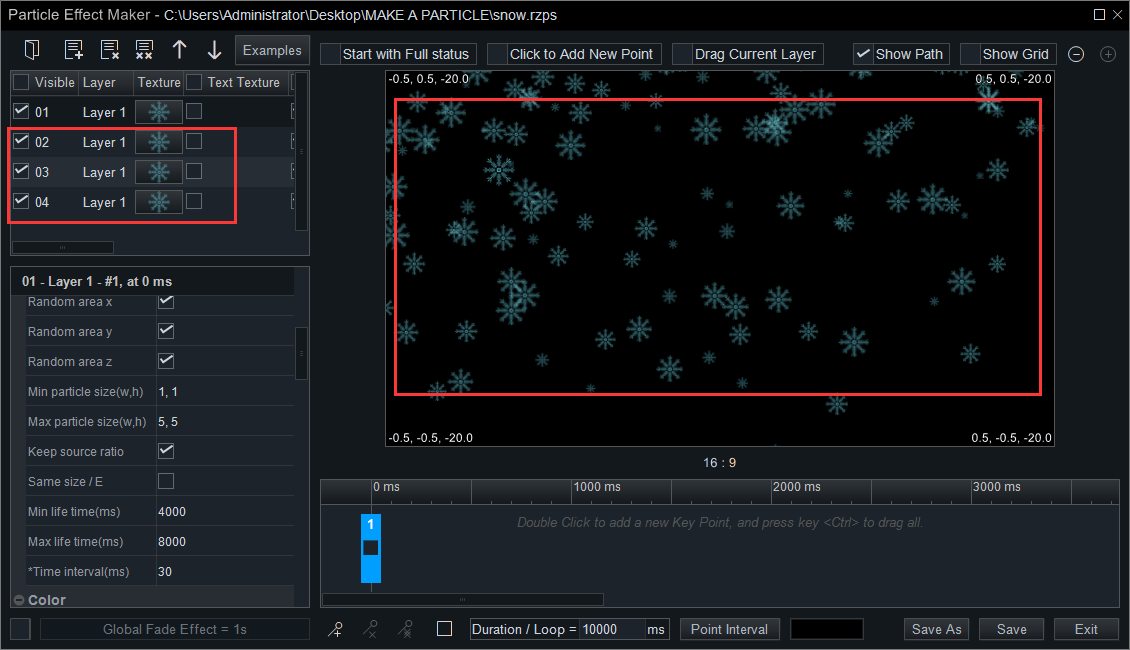
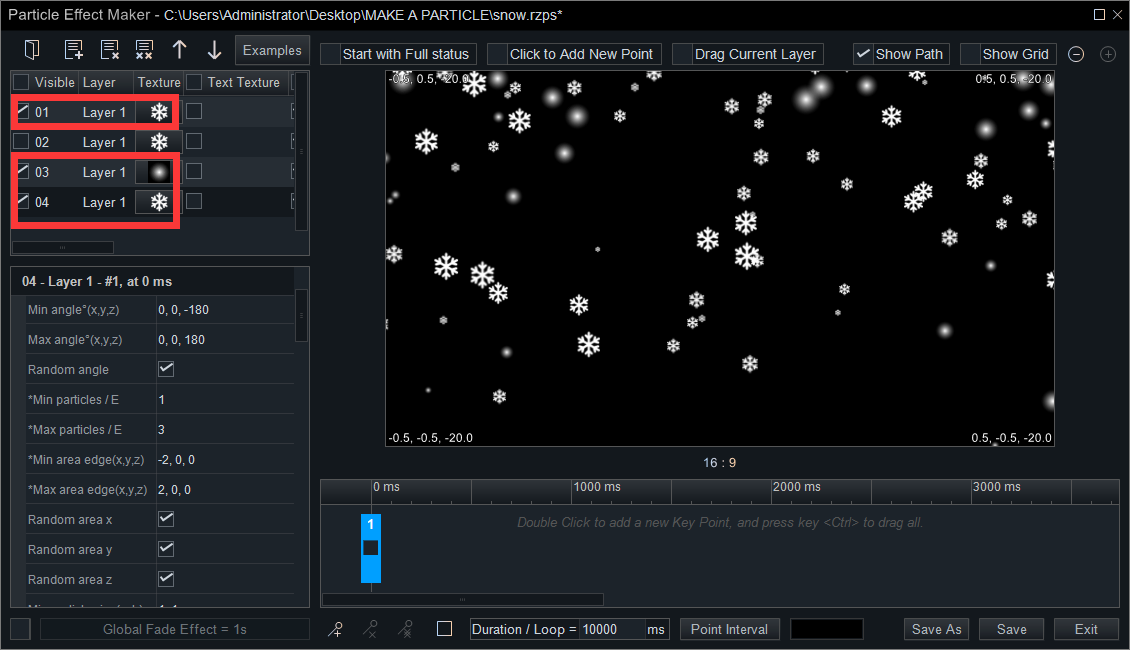
Step 8: Click “Append a new layer” and we can see a choice named “Copy a layer of”. We can copy any existed layer to overlay its effect. As we only have one layer here, so we copy several layers of “layer 1”.

And then, we can clearly find that the number of particles increased.
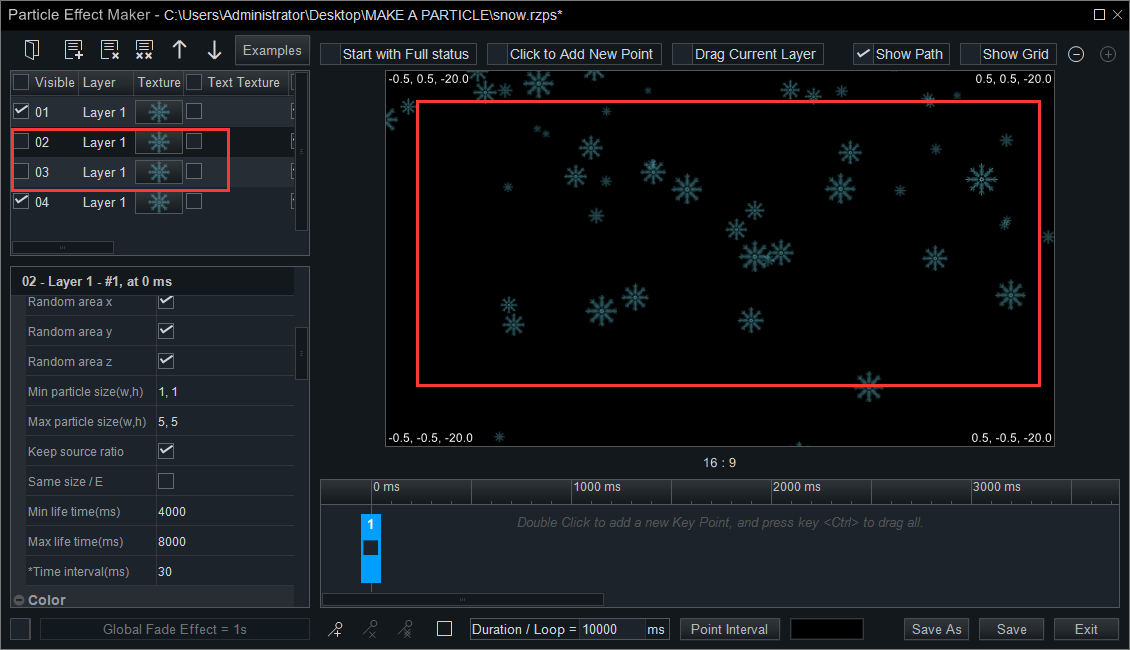
If you find it’s too many, you can uncheck one or two layers to hide them from appearing on the display screen.
Step 9: You can also click the particle item under the “Texture” row to replace it with an existed example. There are more particle items behind the option of “More”.
Then, you’ll see a particle effect as follows.
The particle item we used here is not white, which seems not life-like. So we can find a white one online or directly use the existed examples.
Let’s see what will happen if we change this item into a white snowflake.

The particle effect with white snowflakes as follows.
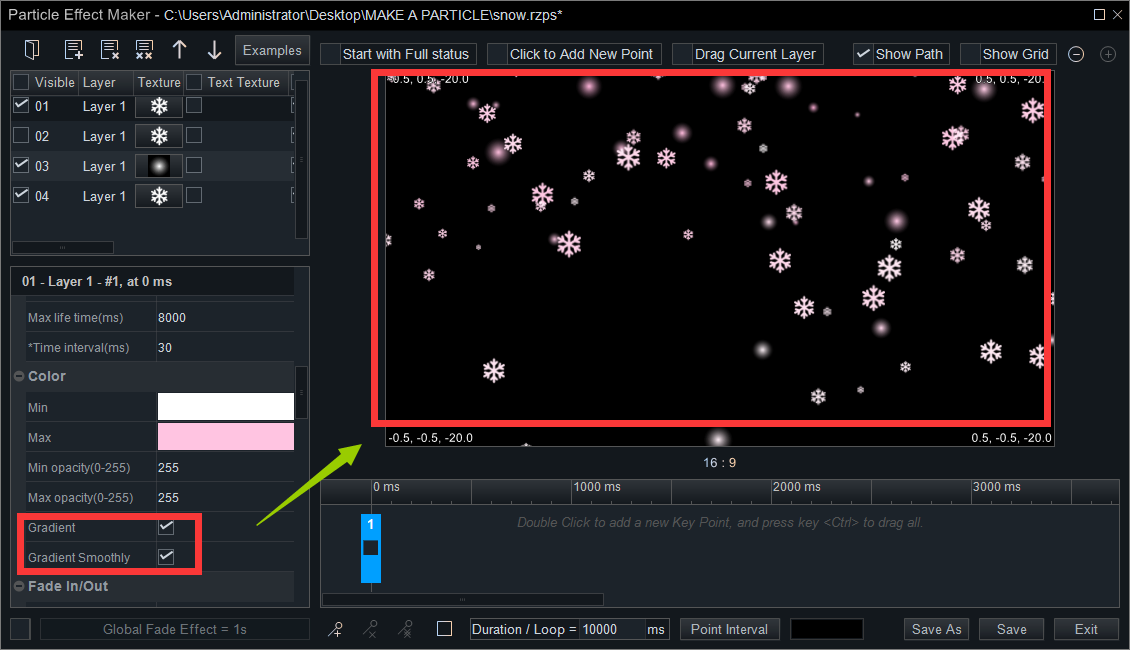
If you want a romantic snowing particle effect, you can change the color of “Max” from white to light pink of each layer.
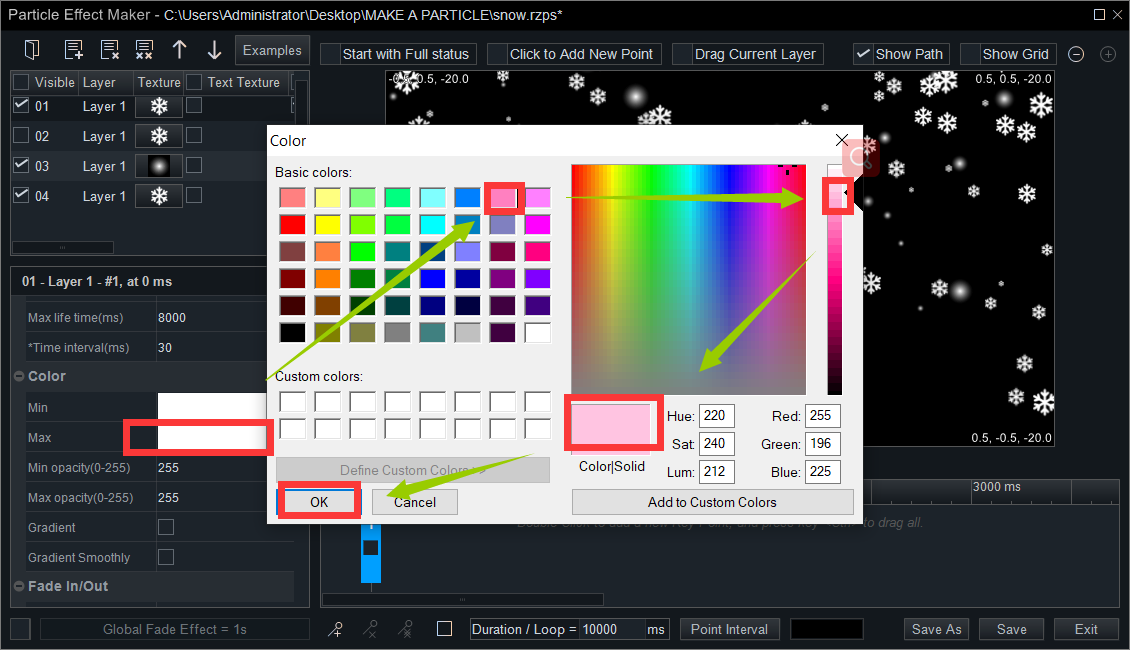
And check the “Gradient” and the “Gradient Smoothly” to make the effect look more natural.
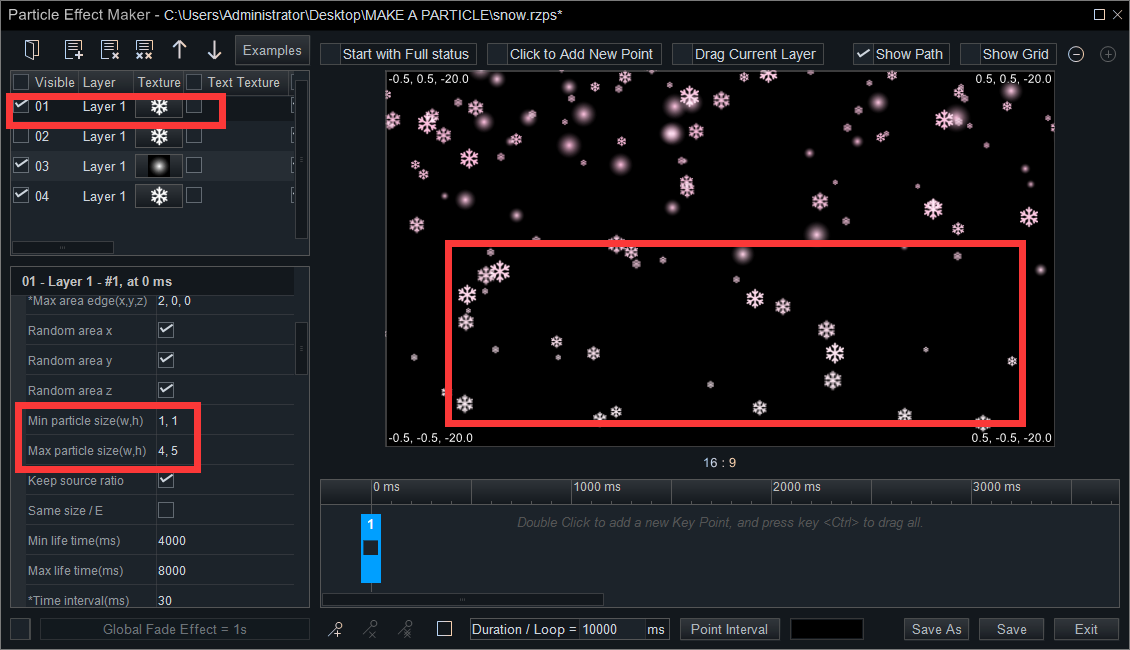
Step 10: Besides, you can adjust the size of the particles as you wish. But remember that you have to reset the value of each layer separately.
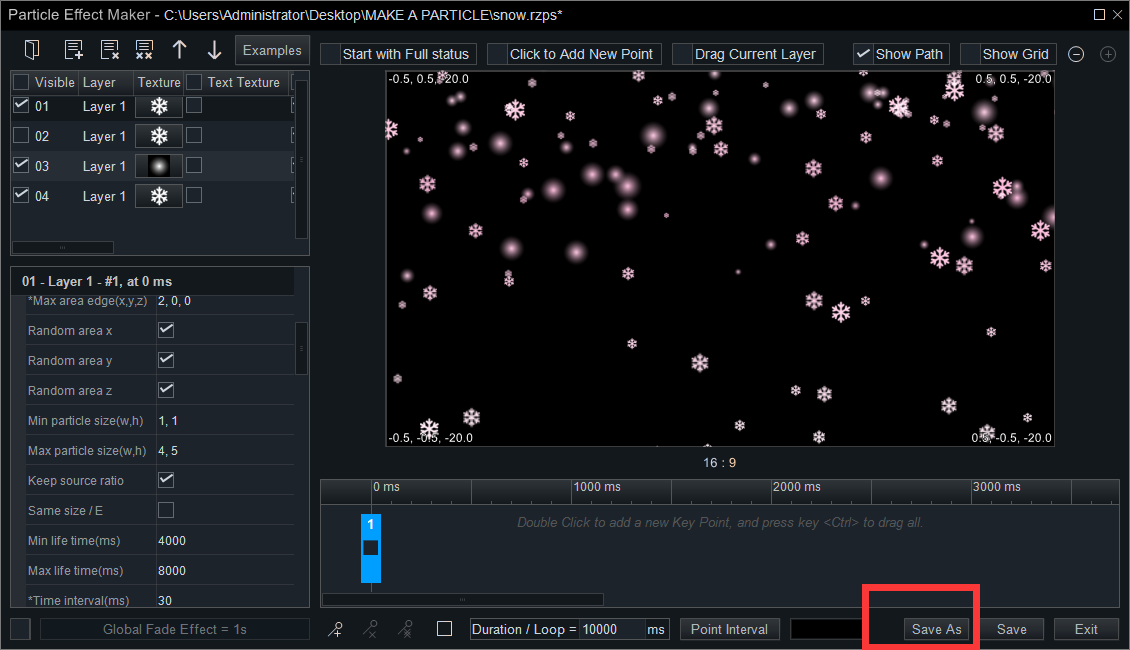
Step 11: Finally, save it as a *.rzps file on your computer.
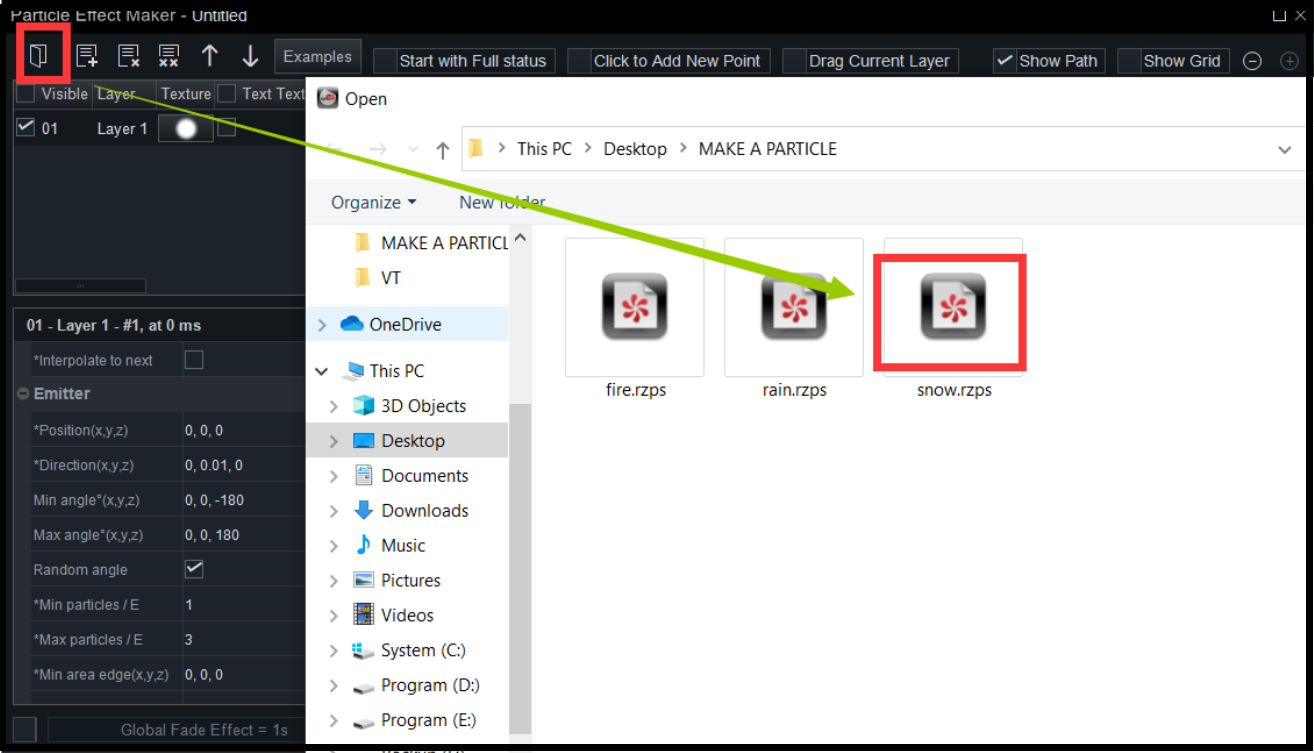
Next time, you can open it by clicking “![]() File”.
File”.
That’s all content about how to make a snowing particle effect. We just share you some basic steps on how to make a particle effect, and you can create various particle effects based on these, such as raining, firing and others. Try it yourself!
But always remember to use a *.png particle item, and we are always ready to help. Of course, you can take the parameters’ setting guide as a reference. If you find it’s interesting, welcome to share it with your friends.


