How to Use YouTube Movie Maker in 3 Steps
01
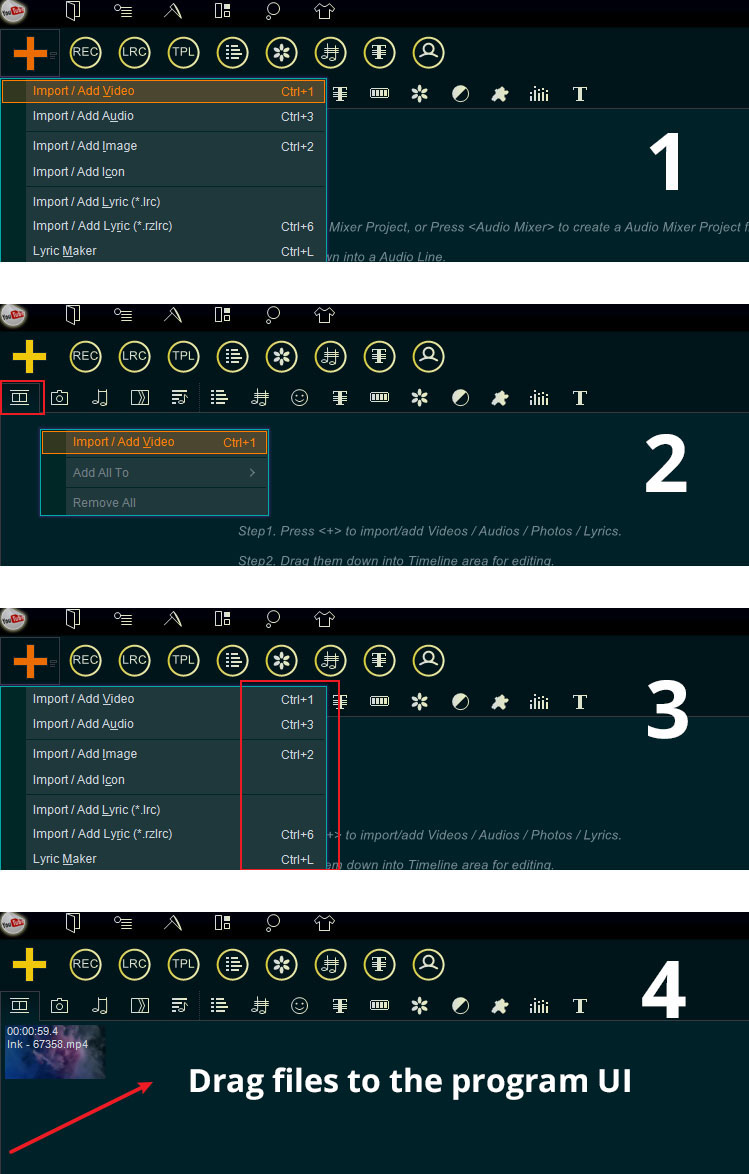
Import media files from your computer
There are four ways to import media files.You can choose any of them to use.
For the first, click the "Plus" button at the top left to add source media files, for example, any video files, image files, audio files, lyrics files, subtitle files, etc.
The second, select and press the category tab(Video, Image, Audio, Lyrics, Credits, etc.), then right click the source bin area, select "Import / Add ..." from right-click function menu.
The third, directly use the shortcut keys to import source media files quickly.
The fourth, drag and drop the media files directly into the program UI.
02
Apply and adjust the media files
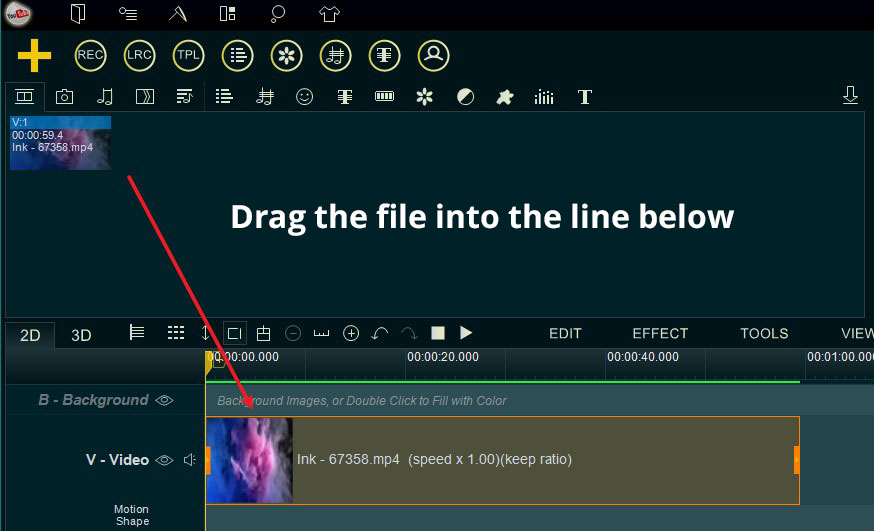
After imported media files into the program, simply drag and drop them down into the Timeline for editing.
You can simply drag and drop the videos/images down into Video Line or Overlay Line for editing, such as crop, split, cut, rotate, mix, add effects, etc.
Usually, we put the background elements to the Background line or Video line, put other non-full-screen elements to the Overlay Line, and put the audio file to the audio line.
There are three ways to add the source medias to Timeline for editing.
First, you can directly drag and drop them down into suitable Timeline Tracks/Lines.
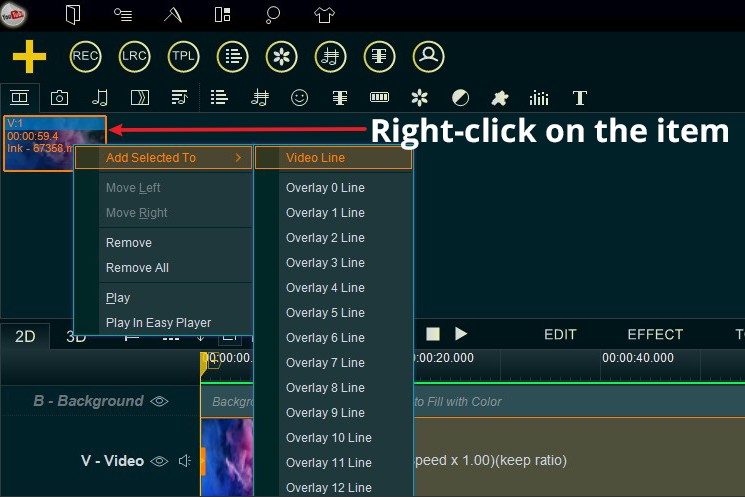
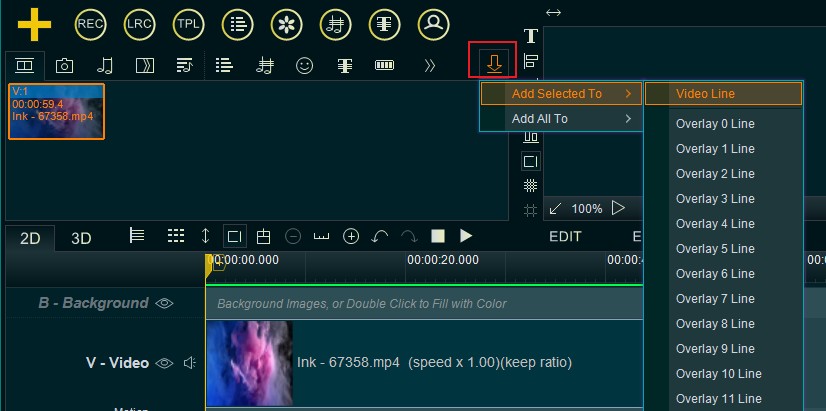
Second, right-click on the file you want to edit, and click "Add selected to ... ".
Third, select a file in the source media bin area, then click the down arrow.
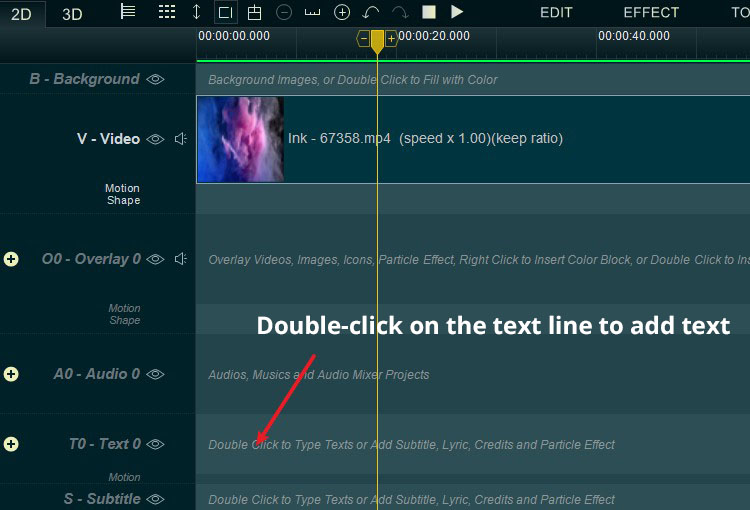
You can double click on the blank area of any Text line to input text, or import subtitles to Text line.
You can double click on the blank area of Graffiti line to draw anything on the upper right "Preview/Editing" window.
If you want to add audio/sound spectrum, color blocks, etc., you can simply double-click on the blank area of any Overlay line. You can also double-click on these added elements at any time to modify them.
Meanwhile, you can preview the changes of adjustments in the upper right "Preview/Editing" at any time.
03
Export the video
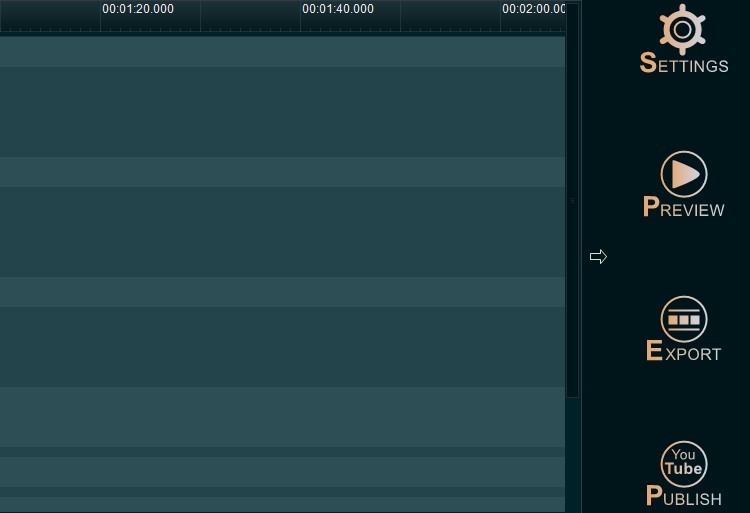
You can click the "SETTINGS" button to set the target video resolution, video quality, audio quality, etc.
Once the adjustment is complete, you can click the "Preview" button to see if the video is OK.
If it's OK, click the "Export" button. After selecting a location to save the video, YouTube Movie Maker will start exporting the video.
Or click the "Publish" button to export and upload the created video onto your YouTube channel directly.
YouTube Movie Maker is an award-winning program which is worthy of your trust

Free Download
YouTube Movie Maker
100% Safe and Clean, No Watermark, No Trial Time, No Adware.
What our customers say
Join millions of satisfied customers using our video maker globally.
still can't believe nearly 5 million people have clicked subscribe while watching my videos on YouTube. I'm so lucky to have your all!
Cameron, USA
I like it, helps me easy to record game play on windows, add narration, then upload to youtube, now I can easy to complete a complex work.
Wiler, USA
Great programs! Very easy to use, now create and upload YouTube videos become so easy, thanks, you are doing the right job.
Paul, USA